Pages

Sunday, December 18, 2016

Origami Shadow Box Fold Cards - Jar of Love

Origami Shadow Box Fold Cards


OH MY GOODNESS!!  I just LOVE the way these cards turned out and how STINKING SIMPLE they were to create!!  I also like the look of the monochromatic color schemes.  I am TOTALLY making MORE of these to send out to my friends and family!!

Since I don't have my video space ready yet, I decided to do a pic tutorial to show you how to make the folds to create this.  

Step 1.  For MY card, I used a 3 3/4 x 3 3/4 piece of two sided paper.  You are going to score your paper at 1 7/8 on one side and again on the other side.  Basically you are going to score/fold it in half on both sides.


Step 2.  You are going to fold the edges into the center of the paper.  This is where the score lines come in handy.  It helps you find the center a little easier.


Make sure you know which side of the paper you want folded out before you start folding.


Step 3.  Now you are going to take the corners in the center of the square and fold them back towards the edge of the square.


Step 4.  Turn paper over and add adhesive to the outer edges of the fold, so it doesn't flop open.  I did NOT adhere the front flaps down, as I liked the dimension it gave with them popped open a bit.


Step 5.  Add a 1 1/4 x 1 1/4 piece of Whisper White CS to the center and stamp your sentiment.  


I put my Origami Shadow Box Fold onto the largest Scalloped Square from the Layering Squares Framelits Die set.  Which is why my paper started at 3 3/4 x 3 3/4.  The final square for my "shadow box" was 2 5/8 x 2 5/8.  You can start with a larger piece of paper, if you would like to use a bigger sentiment in the center.  

Dimensions: 
Whisper White CS - 4 1/4 x 11 (scored at 5 1/2), 3 1/4 x 3 1/4 (for scalloped square), 1 1/4 x 1 1/4, scraps for fish/flowers.
Pool Party/Calypso Coral CS - 4 x 5 1/4
Pool Party/Calypso Coral DSP Stack - 3 3/4 x 3 3/4


Stampin Up! Supplies Used: 


Thanks SO much for stopping by today!!

Hope this has inspired you to give this a try!!  I promise it was SUPER simple to make and looks like you spent FOREVER on it, when you really didn't!!

Happy Stampin' Up!

Jen

Wednesday, December 14, 2016

Paper & Ink Sketch #11 - Plus Occasions Sneak Peek!!

Cool Treats - Sneak Peek 


Happy Wednesday All!!  I am SO SO very excited about this card!!  I just LOVE the way it turned out and couldn't wait to share it with you!!  This was created using the Paper & Ink Sketch #11. 


 Normally, I stick to the original sketch as closely as I can.  BUT I REALLY wanted to use the NEW stamp set "Cool Treats", that will be released in the AMAZING NEW Occasions Catalog on January 4th.  SO I flipped it to make it a vertical card, instead of a horizontal card.  I kept all my measurements the same as the original sketch though.  

Card Dimensions: 
Whisper White CS - 5 1/2 x 8 1/2 (scored at 4 1/4), 2 1/4 x 4 1/4, 2 1/2 x 3 1/2 (for the oval), scraps to stamp ice cream scoops on and cut out.
Pool Party CS - 4 x 5 1/4 
Watermelon Wonder CS - 2 1/2 x 4 1/4
Peekaboo Peach CS - 2 3/4 x 3 3/4 (for scalloped oval)

This card was SUPER quick to put together!!  I embossed the Pool Party CS using the NEW Hexagons Dynamic Embossing Folder, that will also be released on the 4h of January!!  The striped accent and popsicle accent are washi tape from the Tasty Treats Designer Washi Tape collection.  Are you excited for the new releases yet??!!  I know I am!!  


Stampin' Up! Supplies Used: 


Paper & Ink Sketch Challenge with a PRIZE!!  

If you would like to play along with the sketch this week, I will be posting a challenge on my Facebook Page!!  Head on over and check the details on how you can play along and win a cool prize!!

Thanks SO much for stopping by!!

Hope this has inspired you to play along with the Paper & Ink Sketch this week!!  

Happy Stampin' Up!

Jen


Friday, December 9, 2016

Merry Christmas Snow Friends!!

Merry Christmas Snow Friends!!
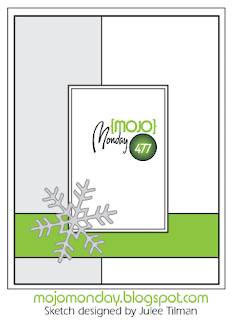
Mojo Monday Sketch Challenge


OH MY GOODNESS!!  This week's Mojo Monday Sketch Challenge was quite the challenge for me!!  Not because I haven't had time to do it, but because I really struggled with it for some reason!  BUT thanks to my friend Nicki challenging me to give it a try, I forced myself to sit down and play with it!  It took SEVERAL tries, with several different color and paper combinations to FINALLY come up with something that I liked!  


I just LOVE the little penguin from the Snow Place stamp set and coordinating Snow Friends Framelits Dies!!  He is SO STINKING cute!!  Don't you think so??  

Here are the dimensions for the card: 

Basic Black CS - 4 1/4 x 11 (scored at 5 1/2), 2 1/2 x 3 1/4, 1 x 4
Garden Green CS - 1 3/4 x 4
Cherry Cobbler CS - 2 1/4 x 4
Whisper White CS - 2 1/4 x 3, 3/4 x 4, scraps for penguin, hat, scarf and holly berries

If you would like to create this card, I have downloadable/printable instructions listed in the SUPPLY LIST below!!


Remember I talked about NEW changes that I was implementing on my blog??  Well, I am SO excited to announce that I will now be giving YOU a gift when you place an order on my website!!  All you need to do is enter the hostess code HTX2NFPU when you place your order.  Each month I will have a new hostess code for you to use and I will send out everyone's gifts at the end of the month!!  YAY for free goodies!!  


Just in case you haven't checked out Stampin' Up!'s specials lately, you might want to do so!!  There's a TON of AWESOME products that you are NOT going to want to miss out on!!

Check out the Year End Closeouts HERE!

Thanks SO much for stopping by!!

Hope this inspires you to play along with the Mojo Monday Sketch Challenge this week!!

Happy Stampin' Up!

Jen

Thursday, December 8, 2016

Tasty Trucks - You're the Sweetest!!

Tasty Trucks - You're the Sweetest!! 

\
After creating the card below, I decided to change the 
background of this card to an embossed background as well.
I just LOVE the dimension it gave the finished card!


Dimensions: 
Basic Gray CS - 4 1/4 x 11 (scored at 5 1/2), 3 1/4 x 4, 2 1/2 x 4, 1 3/4 x 4
Bermuda Bay CS - 4 x 5 1/4
Shimmery White CS - 2 1/4 x 4, 2 1/2 x 3, 1 x 3
Daffodil Delight CS - 1 1/2 x 4


I think I am in LOVE with this little food truck!!  Isn't it just the cutest??  Although it isn't available quite yet.... thought I would go ahead and share anyways!!  BUT guess what??!!  It is a FREE stamp set with a qualifying purchase, starting on January 3rd, when the Occasions and Sale-A-Bration catalogs are released!!


You all know how I love my sketch's!  Well, I found this one on Pinterest.  I THOUGHT it would be SUPER SIMPLE to put together since the dimensions are already on the card.  BUT I was a bit confused as to what papers the measurements actually belonged to!!  Then again, I am VERY easily confused!  SO I am including my dimensions, to hopefully make it easier for you all to follow!


Basic Gray is your card base.  Bermuda Bay is the background paper.  In the center of the card, you are going to layer the Basic Gray, Shimmery White, Basic Gray, and Daffodil Delight.  After coloring in my cute little truck on the Shimmery White CS, I popped it up on the Basic Gray CS for dimension and added the smaller piece of Shimmery White to the bottom of the Basic Gray Cs.  

Did you know that you can use the Shimmery White CS to water color on?  This was my first try at it and I really liked the way it turned out!!  Which reminds me.... the water color pencils I used to color the truck in, will be available to order on January 3rd as well!!  WOO HOO!!!


Stampin' Up! Supplies Used: 


Thanks SO SO much for stopping by!!

I hope this inspires you to create!!  Maybe even use this sketch for your next card!!

Happy Stampin' Up!

Jen


Monday, December 5, 2016

Three Wise Owls

Three Wise Owls


SO I don't think I could EVER get tired of playing with these little owls!  When I was a Stampin' Up! Demo 2 years ago, I purchased the Owl Builder Punch and had a BLAST playing with it!!  After going back to CTMH last year, it just sat in a bin and never saw the light of day.  Then in the spring, I went through all of my crafting supplies that I wasn't using and sold most at a craft garage sale, including the Owl Builder Punch.  Little did I know then, that I would be joining SU! again!  lol  When I joined SU! again in October of this year, I knew I NEEDED to buy another Owl Builder punch!!  

ANYHOO.....  I know Christmas is just around the corner, so I am trying to use up the Warmth and Cheer DSP stack, so I can start playing with the NEW papers that are coming in the Occasions and Sale-A-Bration catalogs!  YAY for new and shiny!!  LOL  

Because I wanted my owls to be festive, to go along with the papers I was using, I pulled out my Snow Place stamps and the Snow Friends Framelits Dies to add the little Santa hat, ear muffs and sentiment.  TOO STINKING CUTE!!!  

Card Dimensions: 

Crumb Cake CS - 4 1/4 x 11 (scored at 5 1/2), scraps for owls
Black CS - 2 1/4 x 4, 3/4 x 3 3/8 (banner), scraps for owls
Garden Green CS - 2 1/8 x 4
Whisper White CS - 2 x 4, 5/8 x 3 1/4 (banner), scraps for owls
Warmth & Cheer DSP - 4 x 5 1/4, scraps for owls

Since switching back to SU!, I have not been edging my papers with ink like I used to do.  BUT I felt like the owls needed some kind of dimension, so I inked around each of the owl parts plus the papers on the card itself.  


Stampin' Up! Supplies Used: 


Thanks SO much for stopping by!!!

Hope this has inspired you to play around with the SUPER CUTE Owl Builder Punch!!  It's SO much fun!!  

Happy Stampin' Up!

Jen

Thursday, December 1, 2016

Cheers to Mixed Drinks!

Cheers to Mixed Drinks!!


SO for some reason, I was WIDE AWAKE at 2am this morning!  UGH!!  There was NO way I was going to fall back to sleep, so I made some coffee, place an SU! order and got to playing with the Mixed Drinks stamp set I bought a month ago!!  LOL  

As I was looking at all the YUMMY drink images, I was trying to figure out what the heck to do with them.  THAT'S when it came to me....  this would make a PERFECT random stamped background!  WOO HOO!!  I got busy stamping all the glasses and filled them in with Pear Pizzazz, Watermelon Wonder and Peekaboo Peach.  After that, I stamped out the orange slice, the cherry and finally the lime.  PERFECT!!

Dimensions: 
Whisper White CS - 4 1/4 x 11 (scored at 5 1/2), 3 3/4 x 5, 2 1/8 x 3/4 (banner), 2 3/8 Circle, scraps to stamp glasses on.
Pear Pizzazz CS - 4 x 5 1/4
Peekaboo Peach CS - 1 x 2 1/4 (banner)
Watermelon Wonder CS - 2 3/4 Scalloped Circle


Stampin' Up! Supplies Used: 


Thanks SO much for stopping by!!

I hope this inspires you to create your OWN background papers!!  It's SO much fun!!

Happy Stampin' Up!

Jen