Showing posts with label Dimensional Elements Monograms. Show all posts

Thursday, April 22, 2010

A scrapbook page of me and my sis....

Yesterday I pulled out some photos of myself when I was little.  There are only a handful of pics of me when I was little as my parents did not have a camera at that time.  And of course, because they are almost 40 years old, they are discolored and fading.

I set out on the small task of scanning each one and enhancing them with the software on my Mac Laptop. For the most part, they turned out awesome!  I think though that with a bit more tweaking I can make them even better.

The photos on this page are not the originals as I was afraid to adhere them to my page.  So, I scanned and fixed them and then "antiqued" them.  LOL  The originals are black and white, but they did not look right with the papers that I chose.  Sounds funny to "antique" photos that I am trying to fix!  LOL

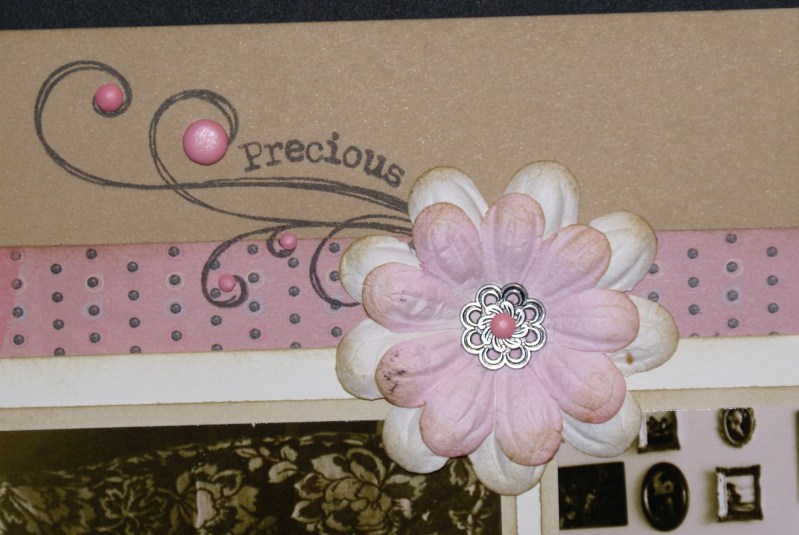
ANYHOO......here is the page and a couple of close ups.....


I used papers from 2 different paper packs, which is a personal challenge for me.  If you are anything like me, you "collect" paper and scrapbook accessories.  I find that when I use a paper pack for my scrapbook group that I am just plain tired of looking at the papers by the time I have created 6 pages plus cards and such from the same 6 patterned papers.  So, I am trying to not only use what I have, but mix up what I have and use it in a different way than before.


The letters that I used to create the word SWEET are from the Dimensional Elements Monograms.  I LOVE these letters as I can mix and match my letters to create a dimensional hodgepodge of letters.  Funny thing is, I was running out of E's, so these were my only 2 choices......gotta use what I have.....but I think that they worked PERFECT to create this title!!


When I first started this blog, I would give you a supply list of products used.....I think that I am going to go back to doing that at the end of each post.....

Thanks for stopping by!!

I hope that I have inspired you to get out and use what you have!  Mix and match your papers.  You might be surprised at what you will come up with!!

Supplies used:  All Items CTMH (unless noted)

Paper: Silhouette and Notebook
Stamps: Playful Flourishes
Embellishments: Brad Assortments; Metal and Winter Cozy, Colonial White Ribbon, Big Blooms, Filigree Charms, Dimensional Elements Monograms letters; S, W, E, T

To purchase any or all of the above items, visit my website or purchase from your favorite consultant!

Happy Scrappin' and Stampin'

Jen

Saturday, September 12, 2009

I am on a scrapbook roll........

Lately, I have been concentrating on getting pages done. I LOVE to create cards as they are sometimes a little less scary to put together than a 12 x 12 page, BUT I have a TON of photos that are desperately in need of pages!

A few months back I came accross this awesome workshop that a fellow CTMH consultant Robin created and shared. I had been looking for a multi-page workshop since the CTMH Base Pages had been retired and this is EXACTLY what I needed!!!!

This workshop requires 1 Level 2 My Reflections paper pack along with extra CS to complete the pages. I had actually bought the Majestic Blue paper pack a year before with the intent of using it for my Jamaica photos. So, I thought I would pull it out and give it a try with this workshop.

LOVED IT!!!! Only 1 slight problem.....Moon Doggie came out in the Summer Idea Book right after I had completed these pages! The colors and flowers in Moon Doggie went much better with my Jamaica photos than the Majestic Blue papers. SOOOO I pulled out my beach photos from our trip to Florida last year and started going to town. MUCH BETTER......

Here are a few of the pages that I have almost completed.....I mean almost because I have not journaled on them YET!

The wavy border on this page is from the Fancy Cuts package by CTMH. I inked the edges of the border with Desert Sand ink and then attached it to the Outdoor Denim CS border. I then added Colonial White Brads. The buttons are Crystal Blue and come from the Winter Button Collection.


The letters are Dimensional Elements Monograms. These are awesome for creating titles to match your papers and photos! For these letters, I first stamped them with a now retired stamp set in Outdoor Denim ink, sponged Desert Sand ink to distress and then sponged Outdoor Denim ink around the edges to make it stand out. LOVED the way these turned out! The word THREE at the top of the page was sponged heavily with Outdoor Denim ink to match.

I is kind of hard to tell in this photo, but the scalloped borders around both photos are from the Dimensional Elements Borders. I applied Desert Sand CS to them, cut around it with an exacto knife then finished them with the finishing files and Desert Sand Ink along with a few brads for accent.


For these letters, I started by adhering Desert Sand Cardstock to the letters, cutting around them with an exacto knife then using my CTMH Finishing Files I filed down the CS around the letters. I then stamped the images with Desert Sand ink and sponged the edges with Desert sand. To give them a finishing touch I added Antiqued Copper brads and Colonial White Waxy Flax.


Lastly I created this border in the same manor as the letters and borders above. This frame comes from the Dimensional Elements Framed Fun and the other shape comes from the Dimensional Elements Fresh Shapes. The buttons are from the Autumn button collection.


If you live in the Omaha area and would like to hold an 18 page workshop for you and your friends, contact me to see what dates would work! This workshop works for ANY Close to my Heart My Reflections Level 2 paper pack. I have a workshop planned for Teresa next Saturday and all 9 that are attending are using different paper packs. I can't wait to see how they all turn out!

Thanks for stopping by!

Hope to have inspired you to try out some of these super fun Dimensional Elements that Close to my Heart carries. The possibilites are ENDLESS and they add so much to your pages!!

Jen

Sunday, February 15, 2009

Unit Swap Post-It Note Booklet

I am so sorry that it has been a few days since my last post! It has been a little while since I have been able to sit down and "play"! I wanted to show you all what I made for Shari's unit swap this month. If you read on down to the bottom of this post, I will give you the dimensions I used to create this booklet.


When I signed up last month to participate in the swap, I asked Shari to surprise me with my swap item. She chose a dimensional item for me to make. I like dimensional items because they always challenge me to come up with something fun! Up until the day of the swap, last Tuesday, I had NO clue as to what I was going to make. LOL Nothing like procrastinating until the last possible minute.


SOOOO, Last summer I went to my first CTMH convention and had a BLAST!! While I was there, a fellow CTMH sistah Pamela gave me a darling little bag decorated and filled with lots of goodies!! One of those little goodies was a little Post-It note booklet, which I decided to make for my swap! Because I had not prepared ahead of time, I did not have enough paper to create each little booklet exactly the same. But, I think that just added to the fun of creating them!!


As I was struggling with what to put on the front of the booklets, I decided to get out my Dimensional Elements Alpha Solos and personalize each booklet by putting the first letter of the first name of each in my swap. After I had adhered the letter on the front it still felt like something was missing.......soooooo........what else would I add to the front but a little BLING!!


For the covers of this booklet, I used coasters trimmed down to 3 1/2 x 3 1/2. I covered them with paper cut to 4 1/2 x 4 1/2 so I had plenty of room to bring around to the inside of the coaster. I then cut a piece of CS to 3 1/4 x 6 3/4 and scored at 3 1/4 and again at 3 1/2. I took both covers and set them side by side and adhered the scored piece on top. This gave me a finished look on the inside of each coaster and created a "spine" for my booklet.

For the Post-It notes on the inside, I set them in the center of the right side, marked where I was going to put a hole in by using my paper piercer and piercing all the way through the paper and the coaster. After I had it marked on both sides, I used my Exchangeable head punch and punched holes in the notes and both sides of the coasters.

After the holes were punched, I put the ring through and tied ribbon to it. And there you have it! Easy peasy!! Thanks Pamela for such a fun little project idea!!! If it were not for your gifts, I would have been up a creek without a paddle for my unit swap this month! LOL

OH and by the way......they were a HIT!! Yay!!

All supplies are CTMH (except the coasters)
Paper: My Reflections Stardust
Ink: Moonstruck, Topiary
Embellishments: 3/8 White Daisy Organdy Ribbon, Square Sparkles, Dimensional Elements Alpha Solos

I hope that this has inspired you today!

Thanks for stopping by.......even when I have not posted for a while.......at least you have not given up completely on me! LOL

Jen

Saturday, January 31, 2009

I have been missing in action because.....

I have been busy creating this Acrylic Album for a good friend of mine that had a baby girl in December. I am going to her baby shower tomorrow and just decided on Wednesday to make this for her. I really hope that she likes it. She knows that I scrapbook and loves to go through my albums and such, but she does not scrapbook for herself. I tried to make the album easy for her to be able to add her pictures to it, so I did not do too many different sized photo mats. The only thing I could NOT resist adding to the album was the big scalloped circles that look like flowers. I guess that she does not have add photos to those, she could just leave them alone.

ANYHOO.....on to the album. I created this using CTMH's My Creations Acrylic Album and My Reflections Daydream paper pack. I kind of used a hodge podge of accents, but all are CTMH and are current if you would like to order any! If you like this but it is too girly for you, check out Vicki's version using the My Reflections Stardust paper pack! She even has super cute black and white photos of her son on hers!!

Front cover....


Pages 1 and 2.....


Pages 1 and 2 still, with the divider moved over to page 1.......


Pages 3 and 4......


Pages 5 and 6.......


Pages 5 and 6 with the divider moved over to page 5.....I thought that if she wanted, she could add a photo to this, or she could keep it just plain.


Pages 7 and 8 The "flower" on this page is a large Nestabilities scalloped circle with a regular Nestabilities circle inside.......


Pages 7 and 8 again with the flower flipped over to the other side.


And finally, the back of the album. I did not do anything with the back, just stuck a piece of paper on it and a scalloped circle. I did not think it needed much more!


Am I forgiven for not posting for 2 days?? I thought maybe this would make up for it! If you really like this album and want to make one for yourself, leave a comment in this post and I will e-mail you the cutting dimensions and photos of the album in a word doc. If you want to re-create this using the same papers and album, you can order the supplies from my CTMH website and have them shipped directly to you!

All supplies are ctmh:
Paper: Daydream and Daydream Stickease
Embellishments: White Daisy Mini Medley, White Daisy Ribbon, Baby Pink Ribbon, Love Letters Rub-Ons, Winter Cozy Buttons, Holiday Buttons, Big Blooms, Circle Window Charms, Perennials Dimensional Elements, Monogram Dimensional Elements, and Sparkles

I hope that you have found some inspiration!

Thanks for sticking with me and not giving up on me! Please stop by again soon!!

Jen