Showing posts with label liquid glass. Show all posts

Wednesday, July 20, 2011

As I PROMISED......A Sneak Peak!!

Where OH where do I begin??  Convention was A-MAZING!!!  OH MY GOODNESS......there is going to be SO much to share over the next several weeks!  Close to my Heart is the BEST and I cannot imagine EVER being apart from this company.

I am patiently waiting for my convention bundles to arrive on my doorstep so I can start playing with the stuff that I did not have from Extravaganza.  And I DO mean PATIENTLY........  In addition to the bundles that were PAID for with my Extravaganza convention credit, I just placed an order for 3 of the WOTG kits and the additional projects that are listed with them.......JUST WAIT till you get your hands on the new Autumn/Winter Idea Book!!!  You are going to LOVE everything in it!

While I am waiting on my goodie box to arrive, I have been busy taking pictures of the art that I had on display inside my booth AND on the display boards outside my area.  My topic was "Adding Brazzle Dazzle to Your Artwork.  YEP you guessed it....BLING!!  My favorite thing to add to my pages, cards and paper crafting projects.

Because I can be a bit mean at times.......I am going to drag this out for a bit and make you keep coming back to check for more.......lol


This first card is a 3x3 and it features Prisma Glitter and a button in our new Bling Assortment.  To make the flower, I started with a Creme Brulee flower from the Spring Blossom Just Blooms Paper Shapes.  I covered the paper flower with Liquid Glass then sprinkled (more like poured) Prisma Glitter over the entire flower.  Shake or tap off the excess and let dry.  The flower becomes a bit more sturdy as the Liquid Glass dries.


This second card is also a 3x3 card that features Prisma Glitter, Pins from the Bling Assortment and NEW Flutter Paper Shapes.  Using the tip of my Liquid Glass container, I ran it around the edges and on the inside "embossed" areas of the butterfly.  I sprinkled Prisma Glitter over it and tapped off the excess. It really does not take much time to dry.  Set it aside for maybe 5 minutes and it should be ready to add to your project.  

Another thing you can do using this technique is to either sponge color onto the edges and embossed lines in the center OR spray the whole butterfly using Rubbing Alcohol and Re-Inker.  Then either use Liquid Glass and Prisma Glitter around the edges OR over the entire butterfly/flower.

The new products that were featured on these 2 cards will be available for purchase August 1st!!  You can either order them from me at www.lovinscrappin.myctmh.com OR from your favorite Close to my Heart rep!  

Want to get a discount on CTMH products or start your OWN business by teaching others how to use the AWESOME products that CTMH offers??  Join my team "Creativity in Motion" and join the Close to my Heart community.  It truly is a MAGICAL company to be a part of!!

Hope this has inspired you to get out your Liquid Glass and Prisma Glitter and have a little fun "Adding Brazzle Dazzle to Your Artwork"!!

Happy Scrapping and Stamping!!

Jen


Tuesday, August 31, 2010

3x3 card using Hooligans and Party Animal......

Soooo, did any of you get to watch the marathon of classes this weekend over at Tresa Black's ustream??  I have to admit that as excited as I was about watching it all day......I was SWAMPED this weekend.  Between spending time with the kids and hubby on Saturday to waking up at 6am on Sunday to finish getting ready for my Idea Book Release Party, I had NO time to get on the computer.  But I did see a few of the projects and I was really bummed that I did not see them created live!  Tresa will be holding another live project tomorrow night......have set my alarm so I can remember to sign on and watch!

ANY HOO......I wanted to share these little cards that I created today.  As I mentioned I had my Idea Book   Release Party on Sunday.  Well, I had several make-n-takes for my guests to make and ended up with extras.  SO, I decided to redo the treat pouch and just make 3x3 cards from the left over papers.

These turned out pretty cute, but simple.  I just cannot get enough of the prisma glitter on these little monsters!  If you have a chance to look at the Hooligans Workshop on the Go kit, check out how CTMH created the little monsters that come in the kit.  After stamping/coloring the monsters in, you take a glue pen to which ever parts of the monster you want to cover in prisma glitter.....then glitter away!  CUTE CUTE

OH and I almost forgot....I used Liquid Glass to fill in his eyeballs!  LOVE IT!!!


These papers and this stamp set will be available for sale starting tomorrow!!!  Stop by my website for a look at the online Autumn/Winter Idea Book!  You WON'T be disappointed in all the brand new products!!  Just click on the photo of the Autumn/Winter Idea Book on my side banner......

Supplies Used:
Paper: Hooligans, Black CS, White Daisy CS
Stamp set: Party Animal
Inks: Black Stamp Pad, Sunset Marker, Gypsy Marker, Lagoon Marker and Pear Marker
Embellishments: Prisma Glitter, Liquid Glass and Lagoon Medley, Sunset Medley and Pear Medley


Thanks SO much for checking back to see my latest posts!

Hope this has inspired you to get out your sparkly glitter and make a mess!  LOL

Happy scrapping and stamping!

Jen

Friday, June 25, 2010

CPS Sketch Challenge with a JULY SOTM Sneek Peak

I am very tired and probably should not be posting this tonight....or this morning....or whatever it is!  BUT I finished this card a bit ago and wanted to share it with you!  This was created using the CPS Sketch challenge.  It has been a while since I have been over there to check out the sketch's and I really liked this one.

So, here it is.  The colors that I chose came from a CTMH Idea Book.  Off hand, I don't remember which one.  But the colors are Barn Red, Creme' Brulee, Cocoa and Sorbet.  I used liquid glass on the balloons in which I paper pieced with various patterned papers.  OH and the center balloon is pop dotted for a bit more dimension.


Isn't this little hedgehog just the cutest thing??  I think so!! She is from the July Stamp of the Month called Happy Forever.  I used my CTMH water color pencil Desert Sand and gamsol to color him in.  Thanks to Melissa (a ctmh consultant) for creating this little creature and sharing how she colored it in!!  I did not have a waterbrush to blend the watercolor pencil, so I just used my gamsol and paper pencil thingy that I already had.

Supplies used:
Paper: Boom-Di-Ada, Aspen, Caboodle and Cocoa, Sorbet, Creme Brulee CS
Stamps: Happy Forever (July SOTM) and TLC
Ink: Cocoa, Deser Sand Water Color pencil
Embellishments: Sorbet Ribbon, Cocoa Ribbon, Liquid Glass

Thanks for stopping by! 

I hope that I have inspired you to head on over to CPS and try out this sketch too!!

Happy Scrappining and Stamping!!

Jen
Thursday, May 6, 2010

One more CLEAR scalloped circle card. with paper flower tutorial.....

BUT not the last.....LOL

Have you visited Jeanette Lynton's blog recently?  If not, click on her banner on the side of my blog and check out the cards and color combo that she posted on Monday.  I faithfully visit every Monday to see what color combo's she has and I always have good intentions of creating something using those colors.  But, I never seem to get around to doing it. 

Well, I did this week.  I also created the flower that she created on the bottom card.  It took me a few tries, but I ended up with something completely different, but just as beautiful, I think!  lol


Inside of card is fairly simple......


Onto the tutorial.......This is step by step on how I made this flower.  Remember to check out the flower that this was inspired from over at Jeanette Lynton's blog.....

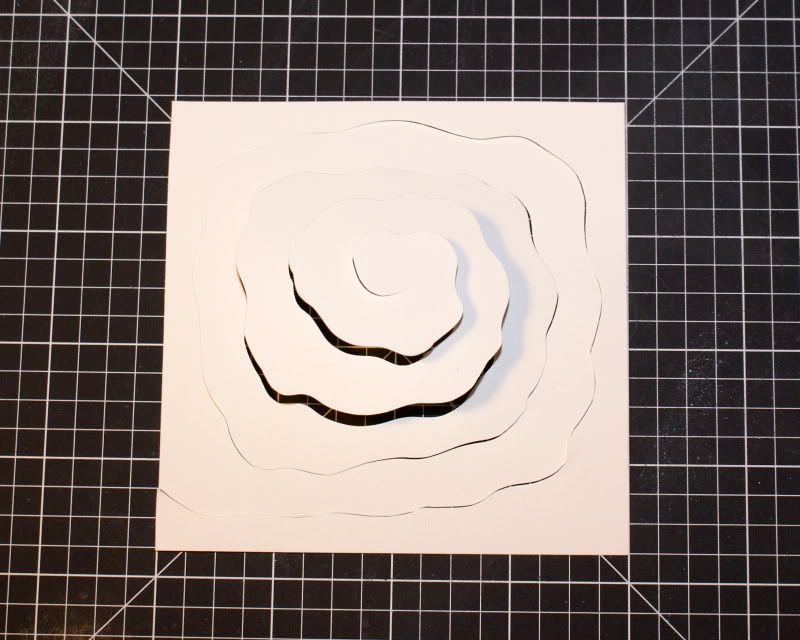
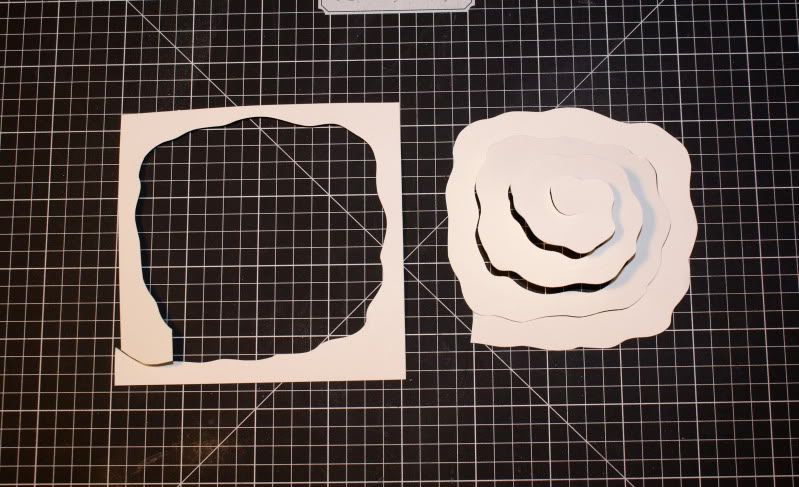
Start with a 4x4 square and hand cut a spiral. i did NOT draw it first....pencil lines showed. I started with a piece of Colonial White CS and dyed it. You can start with any color CS you choose to create your flower with. I am in the dying paper and flowers mode....so I created my own look using Re-inker/rubbing alcohol spray.

Photobucket  

Cut off square edges.

Photobucket 

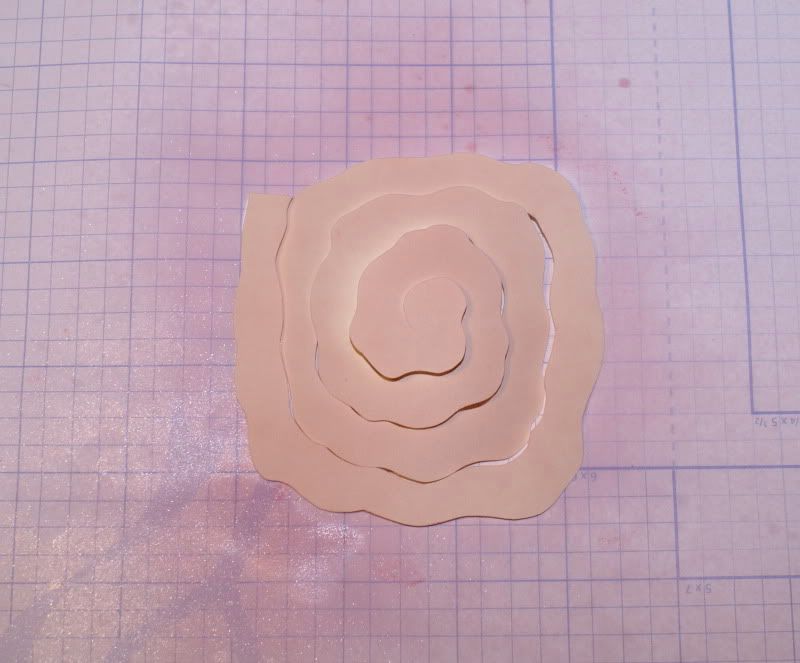
I sprayed mine first with Baby Pink reinker/rubbing alcohol  

Photobucket

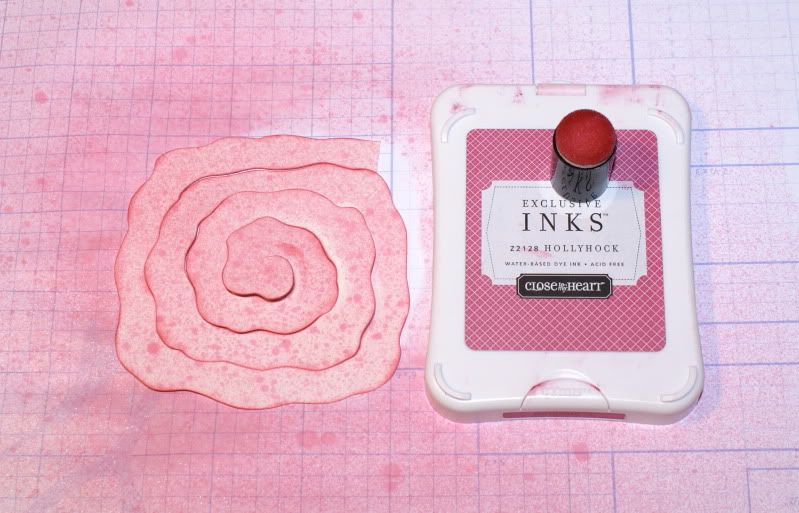
Then again with just a couple sprays of Hollyhock 
Photobucket 
 Sponged the edges with Hollyhock ink 

Photobucket 

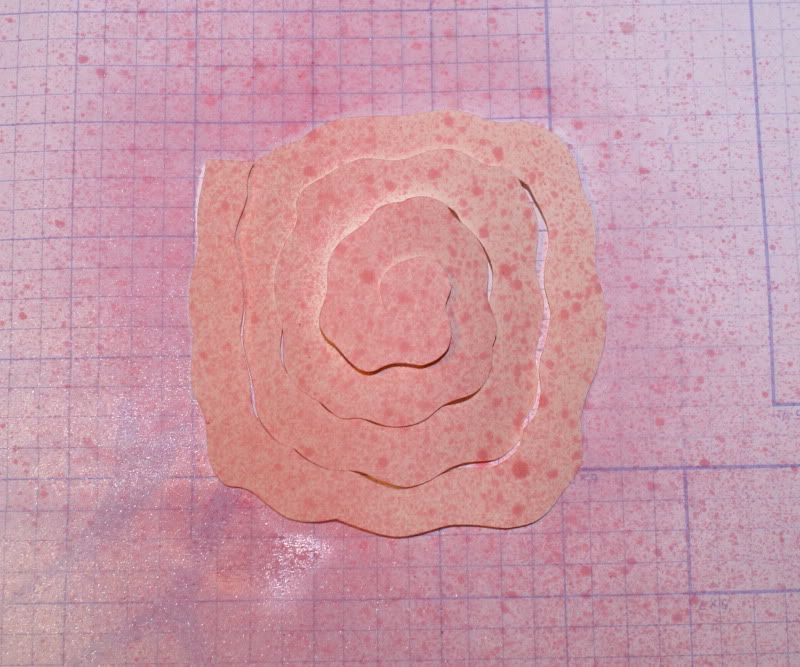
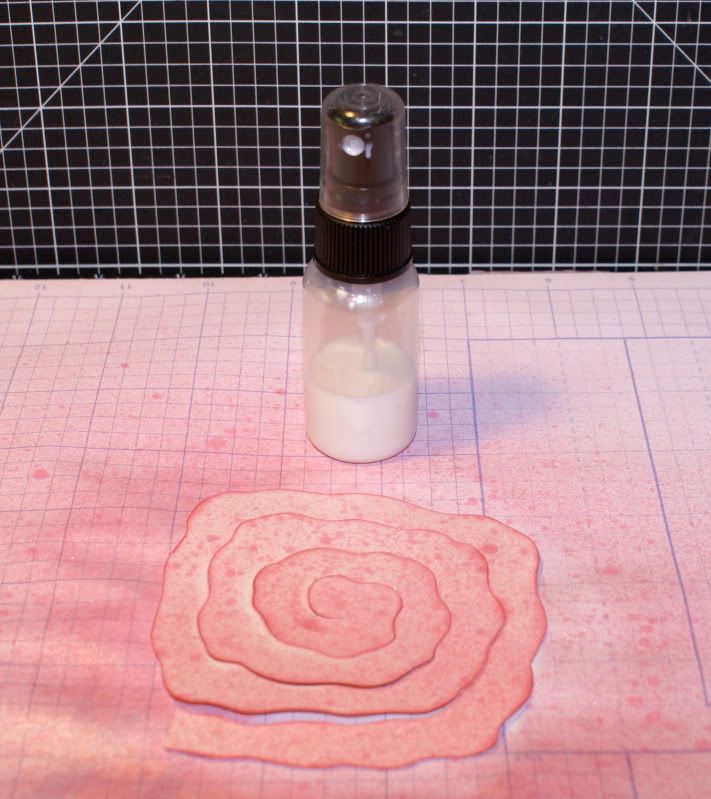
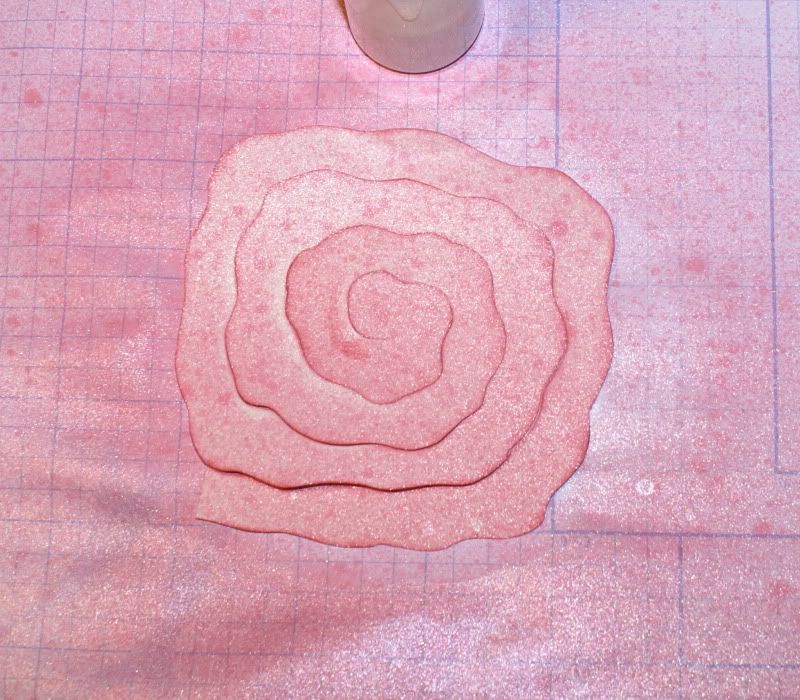
sprayed with shimmer mist (rubbing alcohol and pearl paint)  
Photobucket  

better pic of the shimmer!
Photobucket 

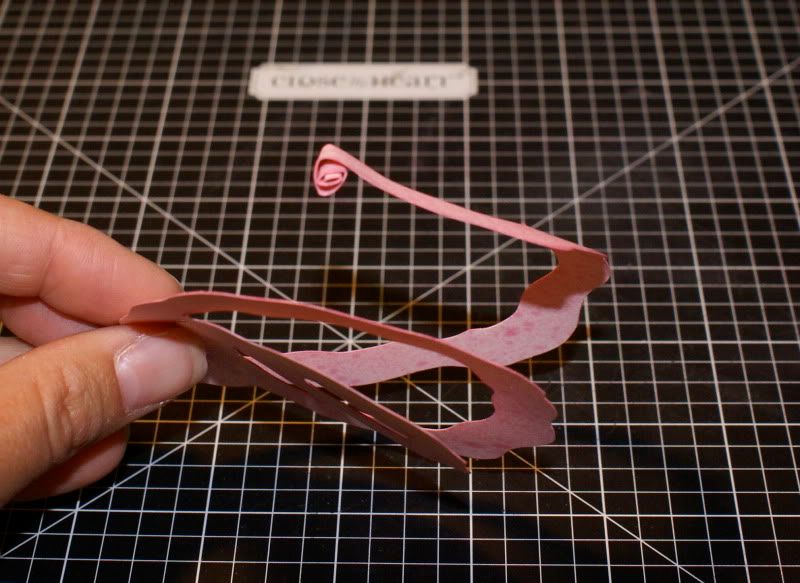
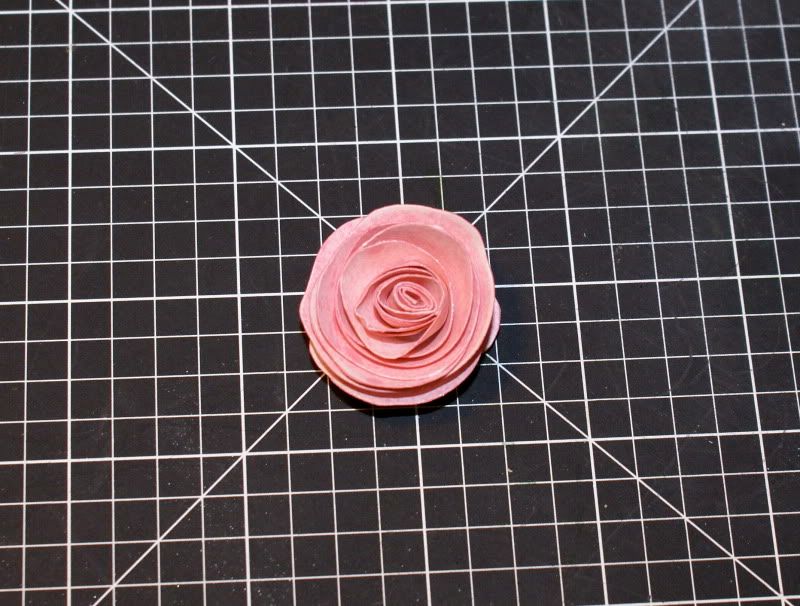
Start rolling in outer edge  
Photobucket 

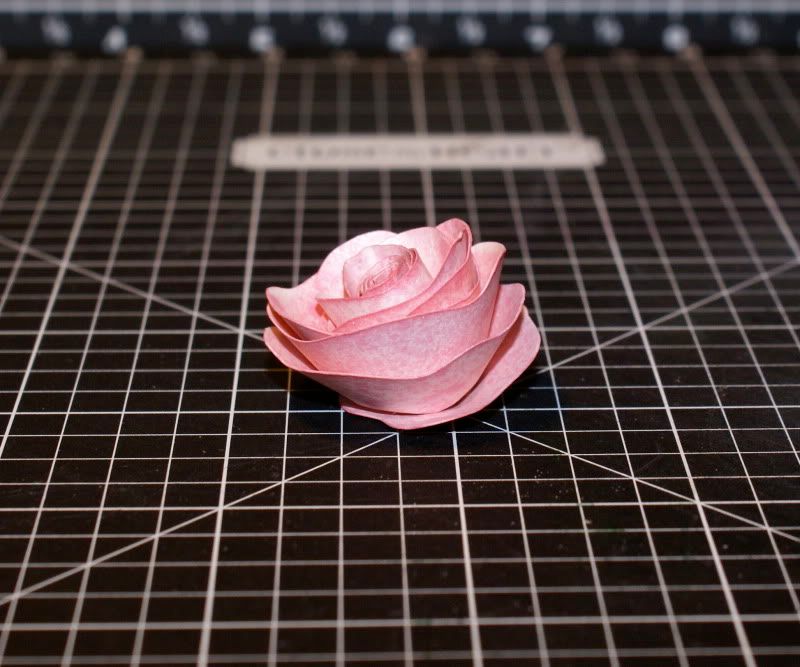
continue till edges are all rolled up. At this point you should only have the center of the swirl left. It will be about 1/2 - 3/4 inch around. This is what you will put your liquid glass on (or other adhesive) and adhere the bottom edges of your flower to.
Photobucket  

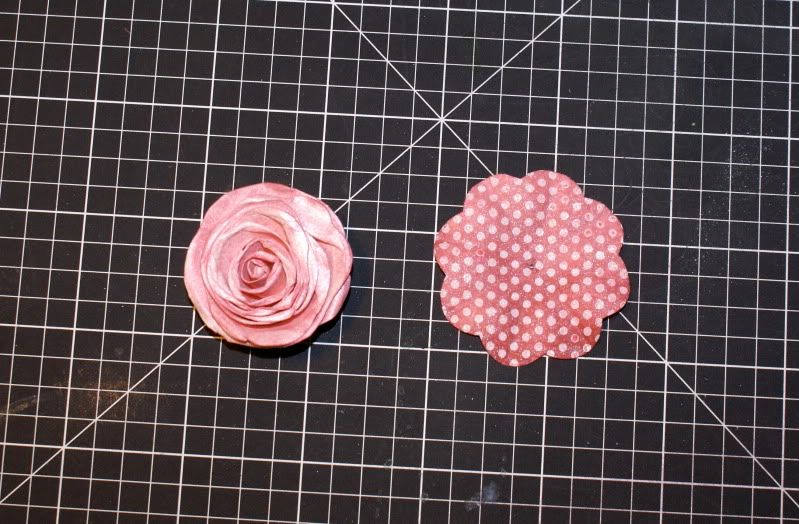
At this point, you can fluff as desired and add to your projects, OR you can continue on as I did and smoosh it so it lays a bit flatter.....

Photobucket 

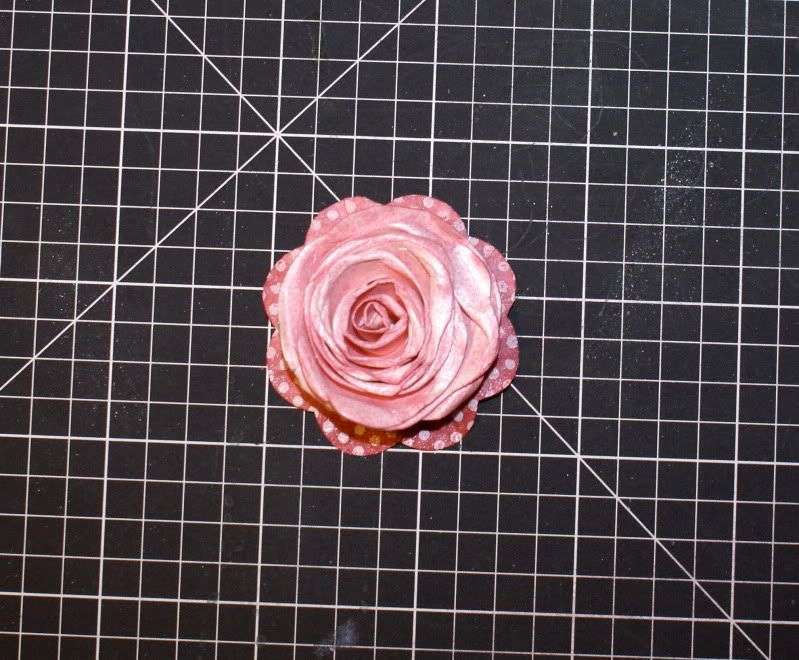
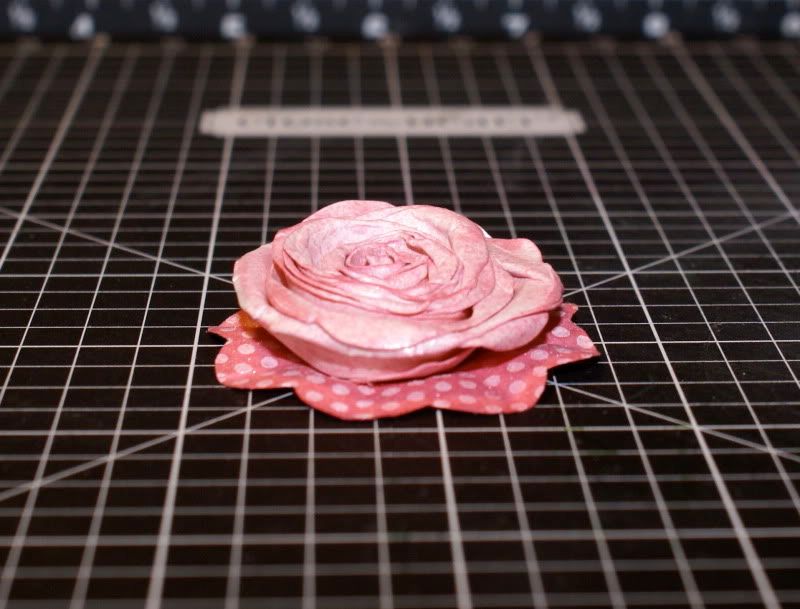
I sprayed mine again and again with the shimmer mist and smooshed and rolled and seperated the edges outward as I sprayed until I got the look and height that I wanted. I put it on top of a bloom that I sprayed Hollyhock and embossed and was finished.  

Photobucket  

I did not put the original flower onto an embossed bloom, but for the tutorial, I used one.

Photobucket  

Finally, a smooshed flower ready to put on any paper project that you create!!

Photobucket

Supplies used on this card are all CTMH unless noted:

Paper: That's Amore', Hollyhock CS, Olive CS and Blush CS
Stamps used: Card Chatter and It's a Buzz
Inks: Hollyhock ink pad, Staz-on white ink pad, Hollyhock and Baby Pink Reinker
Embellishments: Spring Blossom Just Blooms and Clear Scalloped Card from CTMH


Thanks for stopping by!!  

I hope that I have inspired you to check out Jeanette's Blog and to create these beautiful flowers to enhance any project that you are working on!  

Happy Stampin' and Scrappin'!!

Jen