Showing posts with label Close to my Heart. Show all posts

Saturday, March 26, 2016

And yet another Mojo Monday Card!!

I love to stamp.  I love to use stamps on my cards and my scrapbook pages.  So to make something with NO stamping is unusual for me!  BUT this morning, I sat down to play along with this week's Mojo Monday Sketch Challenge and created a card using ONLY the coordinating complements to Close to my Heart's Georgie papers.  I have to say I LOVE the way it turned out!!

Honestly, I forget about the package of complements that I purchase to go with each paper pack that I purchase through CTMH.  Not sure why exactly.  Maybe it's because I usually have a specific stamp set in mind when I set out to create a card.  OR maybe it's because I put them in a separate place from where I keep my papers.  At any rate, after making this card, I am definitely going to start pulling them out when I choose the papers I am going to use on my card.


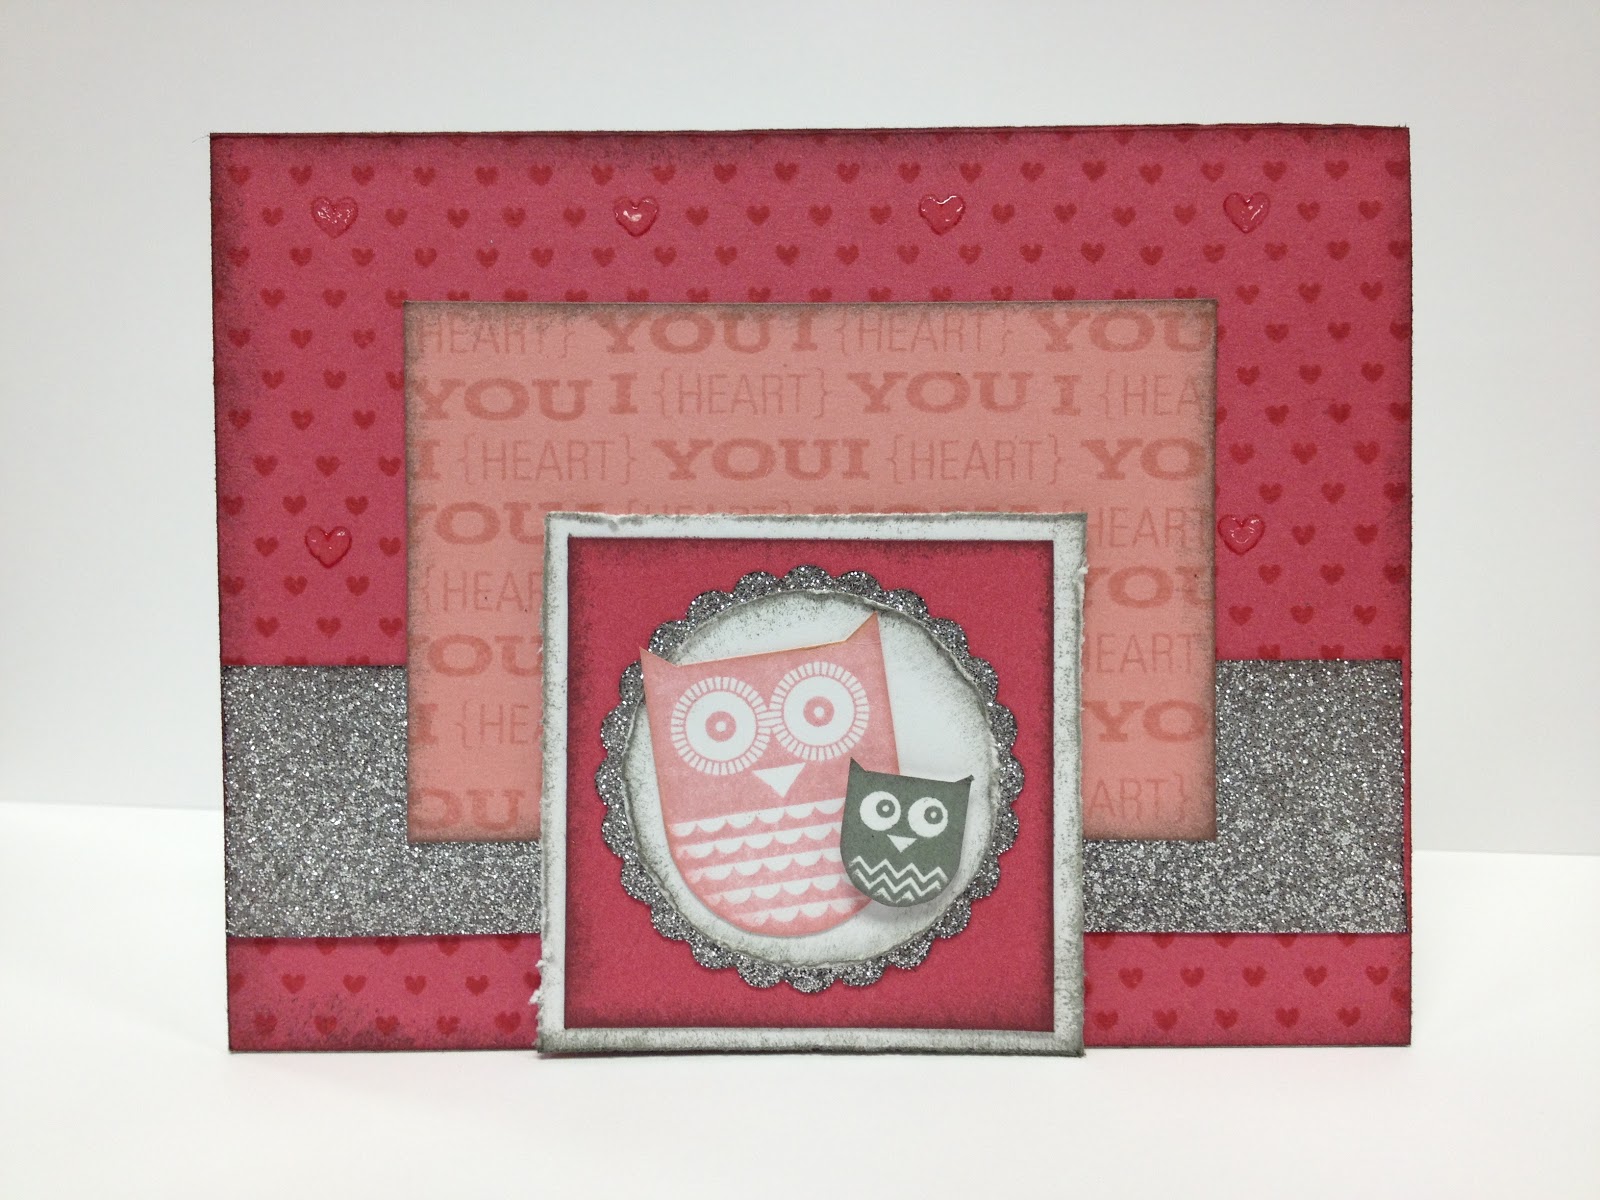
The arrows and the Bundle of Joy chipboard are from the complements.  The little heart in the center of the image is from the sticker sheet that also comes in the complements.  To add dimension to the heart, to make it stand out a bit more, I added liquid glass.  Love how it pops it a bit, without taking away from the whole image.  I liked the little arrows on either side of the circle, but thought they were missing something.  SO I added 3 sparkles on each to begin with, but it looked incomplete.  By adding the bitty sparkles to the ends of the arrows, it completed the look I was going for!!  YAY!!

Thanks SO SO much for stopping by!!  If you like what you see on my blog, make sure to check out my Facebook Page Jen's Scrappy Pages to see more art that I don't post to my blog.  I also post specials that Close to my Heart is holding each month.  

I hope that this has inspired you to try creating a card using something other than stamping on them!  I'm not going to lie, it is weird at first, like something is missing, but in the end it looks just as good AND takes less time to create!!

Happy Scrapping and Stamping!!

Jen

Saturday, February 13, 2016

Happy Hippo!!

I know, I know, It's been a LONG time since I have posted to my blog.  I have been mainly posting to my Facebook Page: Jen's Scrappy Pages.  BUT I thought I would take the extra time to go ahead and post here too.

My creative mojo has been lacking as of late.  I've been making cards/pages using Close to my Heart's new Workshops Your Way kits, but haven't sat down to create anything on my own for a while.  SO the other day, I took out my favorite stamp set Safari Ballet and stamped out the hippo to color.  I found the best coloring medium for her was the Watercolor Pencils and a Blending Pen.  It kept her soft and sweet, I think!  lol


I used Kaleidoscope papers along with Playful Puffies and Bitty Sparkles.  It's weird not having any ribbon or twine on this card, but I felt it just didn't need anything else on the card.  


Supplies used: 
Stamp Set: Safari Ballet
Paper Packet: Kaleidoscope
Embellishments: Playful Puffies, Bitty Sparkles
Coloring Medium: Watercolor Pencils, Watercolor Paper and Blending pen

Thanks SO much for stopping by!!  

Hope this has inspired you to get out your Watercolor Pencils and Blending Pen to color in your images!!

Happy Scrapping and Stamping!

Jen

Thursday, November 19, 2015

Mojo Monday 423 and 424!!

Happy Thursday All!!  Thought I would pop in here quick to share my Mojo Monday Sketch Challenge cards from this week AND last!!  I finished BOTH of them this morning and knew that I needed to put them up on the blog while there is still time for #424.  I'm not as good about posting to this blog as I am to my Facebook page...REALLY need to fix that!

Both cards use my FAVORITE paper pack Georgie, which in in the current CTMH Annual Inspirations catalog.  I just love the hues of Canary, Juniper, Champagne and Whisper that the paper pack uses.  Not to mention the little elephants on the paper are ADORABLE!!  LOL

Since I am posting in the Mojo Monday Sketch Challenge 424, I will start with that card.


Instead of stamping the sentiment,  I found this super cute "sticker" from the Georgie Complements!!  Talk about EASY PEASY!!  The elephant and stars are also from the Complements.  I added Liquid Glass to the stars to give them a bit more dimension.  The circle is from CTMH's Artiste Cricut cartridge.  


This card is the Mojo Monday Sketch Challenge #423.  I just love how the background paper on this card is soft and each of the patterned papers go so well with one another!  The sentiment is one of Close to my Heart's "M" sized stamps.  PERFECT fit for a 2" circle or square.  The flower is also from the Artiste cartridge.

Supplies Used: 
X7203B - Georgie Paper Packet - $9/95
X7203C - Georgie Complements - $9.95
M1054 - Xoxo Stamp - $2.95
Z3089 - Grey Enamel Gems - $3.95
Z2013 - Silver Sequins - $3.95
Z3095 - Whisper Thick Twine - $4.95
Z2173 - Slate Ink - $6.95


Thanks SO much for stopping by!!  

Hope this has inspired you in some way to get creative with your cards/paper crafting projects!!  OR just to get out your stuff and PLAY!!

Happy Scrapping and Stamping!!
Jen


Tuesday, October 27, 2015

Mojo Monday Sketch Challenge 421 Card

Happy Tuesday Bloggers!!  It is a VERY happy Tuesday for me because I actually finished the Mojo Monday sketch challenge a day after it was posted!!  YAY ME!!  Another reason I am happy is NOT only did I get the card made...BUT it is my FAVORITE size too!!  The last Monday of each month, Mojo Monday features the Tall and Skinny card sketch.  This is a FUN size at 3 1/2 x 5 1/2!!

I honestly haven't been slacking TOO much lately, at least not on creating.  I have been posting my Mojo Monday Sketch Challenge cards to my Facebook Page Jen's Scrappy Pages.  SO head on over to check out the last few Mojo Monday Sketch's that I played along with!!


This card came together pretty quickly!!  I have figured out a way to bring the sketch into my Cricut Explore Design Space software, so I don't have to guess at how big or small I need to cut my papers!!  LOVE using this to create my cards!!


The frame I used is from CTMH's Artiste Cricut cartridge!!  I LOVE how it adds extra detail and dimension to the card!!  I cut it at 2 1/2" in my Explore Design Space software.  BUT I believe you should be able to cut it at 2 1/2" if you are using the Expression 1 or 2.

Products used are: 
X7200B White Pines Paper Pack $9.95
B1412 Perfect Fit - Holidays $9.95
Z3093 Fern Thick Twine $3.95
Z1263 Bitty Sparkles $2.95
Z2114 Cocoa Ink $6.95
Z2116 Cranberry Ink $6.95
3174 Blending Pen $4.50
3505 Watercolor Pencils $26.95
Z3118 Confetti Embossing Folder $8.95

If you would like to purchase any of the products that I used to create my card, head on over to my website at jen.ctmh.com 


Thank SO much for stopping by!!  Don't forget to check out my Facebook Page to keep up with my weekly posts!

Hope this inspires you to get out your Cricut Cartridges to use with your cards!!  I am certainly getting a LOT of use from mine since I purchased the Cricut Explore!!  LOVE LOVE LOVE it!!!

Happy Scrapping and Stamping!!

Jen


Tuesday, April 29, 2014

Freshly Made Sketches 133

Thought I would share my creation using the sketch from the Freshly Made Sketches Blog.  I was pretty tickled with the way it turned out!  Although I missed the actual challenge, I still wanted to share!!

Again, I am using the "Free To Be Me" papers from Close to my Heart's National Scrapbooking Month special.  You too can get your hands on this BRIGHT AND CHEERY paper pack starting May 1st through May 31st!!!


I kept this simple, yet sweet as I tend to do MOST of my cards!  LOL  I used Lagoon and Smoothie Baker's Twine from the Paradise Baker's Twine assortment.  LOVE how it adds just a bit of fiber, without taking away from the arrows on the background paper!

Thanks SO SO much for stopping by!!

I hope that this inspires you to play along with the weekly sketch challenges over at Freshly Made Sketches!  I believe a new one is released tomorrow!  Stay tuned for that sketch too!

Happy scrapping and stamping!

Jen

Monday, March 3, 2014

Sweet Thank You Card

Today's post is going to be short and sweet!  Well, so is the card!  LOL Last Thursday I had SO much fun staying in my pajamas all day and playing with all of my papers, inks, stamps, embossing folders and embellies.  Much needed therapy, I tell ya!!

One of my favorite size of card to make is the 4 1/2 x 4 1/2 square.  The only problem is it won't fit in a regular sized envelope.  MAYBE I should make it a 4 1/4 x 4 1/4 so it will fit!  Now THAT'S an idea!


There is something about the colors of the Skylark paper pack that I have fallen in love with.  Funny thing is when I first opened the paper pack, I was a bit stumped as to how to work with it because the colors were so similar.  BUT throw in the Kraft CS and the Sweet Leaf and Lagoon colors just come to life.  Add some Burlap Ribbon and it gets even better!

Supplies used for this card are: Kraft, Lagoon, Sweet Leaf and White Daisy CS; A True Thank You; Aqua Dots; Burlap Ribbon; Lagoon Baker's Twine from the Paradise Baker's Twine Assortment; Dots Embossing Folder.  Cocoa, Lagoon and Sweet Leaf Inks were used for distressing.  Sweet Leaf and Lagoon Alcohol Markers were used to color in the sentiment which was stamped in Cocoa Pigment ink.  

Thanks SO much for stopping by!!

Hope this has inspired you to stay in your pajamas all day and PLAY with all of your scrapping/stamping goodies!!

Happy Scrapping, Stamping and Embossing!!

Jen


Thursday, February 27, 2014

Another Week...Another Mojo Monday Sketch!!

This week over at Mojo Monday, the challenge is to create a tall & skinny card using the measurement 3 1/2 x 5 1/2.  I actually REALLY like this size!  It still fits in a regular envelope, yet is a bit smaller and sweeter.  In addition to creating a skinnier card, I put the fold at the TOP of the card instead of on the side.  WHEW this is a LOT of change for me in one week!  LOL

Here is the sketch from the blog...

And here is my version....


For my card, I used the elegant papers from Skylark, sentiment from Holiday Tags and flowers cut from Art Philosophy.  The wooden button is from the Wooden Medley Assortment, Lagoon Baker's Twine is from the Paradise Baker's Twine Assortment and the Sparkle Flourish...well that is from the Sparkle Flourishes (small, I believe).  

Lagoon Scalloped Circle is 2 1/2", Large Flower is 2 1/2", Smaller Flower is 2", Kraft Scalloped Circle behind button is .90mm.  The 1" scalloped circle was too large, the 3/4" scalloped circle was too small.  SO I changed my Cricut setting to mm instead of cm so I could get an in between size.

Thanks SO much for stopping by!!

I hope that this has inspired you to play along this week over at the Mojo Monday Blog!!

Happy Scrapping and Stamping!

Jen


Tuesday, February 11, 2014

Distressed Version of Wild About Love Card

Because I really liked the way my card turned out that I entered over at Freshly Made Sketches using Balloon Ride papers and the Wild About Love February SOTM, I decided to re-create it by adding different embellishments and distressing the edges of the papers using Saddle Ink.

Putting these 2 cards side by side, I honestly cannot decide which one I like better.  The first card is clean with just a pop of glitter and a few accents.  The second card is all dirty and sparkly and full of different elements from the Brown Glitter Paper behind each of my layers to the birds flying off into the distance...


At first, I was not sure if the Brown Glitter Paper behind each layer was a bit overkill...but the more I looked at it with and without the glitter, I found that I liked the glitter better.  I think that the Burlap Ribbon and Hemp Baker's Twine help bring an earthy element to the glitz of the paper.  


Even this sweet little fox ended up with some Saddle Ink around her edges to help her stand out against the Crystal Blue CS used for the image background.  If you look close enough, I took 1 strand of the Baker's Twine and used it for the stem of the flower.  Adding it in addition to the Pink Glitter Gem gave a bit more dimension to the flower that I cut out of Creme Brulee CS and popped up.


The wooden heart on the stump and the birds in the upper right corner are from the Color Ready Trinkets Wooden Shapes.  I colored the heart with Sorbet ink, but left the birds the natural wood so they would bring the natural look of the Burlap Ribbon and Baker's twine to the upper part of the card.  I think it helps bring it all together!

Thanks SO much for stopping by!!

I hope that this has inspired you to take a card and challenge yourself to use the same sketch, papers and stamp set but add different elements to see how different they can end up looking!!  This was a SUPER FUN challenge for me...one that I just may end up doing again!

Happy Scrapping and Stamping!!

Jen 

Tuesday, January 7, 2014

Mojo Monday Sketch Challenge #327

It has been a while since I have participated in the Mojo Monday Sketch challenge.  SO I thought I would sit down and play along this week.  I forgot how fun it is just to sit down and actually get to "play" with all of my papers, embellishments and stamp sets without having to use specific papers or embellishments.  I REALLY need to do this more often!!

This is the sketch...


This is my version....


The little hearts are from the Trinkets Wooden Shapes.  I sponged Chocolate, Sunset, Lagoon and Buttercup on each one then added Liquid Glass for a little extra shine!


I used the colors and papers from Close to my Heart's Babycakes and the SUPER CUTE giraffe and sentiment are from the Wild Wonders stamp set.  To finish the card, I wrapped it with Chocolate and Sunset Baker's Twine.

Thanks SO much for stopping by!!  

I hope this inspires you to head on over to the Mojo Monday Blog to participate in the sketch this week as well!!

Happy Scrapping and Stamping!!

Jen


Sunday, January 13, 2013

Whooo's Your Valentine????

Now that life is finally getting back to somewhat of a normal....I am able to spend MORE time creating and sharing my creations!  While it is bittersweet, I AM glad to be getting back on track!

Have you seen the SUPER CUTE kit that Close to my Heart is offering through the end of this month in honor of National Paper Crafting Month?  If you have, then you know how STINKING CUTE it is!!!  If you have NOT then you NEED to check it out on my website....lovinscrappin.ctmh.com.  It is ONLY $10!!!  Yep!!  It retails for $40.  BUT during the special when you spend $35, you can purchase the kit for just $10!!


I have to be honest, as I always try to be!  lol But when they first offered the kit, I was not a big fan...that is UNTIL I sat down and played with the stamp set and the new Silver Glitter Paper.  Then I fell in LOVE with it!  I even created my own patterned paper using the background stamps that are included in the stamp set!!


If you are like me, you probably don't have any use for 12 treat tubes to send Valentine's to anyone.  I am sure I will find something else to use those for....and when I do I will post it!  But who can't use some STINKING CUTE owl stamps and AWESOME Silver Glitter paper??  REALLY??


I have purchased glitter paper before, but it was too course...kind of like a course sand paper.  BUT NOT this stuff!  This GLIDES through your paper trimmer!  I even punched out the scalloped circle with no problem!  


I did not add any additional embellishments that were NOT included in the kit.  The only thing I used that was not included was Blush, Hollyhock and Slate ink to stamp with.  Plus a Hollyhock Alcohol Marker to color in the hearts on the first card.

Thanks SO much for stopping by!!

I hope this has inspired you to either get out your Whooo's Your Valentine Kit that you have already purchased OR hurry up and order one before the end of the month OR before they run out!!

Happy Scrapping and Stamping!

Jen


Monday, December 17, 2012

Spotlight on Art - Jeanette Lynton's Blog

Last week I received an email from Close to my Heart telling me that I had earned a spot in the Spotlight on Art segment of Jeanette Lynton's Blog!!!  I was completely BLOWN AWAY when I received the news!!!

I had submitted my Flakey Friends/Pun Fun cards using Dakota in late October and received a quick note 4 days later thanking me for my submission.  When I read the email, I figured that I had not been chosen.  SO much to my surprise when I checked my email last Tuesday, I had indeed been chosen and it was being featured THAT DAY!!  I was SO excited that someone could have slapped me and I would have still been smiling!  LOL

I am a firm believer that things happen for a reason....this could NOT have come at a better time in my life....

Let me explain why....

4 1/2 years ago in August of 2008, my SIL (my hubby's sister) was diagnosed with Leiomyosarcoma (uterine sarcoma) cancer.  When she was diagnosed, she was given 6 months to live which was devastating to us all!  She immediately had a complete hysterectomy and started her chemo treatments within the month.

Her first round of chemo treatments proved to be successful!  Her scans showed the cancer to be gone! But towards the end of that first year, her cancer had moved to her lungs and liver.  By November 2009 she was on her second round of chemo with the hopes of slowing down the growth.  She was told that any chemo treatment from here on out would be to extend her life, but that curing her cancer was not a possibility.

Over the next 3 years after many hours of research by not only the dr. but my hubby, they would try several different chemo treatments and even go on to try some trials that had shown success.   Some were successful at shrinking the tumors that had grown on her liver and her lungs.  But unfortunately that success was not long lasting as the cancer was spreading through her body like wildfire.  After trying radiation to shrink a mass in her abdomen, she stopped any and all treatments in the summer of 2012.

Rhonda was admitted to the Hospice House on Wednesday, November 21st 2012 and passed away 3 weeks later on Friday, December 14th 2012. She fought to the bitter end...as we expected she would!

When I received the notification of being featured in the Spotlight on Art, I was at lunch with my hubby after a LONG night at the Hospice House.  My heart was heavy and my eyes burned from the tears that kept welling up in my eyes that day.  Jeanette provided a BRIGHT moment in my day and words cannot express what it meant to me to be in the Spotlight during such a dark period in my life.  This moment will never be forgotten....


Rhonda as a toddler.


Rhonda's High School Graduation Photo


Rhonda's family at a Christian Convention in 2007.  Matt, Dan, Rhonda and Mandi.  


Rhonda with Rod (her brother and my hubby) at our daughter Rachael's graduation ceremony in May of 2012.


Rhonda attending Rachael's graduation party in June of 2012.  Rhonda was very sick when this photo was taken, but she was NOT about to miss her niece's graduation party.  


Thanks SO much for stopping by!!

I hope that this inspired you to submit your favorite art to Jeanette Lynton's Blog....

Happy Scrapping and Stamping!!!

Jen


Tuesday, September 4, 2012

Altered Notebook in Clementine

SO I found these little notebooks on clearance a while back and am just now getting around to doing something with them!  They are 4 x 5 3/4, so the PERFECT size to find a card pattern for.  I found this card pattern in the Make it from your Heart book that CTMH released with the new Autumn/Winter 2012 Idea Book.  If you have NOT seen this book YET....I HIGHLY encourage to check it out!!  In fact...here is the link to it on my website....go ahead, CHECK IT OUT!!!

ANYHOO....On to the sweet little notebook....I used my FAVORITE papers from Clementine and my new FAVORITE stamp set Pun Fun.  As you can see, I paper pieced the cupcake and topped it with Liquid Applique and Prisma Glitter.


I can't wait to get back to my shop and make up a few more of these!  These make GREAT little gifts!! PLUS I love me some notebooks!  I am always filling notebooks up with ideas, lists, and notes that I don't want to forget.  This is the PERFECT size to keep in my small purse as they don't take up much space at all!

Well, thanks AGAIN AND AGAIN for stopping by!!!  

I hope that this has inspired you to get out those clearance notebooks that you JUST HAD TO HAVE 2 years ago and have not done anything with yet!  LOL or head on over to the closest store and check out their notebooks...you never know, they may have some on clearance as well!!  

Happy Stamping and Scrapping!!!

Jen

Saturday, September 1, 2012

Another Card using Moonlight!

HAPPY SATURDAY!!!  I am sitting outside on my deck, overlooking the lake and soaking in the GORGEOUS Saturday morning weather.  I plan on spending as much time as I can OUTSIDE this weekend!!!  It is hard to believe that we are already at the beginning of SEPTEMBER!!!  OH MY GOODNESS where did the SUMMER go??  This time of year is always bittersweet for me.  I LOVE the Fall and the cooling temps, BUT I DISLIKE the COLD in the winter and I have a feeling that we are in for a long, cold, miserable winter.  THANK GOODNESS I have paper crafting to keep me busy...otherwise I think I would go CRAZY!

WHEW....I am done ranting now!  LOL  ONTO the card...

I am SO STINKING excited to share this card with you all.  NOT because it is the CUTEST card I have EVER created, BUT because this was my FIRST Creativity in Motion TEAM swap!!!  We had 8, yes 8 girls on my team that participated in the first month's swap!  And let me tell you, they are some STINKING TALENTED girls!!  I am SO blessed to have such a great group of girls on my team!!!!!

I will share my card first, then I will share EVERYONE'S swaps over the next couple of days....


SO when we were swapping our creations, as my card was passed around, everyone mentioned how HEAVY it was!  LOL  Yeah, I guess I got a bit carried away with the layers of paper!  There are 6 layers of paper, then the sprial thingy on the top plus the cardstock circle and flower on the top of that.  OH not to mention the layer of Tulle....I guess I just could not help myself.  Each layer complimented the other and I don't think it would have turned out at cute with out each of the complimenting colors!

Thanks for stopping by to check out my latest creation!!  

I hope that this has inspired you to add a few extra layers to your card patterns!  HAHA  Might not want to mail it though...might cost you a small fortune! 

One more thing....If you are thinking about joining Close to my Heart, I would LOVE to have you on my team!!!  In August alone, we welcomed 6 new girls to Creativity in Motion and I tell you what, we are REALLY setting things in motion and moving forward!!  Join us on this AMAZING ride!!

Happy Scrapping and Stamping!!!

Jen

Tuesday, August 28, 2012

It's Your Day Card

Happy Tuesday!!  I am SO excited to share with you all these SUPER CUTE cards that I 100% scraplifted from Brenda Thacker (fellow CTMH consultant).  Brenda created these at the beginning of this month while we were at a consultant scrap weekend.  They are such HAPPY cards that I knew I NEEDED to make them!  Thanks to Brenda for sharing her creativity with us!!!!

Brenda created each of these cards using the National Stamping Month stamp set "It's Your Day".  This set is AWESOME!!!  If you have NOT purchased yours YET, you are MISSING OUT on a TERRIFIC deal!!  You will receive a double d sized stamp set for $5 when you purchase $35 in CTMH products.  Special ends at the end of September!  Check out my website to see the stamp images and to place a qualifying order!!  www.lovinscrappin.myctmh.com 


In addition to totally scraplifting these cards...I am offering a card workshop where we will make 2 each of the 5 different cards using ONLY the It's Your Day" stamp set for the sentiments AND for creating our own background patterns!  Check out my Monthly Classes and Workshops tab or go to my Meetup.com group site for more details and to see the rest of the cards.....

The patterns followed to create these cards can be found in the NEW CTMH how-to book "Make it from your Heart".  There are 12 card patterns in total!!!

Thanks SO much for stopping by!!

I hope this has inspired you to take advantage of this AWESOME deal in September!!  OR If you already own this set...create your OWN patterned paper and cards!

Happy Scrapping and Stamping!!

Jen


Friday, April 20, 2012

A couple of cards using Cracked Glass Technique

There are some techniques that I fall in love with, create a bunch of stuff using it and forget about it once I learn the next cool technique.  That was the case with this technique.  I was going through my scrapbook room, you know doing the quarterly clean out, and ran across something that had this technique used on it.  SO I thought I would give it a try with this new stamp set from CTMH "Quick Cards Butterfly" and the GORGEOUS paper from "Florentine".


 Honestly, I am not even sure if this is the correct name for the technique.  BUT we are going to call it Cracked Glass for this post!  For this technique, you need Versa Mark, Clear Detail Embossing Powder and a Heat Gun.  Simple so far!  After you have stamped your favorite image on a piece of CS, you will cover the ENTIRE piece of CS with Versa Mark...then pour the Embossing Powder all over the top so you have a nice layer of powder covering the entire piece of CS.  Heat until melted.  Repeat the VersaMark and Embossing Powder step again.  Heat until melted.  This time, while the embossing powder is melted and still hot, cover again with embossing powder, heat till melted and repeat these steps until you have about 5-7 layers of embossing powder.  


Once you have the number of layers that you like on your image, let it cool completely.  I have seen where some will put it in their freezer to speed up the cooling process.  Once completely cooled you will very gently fold the image until the embossed layers start to crack.  You can crack it as little or as much as you would like!  After I cracked mine, I added a bit more ink to the top, so as to get into the cracks and around the edges....for  a more antiqued look.

I am sure there are youtube tutorials out there on how to create this technique.  I just don't have time right now to post a tutorial!  BUT I hope that you were inspired to try this technique out if not for the first time, maybe revisit the technique with new papers and embellies that you have in your stash!!

Thanks SO much for stopping by!!

Happy Scrapping and Stamping!!

Jen


Thursday, April 5, 2012

I'm BACK!!!

First of all, I would like to apologize for my absence over the past several months.  While I have not been posting here to my blog, I have been posting to my Meetup.com group site Scrappin' and Stampin' Made Easy but Beautiful which has kept me fairly busy!  Which is a GREAT thing!!!  BUT I have had a few of my blog followers ask if I would also update here as well.  SO I AM!!

If you noticed at the top of my blog I have added a second page.  This is where I will be adding my upcoming crops, workshops and scrapbook group events.  If you would like to attend one of my events, please visit my Meetup.com group site to RSVP.  All of my Meetups are arranged by date first then the time of the meetup.  

I am going to start with my most recent card that I created using Close to my Heart's "Art Philosophy" Cricut Cartridge.  Did you know that this cartridge has a card function that cuts out an image from the front of the card??  It DOES!!!  When I first discovered this function, I have to be honest, I was not exactly sure how I was going to decorate around a whole in the middle of my card.  But let me tell you this...once I figured out HOW I was going to cover it, I fell in love with this function!!


For this card, I cut out 4 cards using 4 different papers from the "Florentine" paper pack.  The base for my card was cut in Vanilla Cream CS.  The second was the Creme Brulee patterned paper,  the third was the Twilight patterned paper and the 4th was the floral print patterned paper.  

You might think that it would be wasting too much paper to cut out all those cards....Well maybe you are right!  LOL  But I was "playing" around trying to find just the right combo of colors, so ended up cutting out 4 different cards.  It really is not a waste if you were to cut out 4 card bases using Vanilla Cream CS and use each of the left over parts to create 4 different cards using the same cut out.  Clear as mud??  LOL


The placement of the trees and house on the inside of the card is EASY PEASY.  Just close the card and use the front as a template to stick your trees and house into.  Maybe I will do a photo tutorial to SHOW you how I did it....kind of hard to explain with just words.  

ANYHOO....Thanks SO much for stopping by and for sticking around for this long!!

I hope that this has inspired you to play around with some of the FUN functions on the "Art Philosophy" Cricut Cartridge from Close to my Heart!!  

Happy Stamping and Scrapping!!

Jen


Thursday, December 8, 2011

January Scrapbook Group Pages - Wonderland

Thought I would share the pages that my monthly scrapbook groups will be making in January.  I just LOVED the way they turned out!  The papers from Wonderland are SO winter.....with shades of Grey, Blue and Brown and the Stickease that coordinate come with those ADORABLE snowmen and kids playing in the snow.  This paper pack is also extremely versatile as well.  You can flip the snow printed papers for a completely different look and have pages/cards and whatnots that have nothing to do with Winter!  LOVE IT!!

If you live in the Omaha area and would like to attend one of my scrapbook groups to create these 6 pages, check out my Meetup.com group at Scrappin' and Stampin' Made Easy but Beautiful.


The last 2 pages can be created by purchasing the Wonderland Workshop on the Go Kit.  You can either purchase it from ME at www.lovinscrappin.myctmh.com under the shopping tab OR from your favorite CTMH rep in your area.  

Thanks SO much for stopping by!  

I hope that I have inspired you to create some pages, cards or paper projects using this GORGEOUS paper pack!

Happy Scrapping and Stamping!!

Jen

Wednesday, July 20, 2011

As I PROMISED......A Sneak Peak!!

Where OH where do I begin??  Convention was A-MAZING!!!  OH MY GOODNESS......there is going to be SO much to share over the next several weeks!  Close to my Heart is the BEST and I cannot imagine EVER being apart from this company.

I am patiently waiting for my convention bundles to arrive on my doorstep so I can start playing with the stuff that I did not have from Extravaganza.  And I DO mean PATIENTLY........  In addition to the bundles that were PAID for with my Extravaganza convention credit, I just placed an order for 3 of the WOTG kits and the additional projects that are listed with them.......JUST WAIT till you get your hands on the new Autumn/Winter Idea Book!!!  You are going to LOVE everything in it!

While I am waiting on my goodie box to arrive, I have been busy taking pictures of the art that I had on display inside my booth AND on the display boards outside my area.  My topic was "Adding Brazzle Dazzle to Your Artwork.  YEP you guessed it....BLING!!  My favorite thing to add to my pages, cards and paper crafting projects.

Because I can be a bit mean at times.......I am going to drag this out for a bit and make you keep coming back to check for more.......lol


This first card is a 3x3 and it features Prisma Glitter and a button in our new Bling Assortment.  To make the flower, I started with a Creme Brulee flower from the Spring Blossom Just Blooms Paper Shapes.  I covered the paper flower with Liquid Glass then sprinkled (more like poured) Prisma Glitter over the entire flower.  Shake or tap off the excess and let dry.  The flower becomes a bit more sturdy as the Liquid Glass dries.


This second card is also a 3x3 card that features Prisma Glitter, Pins from the Bling Assortment and NEW Flutter Paper Shapes.  Using the tip of my Liquid Glass container, I ran it around the edges and on the inside "embossed" areas of the butterfly.  I sprinkled Prisma Glitter over it and tapped off the excess. It really does not take much time to dry.  Set it aside for maybe 5 minutes and it should be ready to add to your project.  

Another thing you can do using this technique is to either sponge color onto the edges and embossed lines in the center OR spray the whole butterfly using Rubbing Alcohol and Re-Inker.  Then either use Liquid Glass and Prisma Glitter around the edges OR over the entire butterfly/flower.

The new products that were featured on these 2 cards will be available for purchase August 1st!!  You can either order them from me at www.lovinscrappin.myctmh.com OR from your favorite Close to my Heart rep!  

Want to get a discount on CTMH products or start your OWN business by teaching others how to use the AWESOME products that CTMH offers??  Join my team "Creativity in Motion" and join the Close to my Heart community.  It truly is a MAGICAL company to be a part of!!

Hope this has inspired you to get out your Liquid Glass and Prisma Glitter and have a little fun "Adding Brazzle Dazzle to Your Artwork"!!

Happy Scrapping and Stamping!!

Jen


Sunday, April 3, 2011

April Scrapbook Group Pages using Miracle

Happy Sunday All!!  I thought I would share the 6 pages that my scrapbook groups will be making this month.  All 6 pages are created using the sweet papers from "Miracle".  I added Clear Buttons as an "extra" embellishment that group can purchase to add to their pages if they would like, but they are not necessary to complete the pages.  

I was pretty happy with the way these turned out.  One thing I love about this paper pack is it does not scream boy or girl or really anything too specific.  But after the first 4 pages were done, I had a hard time coming up with the last 2, which ended up being my favorite pages of all 6!  Funny how it all works out in the end.  I will focus this week on finding pictures to put on these pages this week.  I have a few ideas.....just need to search through the endless files of photos on my computer and if I can't find any there, I have plenty of albums to search through......lol 


Is it just me or does this pic look smaller than usual?  Must be that it is longer than my card pics.  HHMMM  If you would like to see it a bit larger, just click on it.  These pages look a bit odd without the photos......but will look super cute when all the blanks are filled in!  The Pinwheels were created using the stamp set that is included in the "Miracle" Workshop on the Go Kit.  The Kraft Color Ready Borders are ALSO included in the WOTG kit.  


This 2nd set of pages uses the coordinating "Miracle" Stickease.  My scrapbook group kits always include the coordinating stickease.  The first 2 pages that we create focus on stamping and a new technique.  The last 4 pages that we create focus on using the coordinating stickease and an added embellishment that is not included in the WOTG kit.


The last 2 pages are my personal favorites!  The LO's for all 6 pages were taken from the Magic Book.  This is a LO that I have been wanting to make, but was not sure about all the punched circles.  Since CTMH came out with the 1 1/4" circle punch, it made creating this page SO much easier!!  Inside each punched circle is a Clear Button.  

Supplies used: 
Paper: Miracle WOTG Kit
Stamp set: Miracle Workshop on the Go stamp set
Inks: Heavenly Blue, Chocolate, Sweet Leaf, Desert Sand
Embellishments: Kraft Color Ready Borders, Miracle Level 2 Stickease, Clear Buttons
Tools: CTMH 1 1/4" Circle Punch

Thanks OH SO much for stopping by!!   If you live in the Omaha area and would like to create these pages, our group meets each 3rd Friday of the month at 9am or 7pm.  There is ALWAYS room for guests!!  Contact me to reserve a spot for you and a friend!

Hope this has inspired you to visit one of my scrapbook groups OR find a local CTMH consultant to see what kind of classes they offer!

Happy Scrapping and Stamping!!

Jen