Thursday, April 22, 2010

A scrapbook page of me and my sis....

Yesterday I pulled out some photos of myself when I was little.  There are only a handful of pics of me when I was little as my parents did not have a camera at that time.  And of course, because they are almost 40 years old, they are discolored and fading.

I set out on the small task of scanning each one and enhancing them with the software on my Mac Laptop. For the most part, they turned out awesome!  I think though that with a bit more tweaking I can make them even better.

The photos on this page are not the originals as I was afraid to adhere them to my page.  So, I scanned and fixed them and then "antiqued" them.  LOL  The originals are black and white, but they did not look right with the papers that I chose.  Sounds funny to "antique" photos that I am trying to fix!  LOL

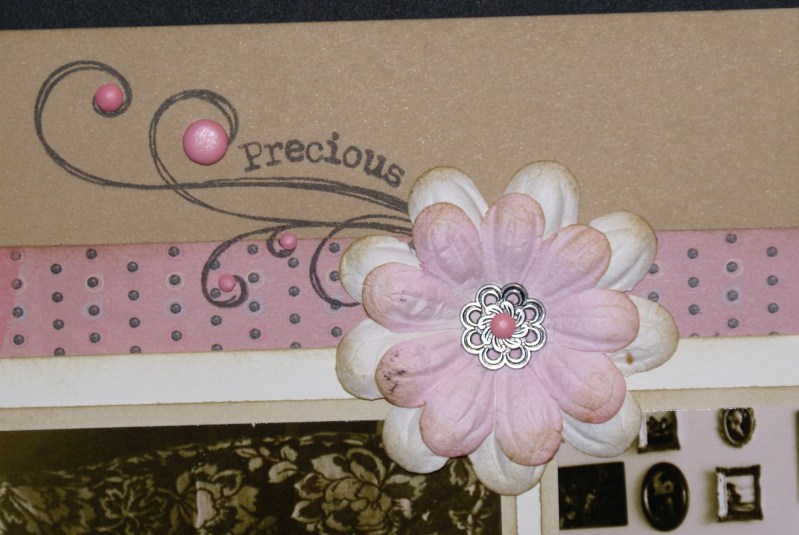
ANYHOO......here is the page and a couple of close ups.....


I used papers from 2 different paper packs, which is a personal challenge for me.  If you are anything like me, you "collect" paper and scrapbook accessories.  I find that when I use a paper pack for my scrapbook group that I am just plain tired of looking at the papers by the time I have created 6 pages plus cards and such from the same 6 patterned papers.  So, I am trying to not only use what I have, but mix up what I have and use it in a different way than before.

The letters that I used to create the word SWEET are from the Dimensional Elements Monograms.  I LOVE these letters as I can mix and match my letters to create a dimensional hodgepodge of letters.  Funny thing is, I was running out of E's, so these were my only 2 choices......gotta use what I have.....but I think that they worked PERFECT to create this title!!


When I first started this blog, I would give you a supply list of products used.....I think that I am going to go back to doing that at the end of each post.....

Thanks for stopping by!!

I hope that I have inspired you to get out and use what you have!  Mix and match your papers.  You might be surprised at what you will come up with!!

Supplies used:  All Items CTMH (unless noted)

Paper: Silhouette and Notebook
Stamps: Playful Flourishes
Embellishments: Brad Assortments; Metal and Winter Cozy, Colonial White Ribbon, Big Blooms, Filigree Charms, Dimensional Elements Monograms letters; S, W, E, T

To purchase any or all of the above items, visit my website or purchase from your favorite consultant!

Happy Scrappin' and Stampin'

Jen

Sunday, April 11, 2010

Scraplifted card from the new Summer Idea Book.......ssshhhh

Just a little tease!  LOL  And not of any new products, but new art using old products!!  So, as soon as I get my hands on the new Idea Books, the first thing that I do is go through the WHOLE Idea Book and search out ALL the new stuff.  The second thing that I do is go back through to make sure that I did not miss any new stuff the first go round!  LOL 

The third and final thing that I do is go back through ALL of the new art that is displayed using ALL products in the Idea Book.  I almost always find a card, LO or dimensional project that has used a stamp set or paper pack that I had previously over looked or owned but had not thought to use it that way. 

That is what happened as I was going through the soon to be released (May 1st) Summer Idea book.  I found 3 cards using 2 stamp sets and papers that I already owned, but had not thought to use them together.  So, I took 2 of the cards and combined the ideas and came up with this card.......


I was pretty tickled with the way this turned out.  I used CTMH papers You Rock and the stamp sets are  Cottage Floral and Cocktail Alphabet (for the thanks).  I stamped the flower in Sunflower and the inside of the flower is Smokey Plum.  The White Daisy Ric Rac is from the Ric Rac collection and the Outdoor Denim ribbon is from the Outdoor Denim ribbon collection.

HHMMM maybe I will re-create the other 2 cards and post them here to show you how I came up with this card.......I will put that on my 2 do list for next week!  Stay tuned!!!

Thanks for stopping by!!!

I hope that this has inspired you to take a card, LO, or other project that you LOVE and re-create it to make it all your own!  I have faith that you can do it too!!!

Jen

Friday, April 9, 2010

Tutorial for Memo "Purse"......

I have had a few questions creating this little "Purse".  Since I am a visual learner, I thought I would post a tutorial for those who like me learn better with picutres!  Hope this helps!! Let's see if I can get all the pictures in order now......


Start with a small 3 1/4 x 4 1/2 Memo Notebook(or other small notebook)


Cut corners off a 3 1/4 x 4 1/2 piece of cardstock to make a template.


Place template on top of notebook, mark and trim off corners.


Once you have your corners cut, start cutting the rest of the papers to match corners.  I found it easier to go about 5-10 pages at a time.  I also used a larger pair of scissors than I normally use for my paper crafting.  It sounds like it would take a while to cut 160 pieces of paper, but it goes pretty fast.


Once all the papers are cut, you can start decorating! 

Thanks for stopping by!!

I hope that this has inspired you to go ahead and start making up these sweet little Notebook Purses!!

Happy Scrappin' and Stampin'!!

Jen