Saturday, December 21, 2013

Clearly the Best: Create the Date

Did you know that Close to my Heart has some GREAT how to videos on You Tube called "Clearly the Best"?  The videos cover topics from stamping techniques to creating fun projects using their AMAZING Cricut cartridges!

The video that I am sharing today shows you how to create a SUPER CUTE 6" desktop calendar.  I don't know about you, but after watching this video, I now NEED to make me one!!  SO cute and SO simple to customize for a last minute gift for your friends and family.  You could make it masculine to sit on your hubby's desk, or by using the school functions, you could give it as a teacher's gift.  Are you a consultant looking for workshop ideas?  How about a calendar workshop in January??

On to the video....


Thanks for stopping by!!  

Hope this has inspired you to create your own calendar using the Artbooking Cricut Cartridge!  As always, if you do not have one and would like to order one, you can order it here, OR contact your favorite CTMH consultant to find out how to order from them!  

Happy Scrapping and Stamping!!

Jen

Friday, December 20, 2013

Artiste "Thanks" Cards

I was starting this post to show you my team swap card, but decided to instead show you the card that I re-created for my Humble Artists swap.  Not only am I going to share October's swap card, I am going to show you the cards that inspired this card.  

If you have not purchased the Artiste Cricut Cartridge from CTMH, you really should look into investing in one.  Especially if you are a big Cricut fan.  This is a cartridge that is a MUST for EVERY scrapbooker/cardmaker out there!!  There are SO many different things that you can do with this ONE cartridge that it hurts my head just thinking about it!

One of my FAVORITE cuts on this cartridge is the "Thanks" card.  It really is the PERFECT thank you card because it says "Thanks" on it so you don't really need to stamp a sentiment on it.  You can stick some paper and a few embellishments on it and call it good!  Check out the different ways I used it...


The first card is the one that I created for the Humble Artists Swap in October.  It really does look better in person!  After I sent off the 5 other cards that I made for the swap, I found some black flourish sparkles and added it to the right side of the card.  I will try to take a pic next time I am thinking of it and post it here for you all to see.


This was using Avonlea which is now retired.


This card used Scholastic, which is also retired.  SORRY!


OH and Claire!  Oh how I LOVED Claire!  It too is retired...darn it!  Don't you just love how I used the SAME pattern on EVERY one of these cards??  LOL 


Do you remember the fun papers from Dream Pop??  CUTE CUTE!!


I just LOVED the bright colors from this pack!  One would think that I could at least have come up with a different pattern...maybe I will have to work on that this next week!


Oh how I wish that the "special" papers that come out for only a short time would stay LONGER!  I KNOW, I don't have to stop playing with them after they are gone...but I do like to move on to the NEW stuff more than I like to hang on to the old!  lol

Thanks SO SO much for stopping by!!

I hope that this has inspired you to get out your Cricut Artiste Cartridge and PLAY with it!!  Even if it is to cut out the "Thanks" card over and over again!  lol  If you do NOT have this cartridge yet...what are you waiting for???  You can either order it online from your's truly....OR contact your favorite CTMH consultant and order it from them!!  

Happy Scrapping and Stamping!!

Jen


Wednesday, December 18, 2013

Washi Tape Wonder!!

Who invented Washi Tape??  What was it originally purposed for?  Well, I searched the internet and this is what I found on Omiyage:

A Short History of Washi Tape
The whole washi tape phenomenon started in 2006. A group of artists approached a Japanese masking tape manufacturer - Kamoi Kakoshi - and presented them with a book of art they had created using the company's industrial masking tapes. The artists requested that Kamoi Kakoshi manufacture colourful masking tapes for artists.
This was the start of mt masking tape. In the beginning, there were 20 colours, colours designed to bring out the beauty of the rice paper (or washi) used to make the tape. The tapes were a hit - with artists, crafters, and design lovers - both in Japan and, gradually, internationally. With success came new colours, patterns and sizes.
But What Is Washi Tape?
To put it simply, washi tape is a high quality masking tape made of rice paper.
But more than that, washi tape is a material which is beautiful yet useful at the same time. You can tear it, stick it, reposition it, write on it... The low tack adhesive makes it extremely easy to use (and reuse). I think it is so popular because it is so easy to use - and looks good while doing it!
What's The Difference Between Washi Tape and Japanese Masking Tape?
Nothing. They're the same thing! Originally marketed as Japanese Masking Tape, at some point the accepted international term for the tape became "washi tape". In Japan, it's known as masking tape (マスキングテープ) and the most renowned brand of washi tape is simply called mt - which stands for "masking tape". The term "washi tape" refers to the fact that the tapes are made from Japanese rice paper and differentiates it from typical masking tape you might find in the hardware store.  


Having said that, last week I was browsing Pinterest for ideas on my upcoming card class.  I was crunched for time and needed ideas FAST!!  LOL Well, I was pleasantly surprised to find a SUPER CUTE card created by Gina Brandstetter using the Sparkle and Shine Washi Tape.  You can find her card HERE!  I knew right then that I needed to recreate her card, not only for card class, but just for fun using ALL of CTMH's washi tapes!!  


I won't bore you with ALL of the cards that I created over the past couple of days...but I will highlight a few here for ya!  Keep in mind that the Sparkle and Shine Washi Tape 3 pack and the Party Washi Tape 3 Pack are both only available till December 31st.  SO if you like these...you need to contact your favorite CTMH consultant and order yours TODAY!!  

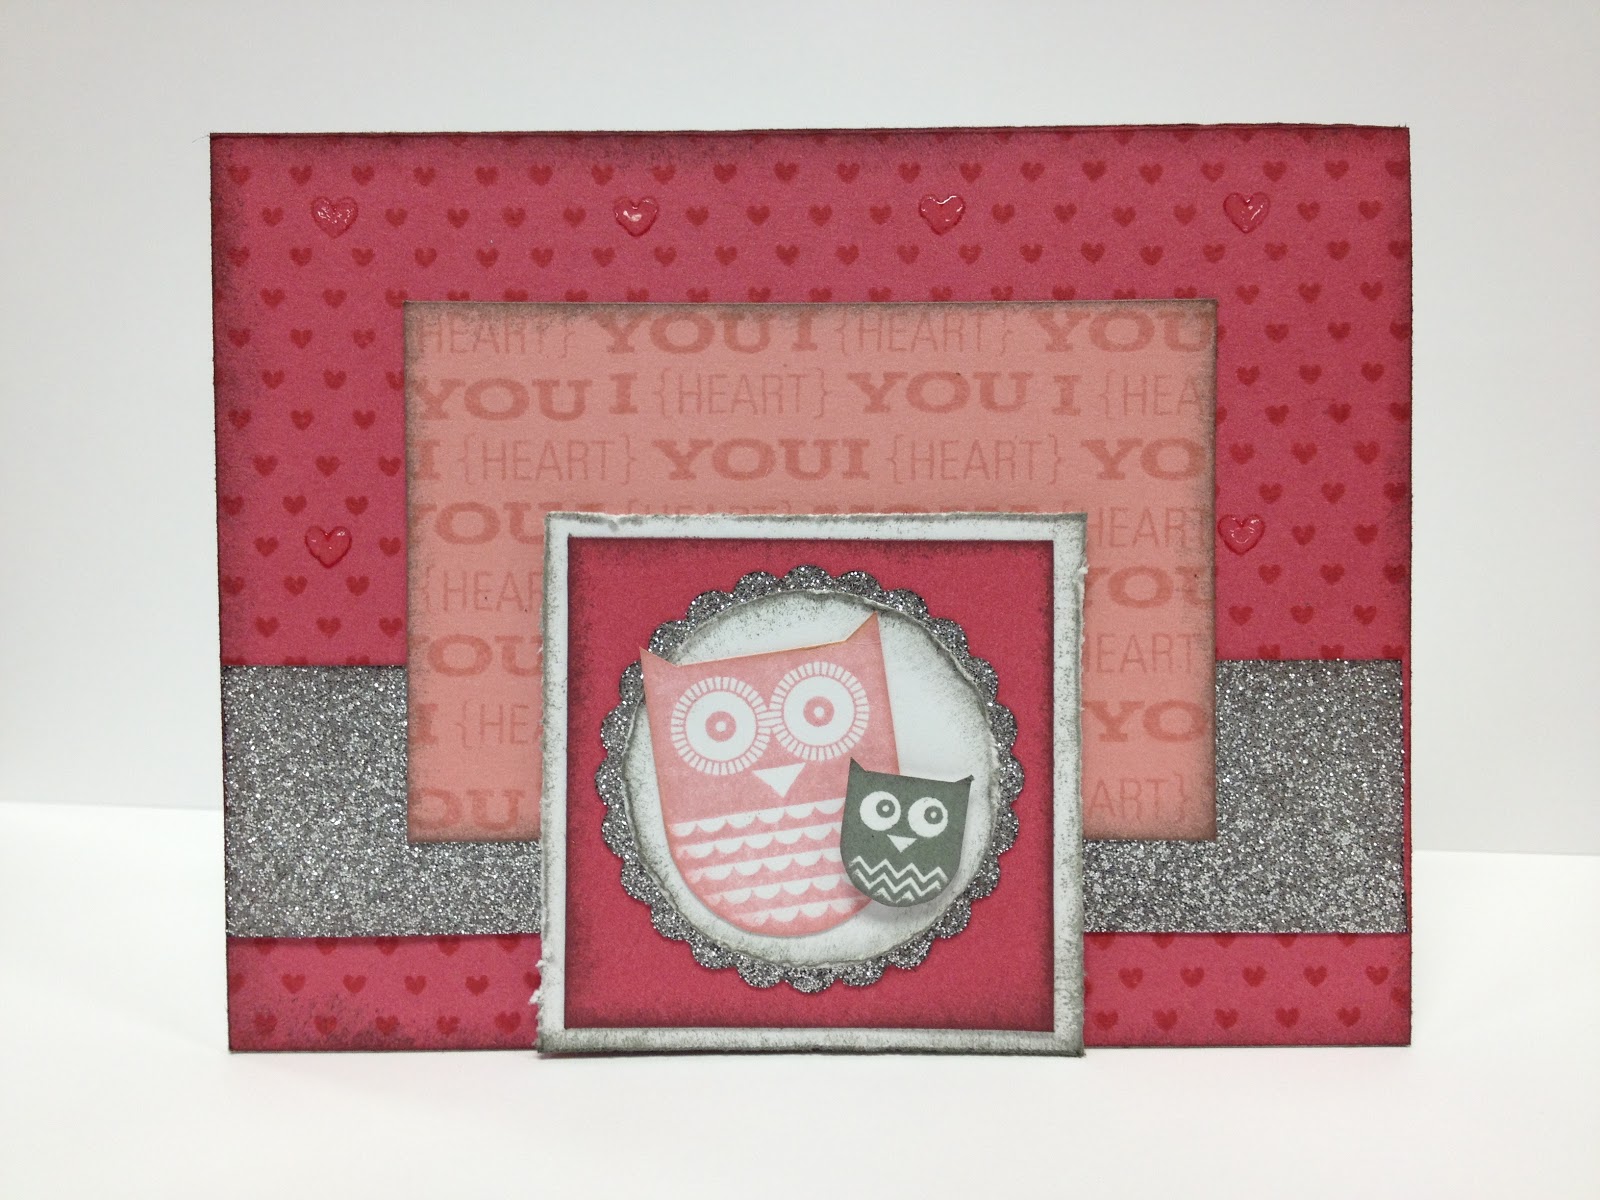
This one is similar to the one that Gina posted, just using the Party Washi Tape combo.  


And LAST but NOT least..I combined the Lagoon Washi Tape with the Honey and Cotton Candy Washi Tape from the 3 pack.  


As you can tell, I had EMENSE fun playing with the different colors of Washi Tape that CTMH has available.  I even added some dry embossing folders in there for a bit more dimension.  Some of the cards, I embossed AFTER adding the washi tape, some I embossed before.  Either way they turned out pretty cute!  

Thanks SO much for stopping by!!  I hope this has inspired you to get your washi tape out and PLAY with it!!  I GUARANTEE that you will have SO much fun, you won't want to stop!!

Happy Scrapping and Stamping!!

Jen

Monday, December 16, 2013

6 Days Since Last Post...WHAT??

So much for New Year's resolutions!  LOL  It has been 6 days since I posted here last.  At least it has not been 6 months??  I guess this COULD be a good thing.  After all, I did not promise to post here EVERY single day, now did I?  HA!  That may have come across a bit snotty....sorry for that!  lol

Well, as you all have noticed by now, I love whimsical images and papers.  SO when I saw the Candyland stamp set in the Autumn/Winter 2013 Idea Book...I KNEW I needed to play with it!!  So I bought it and it sat in my stamp stash for at least a month or more while I figured out what the heck I was going to do with it!

Has that happened to you??  Have you ever purchased a stamp/stamp set that you just LOVED, could not wait to get your hands dirty while playing with the different inks and possibilities that this one stamp set had in store for you?  YET when you actually get it home, it just sits there among all the other sets that you could not live without?  This was one of those sets!  Until I was planning for my monthly card class using the Sparkle and Shine papers...which SCREAMED "GET OUT THE CANDYLAND STAMP SET!!  IT WILL BE PERFECT ON THESE PAPERS!!"  So, I did!!


This was the card that we created for card class.  Couldn't you just eat those little gumdrops and take a nice big lick of that ice cream cone chimney?  I just LOVE how nicely Close to my Heart's alcohol markers color in our images!  Even I can make it look good!  lol  I used Slate for the roof and door of the house and Whisper (light) for the main part of the house.


In case you forgot from previous posts, I LOVE LOVE LOVE Liquid Applique!!  I LOVE it SO much, I just might marry it!  LOL Not only do I LOVE Liquid Applique, but I LOVE adding my 2nd favorite embellishment Prisma Glitter to the Liquid Applique before I heat it.  Especially when I am TRYING to make it look like freshly fallen snow!  


Why am I showing you a 2nd card that looks pretty darn close to the first one?  Well, that is because I re-purposed this card to use for my Humble Artist submission for December.  As I was getting ready to mail this month's swap off, I went back through the guidelines for the swap and realized that I needed a cricut cut somewhere on the card!  CRAP!!  How can I add a cricut cut to a card that was already finished with really no room to add a cricut image?  I make the card BASE the cricut cut!  WHEW!!!  That was easy peasy!  lol

If you look closely at the card, you will noticed that I COMPLETELY forgot to color in one of the windows!  Hope the consultant who receives THIS card has a Creme Brûlée marker to color it in!  SORRY!  

Thanks SO much for stopping by to visit my blog!  

I hope that this has inspired you to not be afraid of that stamp set that you could not wait to get your hands on, but have not pulled out of your stash for months, even years!  Go dig through your stash and relive the moment that you first set eyes on the set that you could not live without!  lol

Happy Scrapping and Stamping!!

Jen

Tuesday, December 10, 2013

Is it too early for New Year's resolutions?

I have been busy keeping up with my Facebook page, but keep neglecting to stop over here to post as well!  SO I am making my New Year's resolution a bit early...or is it a bit late?  Either way, each time I post to my Facebook Page Jen's Scrappy Pages, I will post here as well!!  I may not have a LONG LENGTHY post each time, but I know what you really want to see....ART!!  lol

Each month I participate in 2 different swaps.  The Humble Artist's Swap, as I had posted last time.  But I also hold a monthly swap with consultants from my team and also a few fellow consultants that are not on my team.  I LOVE participating in swaps because it forces me to sit down and challenge myself to create something with a specific color scheme or paper pack.

For our team swap in November, we used the papers/colors from the Frosted papers and I chose to created something from one of Close to my Heart's Cricut cartridges.  Art Philosophy was the first cartridge that CTMH introduced in 2011 and I hate to admit it, but with the introduction of Artiste in 2012 and Artbooking this summer, I forgot how stinking cool Art Philosophy is!!!

 Having said that, I created this sweet stocking card using the Card function on the cartridge.  What is SUPER COOL about it is that not only does it cut out the little stockings from the center of the card, you can also cut out each stocking separately.  In addition to cutting out each stocking, you can cut out the toes, heals and top of the stocking for added dimension!


I chose to cut out each stocking and adhere it to the inside of the card.  You can also use paper to back the front of the card, which would be less time consuming and still make a cute card!


After I made the stocking card for my team swap, I decided that this would be a GREAT project for our team meeting!!  SO I went through the different images in the Card function of the cartridge and came up with the tree card below.  


I still used the paper from Frosted...just changed up the color for a more Christmas feel!  The tree in the center was cut from Close to my Heart's gold glitter paper.  LOVE this stuff!!!

Thanks SO much for taking the time to stop by my neglected blog!!  

Hope this has inspired you to get out your "old" favorite CTMH Cricut cartridge and find some NEW fun projects to make with it!!

Happy Scrapping and Stamping!

Jen


Monday, September 23, 2013

Humble Artists Swap Card


Those of you who know me, know that once a paper is retired, I don't use it in my current art.  One reason is because when I showcase something and you fall in love with it, I want you to be able to purchase it!  I know how frustrating it is to fall in LOVE with a paper, embellishment or stamp set only to find out it is retired.  The other reason is that honestly, I just get plain tired of working with the same papers OVER AND OVER AND OVER again!  SO by the time it is retired...I am SO OVER IT and ready for some fresh stuff!

WHEW...having said that.  I am in a card swap called the Humble Artists Swap.  It is such an HONOR to be part of this swap filled with VERY talented ladies!  Last month our swap guidelines was to use RETIRED papers and mix up the paper packs.  REALLY??  This was going to be quite the challenge for me because I don't keep papers too far back in my stash...plus I have a hard time mixing up the patterns and colors from the different paper packs!!


Going through my LIMITED stash of retired papers, I found 2 that I was happy putting together, Clementine and Florentine.  I used the colors from Clementine with my CS and inking.  Along with using papers from different paper packs, we needed to have a minimum of 8 layers on the card.  WELL I exceeded the 8 layers by 1...if you count the lion's little nose that I cut out with my cricut and glued it on top of the whole that was cut out from the Colonial White face.  That makes 9 total!!

I used Chocolate baker's twine for the lion's zoo bars behind him and Chocolate Opaques were used for his eyes.

Thanks SO much for stopping by!!

I hope that this has inspired you to go search through your stash of papers, put a few together that did not come together and use as many layers as you can possibly put on one card!  LOL

Happy Scrapping and Stamping!

Jen

Saturday, September 21, 2013

October Card Class

This is NOT the first time that I have said this...nor will it be my last!  BUT the first time I opened up the new Autumn/Winter 2013 Idea Book while sitting at our lunch table at convention this summer, I was NOT in love with Sarita.  GASP!!!  Maybe it's because of the LARGE print patterned paper that in my opinion is rather gaudy...and not really my style.  Maybe it's because the color combo was not appealing to me at first glance.  What ever it was...has completely changed after playing with it!


Isn't this stamp sweet?  This is one of the 5 stamp sets that were re-released in acrylic and featured in the Autumn/Winter 2013 Idea Book and I am in LOVE with them!  Especially when coloring them in with CTMH's Alcohol Markers!  


Oh LOOK!  Yet another image from the past!  I just can't get enough of these sweet stamp sets!  This image as well as the one on the first card was stamped with Black Pigment Ink and embossed with Clear Detail Embossing Powder.  I prefer to emboss these images before coloring them with the alcohol markers to prevent the lines in the image from bleeding when in contact with the markers.


TRYING to keep a couple of these cards simple...I made this card as simple as I possibly could and I am STILL not happy with it!  LOL it is sweet, but I feel as if it still needs a little something...


I have always loved the card sample that is in the Make it from Your Heart Vol. 1 how to book from CTMH.  I made one similar to this last year using Moonlight that had LOVE on it instead.  SO decided to give it a try with the Sarita papers and use HUGS to make it a sympathy card.  The font of the letters and in the sentiment don't quite match...but I think it works in a crazy kind of way!  Either that or I am just too lazy to change it!  lol


Last but not least is this card...not that I created them in this order...just the order I loaded them onto the page!  In case I did not mention this before, this is my favorite paper in the Sarita paper pack!  I don't know what it is about it...just think it is sweet!  

My card class is on the 3rd Monday of each month.  October's class kit is $24.09 ($27.43 including tax and shipping) includes the following:
X7171B Sarita Paper Pack $9.95
Z1873 Sarita Complements $5.95
Z280 Natural Hemp $2.25
Z1752 Clear Sparkles $2.95
X1410 Colonial White Cards and Envelopes $2.99 (10 cards/envelopes per kit)
Z1883 Base & Bling Floral Accents (2 flowers per kit)

If you would like to attend this class, check out my Meeup.com/jensscrappypages group for more details on how to sign up.  If you would like to order any of the products that were used to create these cards, head on over to lovinscrappin.ctmh.com!  

Thanks SO much for stopping by!!

I hope this has inspired you to step out of your comfort zone and "play" with papers that don't quite match your style....it may surprise you!!

Happy Scrapping and Stamping!

Jen


Friday, September 20, 2013

Another Wrap Card

As I was getting ready for last month's Cricut Artiste class, I was playing with some of the wrap cards that are on the CTMH Artiste Cartridge to show my class a few variations of this type of card and came across this one.  I REALLY like this one because the card is not a single layer of CS like the last one I posted.  It actually opens up.  The band to this one slides off as well...so you can wrap ribbon around it and your recipient can just slide the wrap off without undoing the ribbon.


For this card, I wrapped the ribbon around the entire card and tied it on the side of it.  The recipient of this card will be able to just slide the band down to open it.  The large circle on both of the cards is adhered to the card front itself.   The next largest circle is part of the band that comes off the card.


This card I wrapped the ribbon around to the back and tied it so the recipient can untie it to open it.  Either way looks sweet...


The stamp set I used is called "B is for Baby" and is filled with sweet images and sentiments.  Paper pack is Sarita once again!  I embossed the image with Slate Pigment Ink and Clear Detail Embossing Powder then colored it in with Whisper, Slate, Cotton Candy and Buttercup Alcohol Markers from CTMH.  

Other embellishments used to create these cards are: Color Ready Seam Binding Ribbon, Paradise Baker's Twine, Clear Sparkles, Grey Opaques and metal flower from the Base and Bling Floral Accents.  If you would like to purchase any of the supplies used to create these cards, you can purchase them from your favorite CTMH consultant, OR you can go to my website lovinscrappin.ctmh.com to order and have them shipped directly to you!  

Thanks SO much for stopping by!!  

I hope that this has inspired you to get out your dusty Artiste Cartridge that you purchased when it first came out and make some of these SUPER CUTE wrap cards!!  Your friends and family will LOVE opening up their envelopes to find one of these interactive cards!

Happy Scrapping and Stamping!!

Jen

Tuesday, September 17, 2013

Playing with Artiste!

Back in April, I started a monthly Cricut class using Close to my Heart's Artiste Cartridge.  I have to tell you, I am not sure who is having more fun with this class, me or my "girls"!  lol  This has been SO much fun as I search through the MANY different options there are on this cartridge.  I tell you, the possibilities on this are almost ENDLESS!

SO for our September class, we made a scrapbook LO along with this SUPER CUTE "wrap" card.  There are several variations of this card on the Artiste...but I chose this one to feature...


I used the BRIGHT and CHEERY papers from Sarita and this DARLING Birthday Bear from Jeanette's Archive to create this card.  


This is just a single layer that the wrap goes around.  The Artiste cuts the Gypsy part of the card first...then cuts the wrap to fit perfectly around the inside.  I cut mine out at 4 1/4 so my "girls" could still send it in an A2 envelope.  


Wouldn't you LOVE to receive or give a fun, interactive card like this?  If you have the Artiste Cartridge, you can make and give as many as you would like!!  If you do NOT have the Artiste Cartridge, you can order one from your favorite CTMH consultant...OR go to my website www.lovinscrappin.ctmh.com to order one and have it shipped directly to you!!

Thanks SO much for stopping by!!  

I hope that this has inspired you to get out your CTMH Cricut Cartridges and just play!!  If you are in the Omaha, NE area...I would LOVE to have you join me for one of my classes in the upcoming months.

Happy Scrapping and Stamping!!

Jen

Tuesday, August 27, 2013

September's Card Class Using Proplayer

I am SO excited to share these cards with you all!!  I will be honest with you...at first, I was not so sure about using Proplayer in my card class.  BUT my card girls are always looking for masculine cards to create and send out.  SO I decided to think OUTSIDE the box with these papers and just GO FOR IT!!


This first card uses this SUPER CUTE little guy trying to kick a football from the stamp set "Play Day".  It is one of my FAVORITE sets and I hope that they NEVER retire it!!  


The stamp for this 2nd card is actually retired (GASP!!).  I am not sure how I let this one slip past me...Maybe because I purchased it and...oh...NEVER used it till NOW!  Well, I guess it is still a CUTE little bus regardless of whether it is retired or not!  LOL


Moving on to a CURRENT stamp!  This Birthday sentiment comes from Just a Number  and is STILL available to purchase!  lol


Convention is ALWAYS an exciting time for us CTMH consultants and this convention was NO exception!!  BUT when they announced that they were bringing back some of Jeanette's classic stamps that she hand drew back when she was first getting started...I think the roof about came off the building from all of the squeals that came from us consultants!!  I could NOT wait to get my hands on these sweet hand drawn stamp sets!!  This stamp is called Birthday Cheer and was SO much fun to color in!! Check out the Liquid Applique with Prisma Glitter on that cake!  YUM!!


Last, but NOT least....The stamps used on this final card is available ONLY to the Hostess with the Mostess!!  This is the first time that CTMH has discounted stamp sets and made them for those who host their own party!  Check out the Autumn/Winter 2013 Idea Book & Catalog for more details on how YOU can get YOUR very own EXCLUSIVE stamp set!!

IF you live in the Omaha, NE area and would like to make these cards...check out my Meetup.com/jensscrappypages group for more details on class dates and times!  If you cannot make the class that is scheduled, you can purchase a PRE-CUT and PRE-STAMPED kit.  

Hope that this has inspired you to think outside of the box when it comes to ALL of your paper crafting and card making!!

Happy Scrapping and Stamping!!

Jen


Sunday, August 11, 2013

Visit me on Facebook!!

Because I post mainly to my Facebook page along with my Meetup.com group, I have FAILED MISERABLY to post here as well.  I apologize for that!!  I will TRY to get better about posting here, but if you would like to keep up with my monthly scrapbook groups, card class and cricut class, you should go to my Facebook page at www.facebook.com/jensscrappypages and LIKE me!!  If you would like to RSVP to any of my upcoming events, you should head on over to www.meetup.com/jensscrappypages and join my group!

BUT for now...I will show you what my card class did in the month of July!


Did you know that CTMH's Wishes card book has several multi-card "workshops" in it?  YUP!!  It give you a cutting guide and complete instructions on how to cut and assemble multiple cards at one time from a VERY small amount of paper!!


This "workshop" uses just 1 sheet of patterned paper, 1 sheet of colored cs and 1/2 sheet of neutral cs.  You can either use a pre-scored card as your base OR you can cut coordinating cs as your background then add it to your pre-scored base.  


In case you do not recognize this paper pack, it is the SUPER GROOVY "Surf's Up" paper pack!  LOVE the retro colors and patterns in this kit!  The stamp set is one of my FAVORITES called "Under the Sea" and it is ONLY $13.95.  It has some of the CUTEST sayings...not to mention those fish are ADORABLE!!


This card "workshop" makes 2 each of 8 different cards for a total of 16 cards!!  For this set...I chose to use the same stamp set for the 8 different cards.  What I LOVE about this workshop is that no matter how many times you use the card LO's, it looks different with each paper, embellishment and stamp set that you choose!!  


As I was putting these cards together, I noticed that they looked kind of plain.  Of course, NOT the cute little stamped images, but the background cs looked plain.  That is when I thought to myself....Self, you have purchased a TON of embossing folders that just sit there BEGGING to be used.  SO I went through my nice little stack and found the one with the circles...reminded me of bubbles!


I used CTMH's Round Durable Studs and the Paradise Baker's Twine for my embellishments.  Then to accent their fins and water, I used my FAVORITE Liquid Glass with Prisma Glitter!!  EVERYTHING looks better with a bit of sparkle on it!  Even the hands of those who open up the card, if some of the glitter happens to fall off!  lol


This was SUCH a fun card workshop to put together and everyone went home with 16 SUPER CUTE cards to send and hand out to their friends and family!!


Thanks SO much for stopping by!!  I hope that this has inspired you to check out the Wishes Card book that CTMH offers.  There are SO SO many different LO's and ideas in it that you will NEVER run out of cards to make!  LOL 

If you LOVE what you see....check out my upcoming classes or events at meetup.com/jensscrappypages OR see my latest creations on my facebook page at facebook.com/jensscrappypages.  

Happy Scrapping and Stamping!!

Jen

Thursday, July 4, 2013

Fun Mini Album from CTMH

One of the MANY things that I personally LOVE about Close to my Heart is their "Show Me How" philosophy. This video is a GREAT example of EXACTLY that! 

In this 9 minute video, Christine will show you how to create a SUPER CUTE 5 x 8 inch mini album using shapes from the CTMH Artiste Cricut Cartridge.

Enjoy!!


Thanks for stopping by!!  I hope that this video will inspire you to get out that Artiste Cricut Cartridge and start playing with the MANY fun shapes and create your OWN mini album!!  


Happy Scrapping and Stamping!!

Jen

Monday, June 10, 2013

Mojo Monday 296 Sketch Card

Yes, I realize it has been 5 months since my last post!  I have been mainly posting to my Facebook Page www.facebook.com/jensscrappypages and also to my Meetup.com group www.meetup.com/jensscrappypages.  Between keeping up with those two sites along with my scrapbook groups, card class, Cricut class and my monthly crop, I have not made the time to stop by here to post as well.

UNTIL I participated (kind of) in last weeks Mojo Monday card sketch.  I say kind of because I did not get the card uploaded to the linky system before they closed it for that sketch.  BUT I wanted to share it anyways!!

Last week I went to Archiver's to see what new fun stuff they had.  Because I use MOSTLY Close to my Heart products on my pages, cards and paper projects, I don't usually make it to Archiver's to browse their HUGE selection of crafting items.  BUT I ended up finding the CUTEST 6x6 paper pads by "doodlebug design inc." and bought 2 of their pads!!  


The card that I created using the Mojo Monday sketch was created using the Snips and Snails papers.  Don't you just LOVE the sweet little owls on the background paper?  To go with the owls on the paper, I ended up using the stamp set that came with the "Whoo's Your Valentine" kit that CTMH sold in January.  I just LOVE those little guys!  

Thanks for stopping by!!  I hope that this has inspired you to stop by the Mojo Monday blog and participate in one of their FUN weekly sketch challenges!!

Happy Scrapping and Stamping!!

Jen


Sunday, January 13, 2013

Whooo's Your Valentine????

Now that life is finally getting back to somewhat of a normal....I am able to spend MORE time creating and sharing my creations!  While it is bittersweet, I AM glad to be getting back on track!

Have you seen the SUPER CUTE kit that Close to my Heart is offering through the end of this month in honor of National Paper Crafting Month?  If you have, then you know how STINKING CUTE it is!!!  If you have NOT then you NEED to check it out on my website....lovinscrappin.ctmh.com.  It is ONLY $10!!!  Yep!!  It retails for $40.  BUT during the special when you spend $35, you can purchase the kit for just $10!!


I have to be honest, as I always try to be!  lol But when they first offered the kit, I was not a big fan...that is UNTIL I sat down and played with the stamp set and the new Silver Glitter Paper.  Then I fell in LOVE with it!  I even created my own patterned paper using the background stamps that are included in the stamp set!!


If you are like me, you probably don't have any use for 12 treat tubes to send Valentine's to anyone.  I am sure I will find something else to use those for....and when I do I will post it!  But who can't use some STINKING CUTE owl stamps and AWESOME Silver Glitter paper??  REALLY??


I have purchased glitter paper before, but it was too course...kind of like a course sand paper.  BUT NOT this stuff!  This GLIDES through your paper trimmer!  I even punched out the scalloped circle with no problem!  


I did not add any additional embellishments that were NOT included in the kit.  The only thing I used that was not included was Blush, Hollyhock and Slate ink to stamp with.  Plus a Hollyhock Alcohol Marker to color in the hearts on the first card.

Thanks SO much for stopping by!!

I hope this has inspired you to either get out your Whooo's Your Valentine Kit that you have already purchased OR hurry up and order one before the end of the month OR before they run out!!

Happy Scrapping and Stamping!

Jen