Thursday, December 15, 2011

Mojo Monday 219....My Card

It has been a while since I have played along with the Mojo Monday Sketch Challenge.  SO yesterday when my friend Nicki stopped by to "play" for a bit, I thought it would be fun to check out the blog to see the current sketch and create a card using some new papers that I bought a few weeks ago.

The papers are NOT CMTH (GASP!!).  I know!  I was really needing some fresh papers and colors to play with a few weeks ago....SO I went to my local Archiver's on a mission to find some fun 6x6 paper packs.  WELL let me tell you....I found a TON of cute 6x6 paper packs!  I found so many that I had to limit myself and put some of them back!  I ended up buying 6!  Not to mention the 3 that I had purchased a few weeks before that......

ANYHOO....Onto the card.....


This card was created using the "Winter Park" 6x6 paper pad from "echo park paper co."  The rest of the embellishments and stamping was from CTMH.  The stamp set used is "Snowflakes", the ribbon is from  the "Designer Ribbon Blue Collection" and the sparkles used are CTMH as well.

The background paper for this card was a bit too plain, SO I stamped snowflakes with White Daisy Pigment Ink from CTMH then I added a sparkle in the center of a few of the snowflakes for a bit more dimension.  MUCH MORE BETTERER!!  lol

That is going to do it for today.....

I hope that this has inspired you to check out the Mojo Monday Sketch Challenge and create one of your own!!

Thanks SO much for stopping by!!

Happy Scrapping and Stamping!!

Jen

Thursday, December 8, 2011

January Scrapbook Group Pages - Wonderland

Thought I would share the pages that my monthly scrapbook groups will be making in January.  I just LOVED the way they turned out!  The papers from Wonderland are SO winter.....with shades of Grey, Blue and Brown and the Stickease that coordinate come with those ADORABLE snowmen and kids playing in the snow.  This paper pack is also extremely versatile as well.  You can flip the snow printed papers for a completely different look and have pages/cards and whatnots that have nothing to do with Winter!  LOVE IT!!

If you live in the Omaha area and would like to attend one of my scrapbook groups to create these 6 pages, check out my Meetup.com group at Scrappin' and Stampin' Made Easy but Beautiful.


The last 2 pages can be created by purchasing the Wonderland Workshop on the Go Kit.  You can either purchase it from ME at www.lovinscrappin.myctmh.com under the shopping tab OR from your favorite CTMH rep in your area.  

Thanks SO much for stopping by!  

I hope that I have inspired you to create some pages, cards or paper projects using this GORGEOUS paper pack!

Happy Scrapping and Stamping!!

Jen

Sunday, November 27, 2011

Bundled Buddies meets Wishes 16 Card Workshop

Hey All!!  Once again it has been a couple of months since I have posted here.  I have been a bit busy with my Meetup.com group and posting my art there.  I would LOVE to have you stop by the site and see what it is all about ... http://www.meetup.com/Scrapping-and-Stamping-with-Jennifer/   Feel free to browse the site and if you like what you see, to join is FREE!!  When you join, you will receive updates on my upcoming crops, workshops and scrapbook groups.

On to my art for today..... I created these cards a couple of weeks ago using the 16 card workshop in Wishes.  You use ONLY 3 sheets of B&T/Cardstock PLUS 16 pre-scored card bases.  I used Close to my Heart's pre-scored cards for my cards.  They come with 50 cards and 50 envelopes for just $14.95!


I absolutely LOVE the Bundled Buddies stamp set!!!  I fell in love with this set the first time I laid eyes on it in the Autumn/Winter Idea Book!  Of course, it only took me 3 months to use it.....lol.  Not sure why I was so afraid of it.  Once I started playing with it though, I just could not STOP!

The embellishments were kept to a minimum on these cards.  I used sparkles from the Clear Sparkles assortment and the Blue and Green Sparkle assortment.  The ribbon used is the Sweet Leaf bulk ribbon and Sweet Leaf ribbon from the Green Ribbon Assortment.  Liquid Glass and Prisma Glitter were used on the trees, hat tops and anything else fuzzy!  SO STINKIN' FUN to use!!

Thanks SO much for stopping by!!

I hope that this has inspired you to use that Liquid Applique that you bought but have not used OR to go out and get some to add to your card making stash.  Try adding different glitters to it.....maybe add some colored glitter to the Liquid Applique before you heat it.  Think I will give it a try!

Happy Scrapping and Stamping!!

Jen

Tuesday, September 27, 2011

A few more cards from Extravaganza!

Here are the cards that I created for Extravaganza using the paper pack Dreamin'.  This is such a fun and versatile paper pack!!  SO sad that it has taken me 2 months to get these posted.......OH well, better late than NEVER!   I will try to give a brief description of each card below it.  My brain is a bit foggy today as I am trying to get ready to go out of town TOMORROW!  SO, if for some reason I cannot remember the name of a stamp set......I will come back and correct it once I know it!  


This first card uses a CTMH Clear Circle Card.  The cute little owl is from Hot Diggity and has always been one of my FAVORITES!!  I stamped him 2 times: Once in Chocolate and once in Goldrush.  I cut out the top half of the owl in Goldrush, added Liquid Glass and Prisma Glitter then pop dotted it to the chocolate image.


This BLING on this card is using a button from the Bling Assortment.  To color the button I took Liquid Glass and Goldrush Reinker and mixed them together on a non porous surface then dipped (or you can brush the mixture on) the button in the mixture and let it dry.  It is hard to tell from this pic......but I spritzed a glimmer mist over the flowers using Rubbing Alcohol and Pearl Paint.


This SUPER CUTE bear comes from Beary Busy.  I just LOVE this guy!!  The sparkle on this card is hard to see, but you can click on the photo to make it larger and see it better.  I used Black Staz-On and VersaMark with Clear Detail Embossing Powder to stamp the outlined image.  I then used my CTMH Watercolor Pencils and Blending Pen to color him in.  To give it a finishing touch, I used Liquid Glass and Prisma Glitter in the center of each flower.  


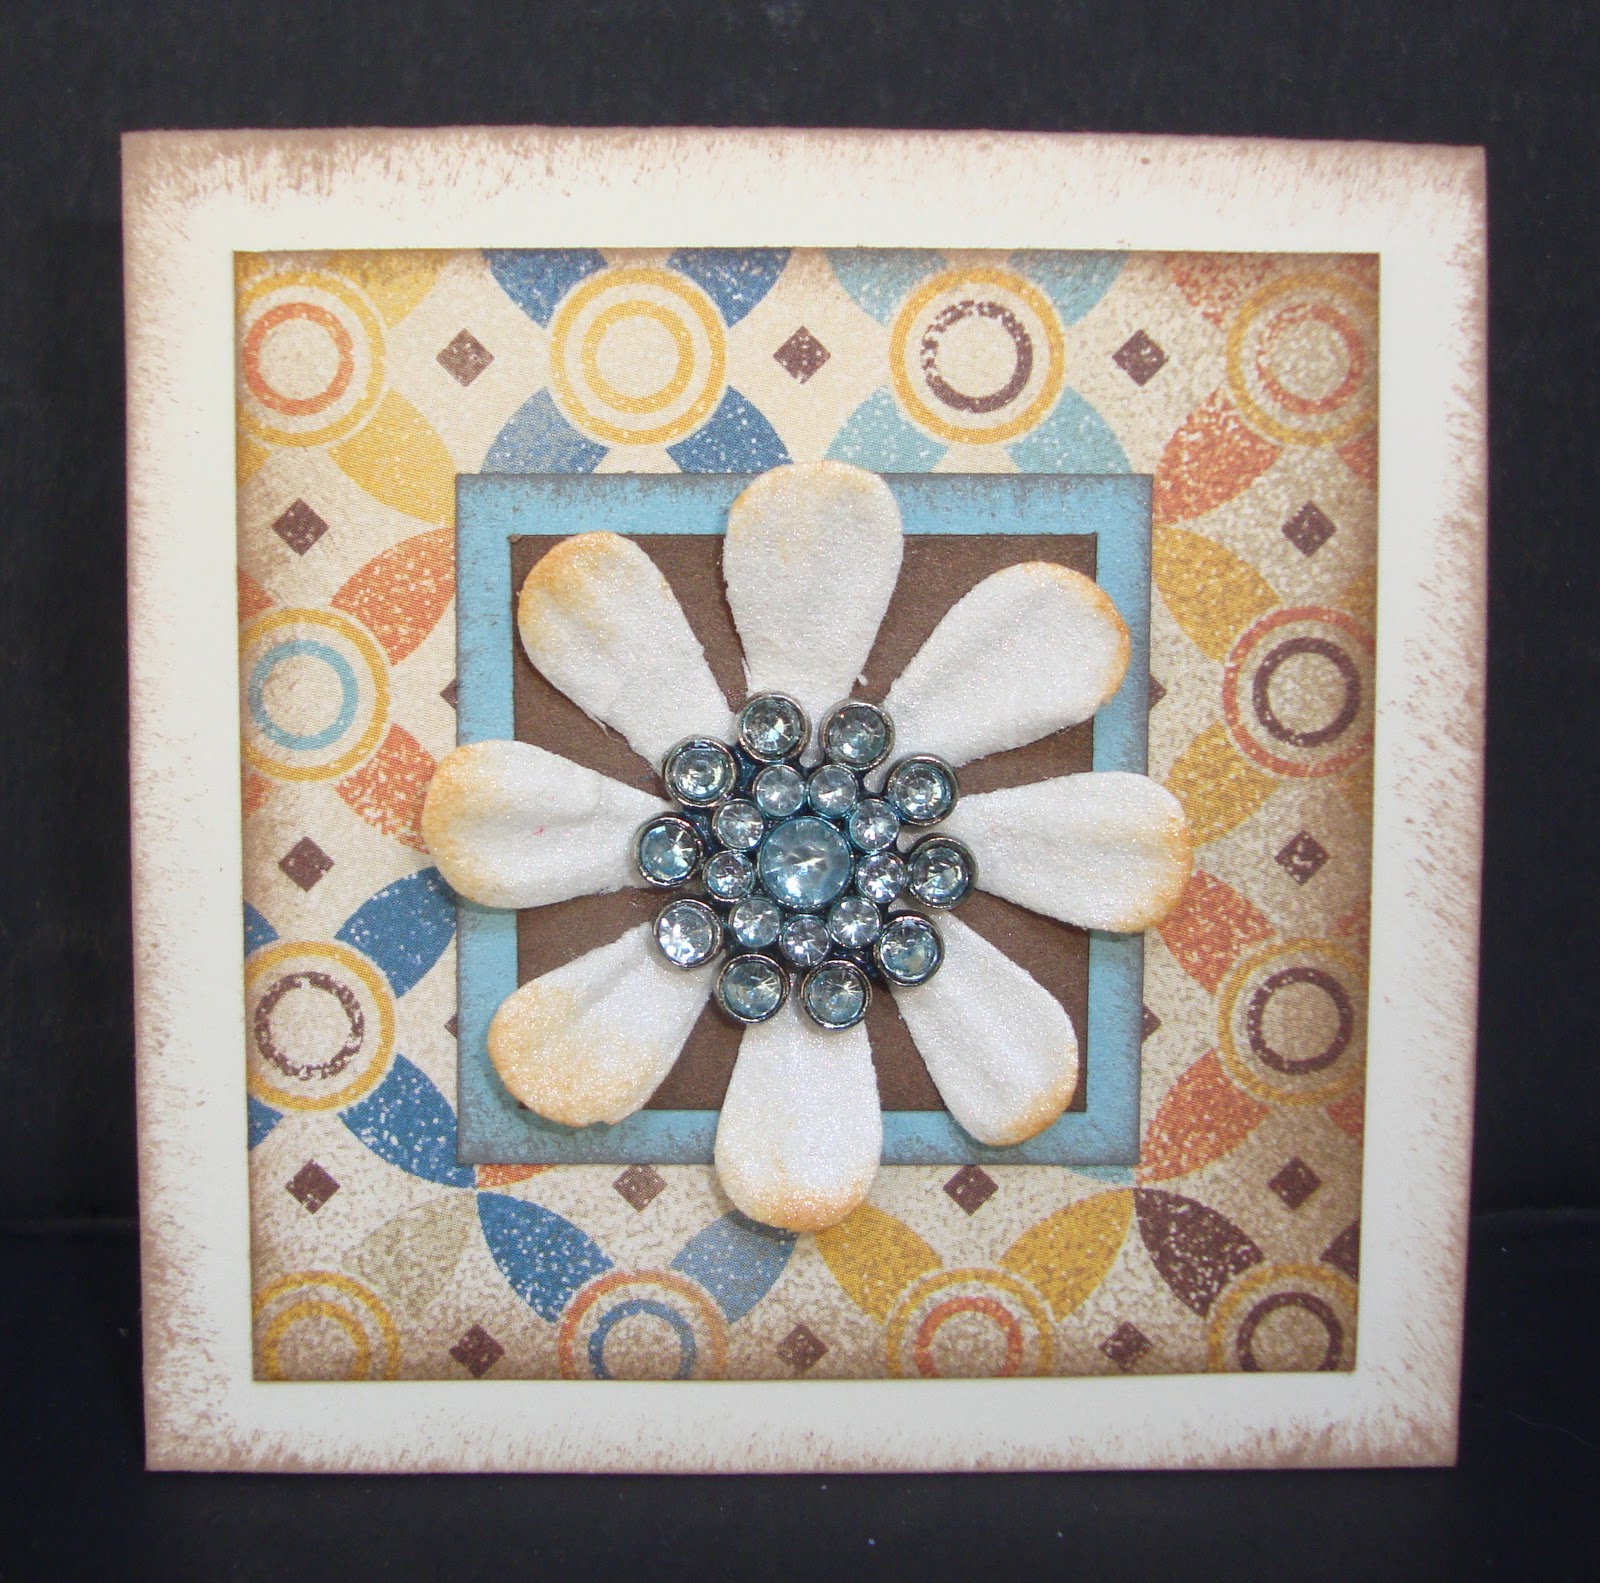
This is a 3x3 card.  The center BLING is from the Designer Rhinestone Brads collection.  I used Liquid Glass and Crystal Blue Reinker to color the Rhinestone Brad.  The flower was spritzed with Pearl Paint/rubbing alcohol for an extra bit of sparkle.


Another 3x3 card.  The flowers were stamped in Goldrush first, then rolled in Chocolate ink for a two-tone look then spritzed with the Glimmer Mist solution mentioned above.  The center of the flowers are Mocha Opaques, which are a MUST have in ANY embellishment collection!  The ribbon bow is from the Honey Mini Medley Collection.


And yet 1 more 3x3 card using blue sparkles from the Blue/Green Sparkles package.  Sparkles are such a fun and inexpensive embellishment to use on cards, scrapbook pages and paper projects.  I swear I am always adding them to each order that I place for fear I will run out!  The ribbon is from the Honey Mini Medley Collection.


I think this is the last 3x3 card in this group!  The butterfly is from the Flutter Paper Shapes and was spritzed with the Glimmer Mist mentioned earlier.  The body of the butterfly is made up of Opaques from the Mocha Opaques Gems.  


The flowers are from the stamp set Unscripted.  Again, the Bling was made by mixing Liquid Glass and Goldrush Ink then dipping the bling buttons in the mixture.  The ribbon is a bulk Chocolate Stripe ribbon that is a bit over 1 inch wide.  I used the brand new ruler from CTMH to create the zig zag stitching along the paper edges.  


This card and the one above and below are all 6x6 cards.  The resin flowers and hanging gem are from the Heirloom Assortment.  I used liquid glass in the center of each flower to adhere a Mocha Opaque Gem.  Stamp set used is Treasure Life and the ribbon is from the Colonial White Ribbon Collection.  I used an edge distresser to the edges of the Colonial White CS to add a bit more dimension and distressing.


Last but NOT least.....In the center of each flower I used a Ribbon Slide from the Foundry Metal Accessories, Bling Buttons and White Hemp.  Each of the flowers was dyed using Goldrush Reinker and Rubbing Alcohol.  The blue flowers that are stamped under the sentiment have liquid glass and prisma glitter added to the center of each one.  You can enlarge the photo to see them up close!  

OK  I need to run.....Hope that I have been able to inspire you to add a bit more BLING to your cards, pages and paper projects!  

Thanks SO much for stopping by!!  

I will have more to share next week!!

Happy Scrapping and Stamping!

Jen

Thursday, September 8, 2011

WOW OH WOW!!!

I have once again let this blog go WAY TOO long without a post!  I really have NO good excuses that I can use.....SO I am just going to share a few more things that I created back in July for my Extravaganza Class that I taught.  Each of these cards were created using the NEW paper kit Typeset from the Autumn/Winter Idea Book.


First card was created using the stamp set Love Birds.  The Juniper Ribbon is from the Designer Ribbon Green Collection and the Pewter Buckle if from the Foundry Ribbon Slides.


The 2nd card uses the stamp set A Twinkle along with Licorice Opaques and ribbon from the Black Mini Medley collection.  The sparkle on the star was made by using Liquid Glass and Prisma Glitter over the cut out part of the star.


This card was created using the September Stamp of the Month Limited Edition.  The C is from the Dimensional Elements Monograms.  Sparkles and Black Ribbon from the Mini Medley collection finish off the card.  Simple, but sweet.


The base to this circle card is available in the Autumn/Winter Idea book to make creating Circle cards SO much easier!  The Butterfly is from the Flutter Just Blooms and the antennae are pearl stick pins that are included in the Bling Collection.  The pearls in the butterfly are the Pearl Opaques AND Ribbon slide is from the Pewter Mini Medley collection.


Last but not least.....Stamp set used for this card is Blue Ribbon.  All embellishments have been mentioned above!

Thanks SO much for stopping by today!!  I will TRY my hardest to NOT let 2 months go by without posting again!  I still have a few more cards and projects just waiting for you to see......

Hope these cards have inspired you to purchase the paper pack Typeset from my website OR from YOUR favorite CTMH consultant!!  

Happy Scrapping and Stamping!

jen

Wednesday, July 20, 2011

As I PROMISED......A Sneak Peak!!

Where OH where do I begin??  Convention was A-MAZING!!!  OH MY GOODNESS......there is going to be SO much to share over the next several weeks!  Close to my Heart is the BEST and I cannot imagine EVER being apart from this company.

I am patiently waiting for my convention bundles to arrive on my doorstep so I can start playing with the stuff that I did not have from Extravaganza.  And I DO mean PATIENTLY........  In addition to the bundles that were PAID for with my Extravaganza convention credit, I just placed an order for 3 of the WOTG kits and the additional projects that are listed with them.......JUST WAIT till you get your hands on the new Autumn/Winter Idea Book!!!  You are going to LOVE everything in it!

While I am waiting on my goodie box to arrive, I have been busy taking pictures of the art that I had on display inside my booth AND on the display boards outside my area.  My topic was "Adding Brazzle Dazzle to Your Artwork.  YEP you guessed it....BLING!!  My favorite thing to add to my pages, cards and paper crafting projects.

Because I can be a bit mean at times.......I am going to drag this out for a bit and make you keep coming back to check for more.......lol


This first card is a 3x3 and it features Prisma Glitter and a button in our new Bling Assortment.  To make the flower, I started with a Creme Brulee flower from the Spring Blossom Just Blooms Paper Shapes.  I covered the paper flower with Liquid Glass then sprinkled (more like poured) Prisma Glitter over the entire flower.  Shake or tap off the excess and let dry.  The flower becomes a bit more sturdy as the Liquid Glass dries.


This second card is also a 3x3 card that features Prisma Glitter, Pins from the Bling Assortment and NEW Flutter Paper Shapes.  Using the tip of my Liquid Glass container, I ran it around the edges and on the inside "embossed" areas of the butterfly.  I sprinkled Prisma Glitter over it and tapped off the excess. It really does not take much time to dry.  Set it aside for maybe 5 minutes and it should be ready to add to your project.  

Another thing you can do using this technique is to either sponge color onto the edges and embossed lines in the center OR spray the whole butterfly using Rubbing Alcohol and Re-Inker.  Then either use Liquid Glass and Prisma Glitter around the edges OR over the entire butterfly/flower.

The new products that were featured on these 2 cards will be available for purchase August 1st!!  You can either order them from me at www.lovinscrappin.myctmh.com OR from your favorite Close to my Heart rep!  

Want to get a discount on CTMH products or start your OWN business by teaching others how to use the AWESOME products that CTMH offers??  Join my team "Creativity in Motion" and join the Close to my Heart community.  It truly is a MAGICAL company to be a part of!!

Hope this has inspired you to get out your Liquid Glass and Prisma Glitter and have a little fun "Adding Brazzle Dazzle to Your Artwork"!!

Happy Scrapping and Stamping!!

Jen


Tuesday, July 5, 2011

June Scrapbook Pages using Lucky

Hey ALL!!  I PROMISE I have a GREAT excuse for being MIA for the past 2 months.  I was once again chosen to teach at Close to my Heart's annual convention!  I have been busy getting ready for my class and have not had much time to do anything else.  BUT I PROMISE that I will have TONS of art using NEW products that will be debuting in the Autumn/Winter Idea Book!!  Maybe you will forgive me for being gone SO long once you start drooling over the pages and cards that I have to show you!

Until then.....thought I would share with you the pages that my scrapbook groups created LAST month.  We used the ever so versatile papers, stamps and Stickease from the Lucky Kit.  This kit was SO much fun to put together and both scrapbook groups LOVED their pages!


The first 2 pages were created exactly as they were shown in the Lucky Workshop on the Go Kit using the stamps and embellishments that are included in the kit.  


These 4 pages were created using the Lucky Level 2 Assortment, Lucky Journaling Spots and Lucky Stickease.  The Level 2 Assortment and Journaling Spots were add ons for group in June.  I had SO many of the Level 2 Assortment, Journaling Spots and Buttons left over that I used them on my Jamaica album using Moon Doggie papers.  They went PERFECT with the colors from that kit!!


Hoping to get photos on the pages once I return from convention!  I have been SO bad the last several months with not putting photos on my pages before group.  I THINK that I am SUPPOSED to set the example for my group girls by completing my pages!!  LOL  DON'T do as I DO, do as I SAY!!  

Looking forward to next Thursday!!!  I PROMISE to come home and post a few SNEAK PEEKS of new products that will debut in the Fall/Winter Idea Book!  I KNOW that you ALL are just going to LOVE the new book!!!!!

Hope this has inspired you to get out your Lucky kit and create some pages/projects with it!!!  You will LOVE it!!

Happy Scrapping and Stamping!!!

Jen

Monday, May 9, 2011

May Scrapbook Group Pages using Mayberry.......

I LOVE the Mayberry Workshop on the Go kit!!!  The papers and stamps in this kit were SO much fun to play with!!  Not to mention the coordinating My Stickease that go with the papers are SO stinkin' darling!  I really had a blast putting these pages together.  The first 2 pages are the pages that Close to my Heart created for the WOTG kit.  The last 4 pages I created using LO's from Imagine.

The scallops on the first 2 pages were created using the pear stamp from the WOTG kit.  I stamped the number of pears that I needed then using my 1 1/4 inch circle punch, I punched the bottom part of the pear out.  Then I used my paper trimmer and cut each of the circles in half.  I went ahead and inked my circle halves with Olive ink, just to finish it off then lined them up and adhered them to the page.  SO CUTE!!

OH I forgot to add that the BLANK Colonial White circles will be filled in with letters from the Token Alphabet......I did not have the alphabet on hand when I created the pages as I had not ordered it yet.  They will be available for group this Friday though.


The Canvas Badge Buttons are SO cool!  They come plain, but you can stamp on them, sponge ink on the or even put stickers or bling on them to dress them up.  I used all but 3 on all 6 pages and have already ordered another package so I can add them to other pages and projects.


As an added embellishment, I used a package of Sparkles to add just a bit of bling to the pages.  Not that they weren't cute before I added the sparkles, but once I started adding them to the stickers, they just came to life!  If you click on the middle pages and look at the basket of flowers on the bicycle, you will see a couple of sparkles in the center of the flowers.  TOO MUCH FUN!!  (insert singing here)


The pages that Close to my Heart created for the Workshop on the Go kit is just one more reason that I LOVE being a consultant.  I would not have thought to use a stamp to create a pattern for a scalloped edge.  The best part about it is that I get to turn around and teach my group girls how to add it to their pages and they get to show their friends their pages and possibly teach them how to create the same page.  This is such a wonderful craft!

Thanks SO much for stopping by!!!!

I hope that this inspires you to find a patterned stamp to create your own scalloped border to use on either scrapbook pages or a card!

Happy Scrapping and Stamping!!!!

Jen

Monday, May 2, 2011

May is National Scrapbooking Month........

...........And to CELEBRATE National Scrapbooking Month, Close to my Heart has OUT DONE themselves!!  Not only do they have this GORGEOUS scrapbook page kit available this month, they are offering 1/2 off their consultant kit PLUS the scrapbook page kit for FREE!! Check out the details below!!  Contact me OR your favorite CTMH consultant to either order the You & Me scrapbook kit or to find out how you can join this AMAZING company!


Join the National Scrapbooking Month celebration by getting the exclusive You & Me scrapbooking kit FREE* and your New Consultant Kit at 50% off when you sign up in May!
With this wonderful kit, you can make two fully embellished two-page layouts using the included instructions, papers, D-size stamp set, and accessories. The You & Me scrapbooking kit includes: 

   1 – My Acrylix
® You & Me Stamp Set
   1 – 12” × 12” Colonial White Cardstock
   6 – 12” × 12” B&T Duos
® Papers
   1 – 6” × 9” You & Me Irresistibles™ Chipboard Die-Cut Sheet
   1 Yard – Chocolate Stripe Ribbon
   1 Package – Opaques Mocha Adhesive Gems
   1 – Instruction Guide
Become a Close To My Heart Consultant during May and you'll save 50% off on your New Consultant Kit and get one You & Me kit for free*!
*Shipping/handling may apply. Offer valid May 1–31, 2011 only.
If you’ve ever thought about owning your own home-based business and would love an exciting career in the booming scrapbooking and stamping industry, you owe it to yourself to take advantage of this opportunity. There’s never been a better time to join Close To My Heart!
Check out my website www.lovinscrappin.myctmh.com to see more about both offers!
Thanks for stopping by!! 
 I hope that this has inspired you to check out these 2 amazing offers that Close to my Heart has this month for you!
Happy Scrapping and Stamping!!
Jen


Tuesday, April 19, 2011

Monthly Unit Swap 3x6 Card using Mayberry

Last month, I posted my monthly unit swap card the day of unit meeting.  Boy did I get grief for it!  lol  SO this month, I thought I would wait until AFTER unit meeting to post this!  I just LOVE participating in swap each month.  The consultants in Shari's team that participate in the swap each month are SO stinkin' talented and I am NEVER disappointed with the cards, pages and 3D projects that I receive.  As the swap items are being passed around the room, all you can hear is OOHHH's and AAAHH's and OH MY GOSH, THIS IS SO CUTE!  It's like opening presents each time!

There are times that I am SO nervous that my swap item is not going to be good enough when compared to the items that I receive.  I guess that is a good thing as it keeps me on my toes and makes me want to push myself to do the best that I can so that I don't disappoint the others that receive my items.  I have to be honest here, it is a big confidence boost to hear the ooh's and aah's as your items are being passed around the room.  Then you know that you have done a good job with your swap.


My swap card this month was inspired by the card that I created for the Mojo Monday #185 sketch.  I really liked the way the scallops looked on the bottom of my card.  SO I decided to go with the same idea on my swap card.  I used a 1 1/4 in. circle punch and cut the circles in half with my paper trimmer, then lined them up with the edge of my strip of Olive CS.

I have to tell you what my daughter Rachael said to me when I showed her my swap card.  She is always honest with me and I can tell immediately if she thinks it is cute or not.  After she read the saying.....You're the apple of my eye......she asked why I put a pear on the card!!!  LOL  Gotta love her!!

All supplies used are CTMH
Paper: Mayberry Level 2 Paper Pack, Olive CS, Cocoa CS and Colonial White CS
Stamps: Mayberry Workshop on the Go stamp set
Inks: Olive, Smoothie and Cocoa
Embellishments: Colonial White Crocheted Ribbon (colonial white ribbon round collection)
Tools: 1 1/4 Circle Punch

Thanks SO much for stopping by!!

I hope that this has inspired you to get out your circle punch and create a fun scalloped border on your cards, pages or paper projects!!

Happy Scrapping and Stamping!!!

Jen

Friday, April 8, 2011

Mojo Monday #185 Challenge.......

I REALLY liked the card sketch over at Mojo Monday this week, so could not wait to play along with this week's challenge.  As an added bonus.....they are giving out a prize as it is the beginning of a new month.  The prize is a stamp set from Verve Stamps!  Who knows.....maybe I will win a set this week!!  After all, one can NEVER have TOO many stamp sets.....RIGHT??  LOL

Take a look at the sweet ribbon "flower" (you can click the photo to enlarge the pic) that I have on this card.  I came across a tutorial to create this flower on Paper Pleats and Ribbon Roses.  Connie had created this flower by stitching and gathering the Colonial White Ribbon that CTMH sells.  She also used retired CTMH colored organdy ribbon on another card that she had posted to the CTMH board.


I LOVED the way the colored organdy flowers looked, but I did not have any colored organdy ribbon to play with.  SO I dyed my Colonial White Organdy Ribbon using Smoothie Reinker and Rubbing Alcohol.  The awesome thing about dying my own ribbon is that the colors are only limited to the number of reinker's that I have in stock......which is not limited at all!  lol

All supplies used are CTMH: 
Paper: Mayberry Level 2 Paper Pack, Colonial White CS, Cocoa CS, Olive CS
Stamp set: Card Chatter: Sympathy
Ink: Cocoa
Embellishments: Smoothie Ribbon (Pinks ribbon collection), Colonial White Ribbon (colonial white collection), Mocha Opaques,  Pinks Collection Buttons
Tools: CTMH 2" Scalloped Circle Punch

Thanks SO much for stopping by today!!  

I hope that this has inspired you to check out Connie's tutorial on how to create this super sweet ribbon flower AND to possibly play along over at Mojo Monday and win a set of stamps from Verve Stamps!!

Happy Scrapping and Stamping!!

Jen

Sunday, April 3, 2011

April Scrapbook Group Pages using Miracle

Happy Sunday All!!  I thought I would share the 6 pages that my scrapbook groups will be making this month.  All 6 pages are created using the sweet papers from "Miracle".  I added Clear Buttons as an "extra" embellishment that group can purchase to add to their pages if they would like, but they are not necessary to complete the pages.  

I was pretty happy with the way these turned out.  One thing I love about this paper pack is it does not scream boy or girl or really anything too specific.  But after the first 4 pages were done, I had a hard time coming up with the last 2, which ended up being my favorite pages of all 6!  Funny how it all works out in the end.  I will focus this week on finding pictures to put on these pages this week.  I have a few ideas.....just need to search through the endless files of photos on my computer and if I can't find any there, I have plenty of albums to search through......lol 


Is it just me or does this pic look smaller than usual?  Must be that it is longer than my card pics.  HHMMM  If you would like to see it a bit larger, just click on it.  These pages look a bit odd without the photos......but will look super cute when all the blanks are filled in!  The Pinwheels were created using the stamp set that is included in the "Miracle" Workshop on the Go Kit.  The Kraft Color Ready Borders are ALSO included in the WOTG kit.  


This 2nd set of pages uses the coordinating "Miracle" Stickease.  My scrapbook group kits always include the coordinating stickease.  The first 2 pages that we create focus on stamping and a new technique.  The last 4 pages that we create focus on using the coordinating stickease and an added embellishment that is not included in the WOTG kit.


The last 2 pages are my personal favorites!  The LO's for all 6 pages were taken from the Magic Book.  This is a LO that I have been wanting to make, but was not sure about all the punched circles.  Since CTMH came out with the 1 1/4" circle punch, it made creating this page SO much easier!!  Inside each punched circle is a Clear Button.  

Supplies used: 
Paper: Miracle WOTG Kit
Stamp set: Miracle Workshop on the Go stamp set
Inks: Heavenly Blue, Chocolate, Sweet Leaf, Desert Sand
Embellishments: Kraft Color Ready Borders, Miracle Level 2 Stickease, Clear Buttons
Tools: CTMH 1 1/4" Circle Punch

Thanks OH SO much for stopping by!!   If you live in the Omaha area and would like to create these pages, our group meets each 3rd Friday of the month at 9am or 7pm.  There is ALWAYS room for guests!!  Contact me to reserve a spot for you and a friend!

Hope this has inspired you to visit one of my scrapbook groups OR find a local CTMH consultant to see what kind of classes they offer!

Happy Scrapping and Stamping!!

Jen


Sunday, March 27, 2011

Owls are ALL the rage right now.......

Have you noticed that owls are HUGE right now in fashion?  While shopping for prom accessories with my daughter the past couple of weeks, I have seen quite a few owl rings, necklaces and earrings.  I have even seen a few tops with cute owls on them.  Reminds me of when I was little and my Aunt Barb had quite the collection of owls in her home decor.  Having seen so many different owl accessories inspired me to bring out my owl stamp set You're a Hoot and play with it.  I really like these whimsical owls.  So fun and cute!

This owl was stamped in Pacifica on the white daisy image square first, then again on a scrap of White Daisy CS and Sky CS.  The wings were cut out and adhered just at the top of the wing with the tips of each wing slightly curled up.  The head was also cut out then pop dotted for dimension.  The eyes were cut out from the Sky CS image with Red Sparkles added.  The stripes of the owl were colored in with Sky and Cranberry markers.


This card was created once again using papers from the Fanfare Level 2 Paper Pack.  The Pacifica patterned paper is actually the back side of the black patterned paper used in the card below this one.  

Supplies used:
Paper used: Fanfare Level 2 Paper Pack, Sky CS, Cranberry CS and White Daisy CS
Stamp Set: You're a Hoot
Inks: Pacifica, Sky and Cranberry
Embellishments: Fanfare Level 2 Assortment (brads), Red Sparkles, White Daisy Grosgrain (bulk) and Pacifica Ribbon (from the Blue Ribbon Assortment)

Thanks SO much for stopping by!!  

What inspires you when you create your cards, scrapbook pages and paper crafting projects?  

Happy Scrapping and Stamping!!

Jen

Thursday, March 24, 2011

Making time to create this week......

Do you have time to create, but don't do it??  That is how I have been lately.  I honestly have quite a bit of time to sit down an play with my paper crafting "stuff".  BUT I find my time getting wasted on the internet, between blog hopping, searching for ideas and new techniques or just talking to my friends and family on Facebook.  Then there is the laundry that calls out to me, or the dog that wants to get played with or those darn kids when they get home from school wanting me to help them with school stuff and what not.

This week I have had to force myself to create something each day.  I chose to create cards.  What I really need to be doing is working on a unit meeting project that I am having a hard time coming up with an idea for.  I am running out of time to submit my idea and project dimensions......guess I should get to working on that next!


I am still working on papers from CTMH's Fanfare Level 2 Paper Pack and the coordinating embellishments.  The colors Pacifica, Cranberry, Sunny Yellow and Sky with bits of Black are SO BRIGHT and CHEERY to work with and I am having the best time playing!

The guitar is from Star Power.  I stamped it first in Black on the White Daisy background paper, then stamped it in Cranberry then cut and pop dotted just the guitar over the black.  If you click on the photo you should be able to see the dimension a bit better.  The brad in the center of the guitar is from the Fanfare Level 2 Assortment.

Supplies used:
Paper: Fanfare Level 2 Paper Pack, Black CS, Sunny Yellow CS and Cranberry CS
Stamp Sets: Star Power, Say it in Style
Inks: Black, Cranberry
Embellishments: Red Sparkles, Fanfare Level 2 Assortment (brad)
Tools: Cuttlebug Embossing Folder, Sand Paper, Edge Distresser and Corner Rounder (to create scallops)

Thanks SO much for stopping by!!

I hope that this has inspired you to make more time to create.  Get off your computer and get your stamps, papers, embellishments and scissors out and PLAY!!  As soon as I am done with this post, my computer is going off......at least for a while.  LOL

Happy Scrapping and Stamping!

Jen

Tuesday, March 22, 2011

Another Mojo Monday Sketch Card......#183

I am so excited that I have been able to participate in the past 2 Mojo Monday Sketch Challenges!  It gave me an excuse to pull out the new Fanfare Level 2 papers and play with them.  It is pretty sad to me that I purchased these papers clear back in the consultant preview period in January, but have just now pulled them out of the bag to actually use them instead of just drooling over them.  WOW Was that a run-on sentence or what??  LOL

Anyhoo......trying to find a stamp set that would not only work with these papers BUT also had to fit the area that I had to stamp in was quite a challenge for me.  Which reminds me of something that I was talking to my friend Cindy about earlier this morning.........


............When you set out to create a card, what do you start with first?  Do you have a specific stamp set in mind that you want to use?  Do you have a certain paper that you just bought and can't wait to cut into?  OR do you start with a sketch, like a sketch challenge and go from there?

Today, I started with the Mojo Monday Sketch Challenge AND the Fanfare Level 2 Paper Pack.  I knew that I wanted to play with the Fanfare papers, but also wanted to try out the new sketch.  But when it came to the stamping......I had NO clue what I wanted to use with it.  Which then created a challenge for me to come up with a set that spoke to me.  As soon as I ran across this set in my boxes, I KNEW it was THE ONE!  It yelled at me......USE ME, USE ME!!  I know you know what I am talking about.  lol

I would LOVE to hear your thoughts on this as I know everyone has a different way of creating that perfect card.......

Supplies used:
Paper: Fanfare Level 2 Paper Pack, Black CS, Sky CS and Pacifica CS
Stamp set: Childhood
Inks: Pacifica, Sky, Cranberry and Black
Embellishments: Cranberry Ribbon, Fanfare Level 2 Assortment
Tools: CTMH 2" Scalloped Circle Punch, SU! 1 3/4 Circle Punch

Thanks SO much for stopping by today!!

I hope that this has inspired you to pull out those papers that you purchased months ago but have not touched since the day you brought them home!

Happy Scrapping and Stamping!!!

Jen

Monday, March 21, 2011

March Stamp of the Month: Sensational Season

I am in love with these bunnies!  They are SO precious and remind me of the bunnies in Peter Rabbit.  I guess that is why I colored the boy bunny blue.

If you like these bunnies, they are only available until the end of the month!  The stamp set is a D size stamp and is $22.95.  You can purchase it for $22.95 OR get it at a discount OR even earn it for FREE, depending on your order total.  For details on the SOTM program, visit my website by clicking on the Spring/Summer Idea Book on the side bar.


This first card is a 4 1/2 x 4 1/2 and the pattern can be found in the Wishes book.  The paper is again from the Creative Basics Wings Collection.  For both cards, the images were inked in VersaMark and Brown StazOn then embossed with Clear Detail Embossing Powder.  I used CTMH's Watercolor Pencils and Blending Pen to color them in.  If you click on the photo to enlarge it, you will be able to see the Liquid Applique that I used on the bunnies tails.  Love that stuff!!


This second card uses the papers from Miracle.  I just felt like these bunnies needed the green/blue tones with a darker brown as contrast.  Maybe because they are more earthy tones......in nature.  So tried to keep it softer and a bit more earthy.  

Supplies used for top card: 
Paper: Creative Basics Wings Collection, White Daisy CS, Juniper CS, Cocoa CS
Stamp set: Sensational Season March SOTM
Inks: Cocoa, Brown StazOn, VersaMark
Embellishments: Colonial White Ribbon, Mocha Opaques
Other supplies: Clear Detail Embossing Powder, Watercolor Pencils, Blending Pen, Liquid Applique
Tools used: Edge Distresser, Heat Gun

Supplies used for bottom card: 
Paper: Miracle, Chocolate CS, Bamboo CS, Colonial White CS
Tools: Marvy Scalloped Circle Punches (large and x-tra large), Paper Piercer
All other supplies on this card are the same as above and all are Close to my Heart!

Thanks SO much for stopping by!!

I hope that this has inspired you to get out your favorite lined stamp and give the Watercolor Pencils and Blending Pen a try!  It reminds me of coloring in a coloring book.  Easy Peasy!!

Happy Scrapping and Stamping!!

Jen

Friday, March 18, 2011

Mojo Monday Sketch #182

It's been a while since I have participated in the Mojo Monday Sketch Challenge.  I try to check in each week to see the sketch, but don't always get around to creating a card.  Well, this week I gave it a try.  Can't say that I am in LOVE with this card.......love the sketch, just not so sure about the card I came up with.


The patterned paper that I used is from the "Wings" Creative Basics Collection.  If you are not familiar with the Creative Basics Collections, it comes in a pack of 12 papers (6 each of 2 designs) and a coordinating ribbon.  The "Wings" Creative Basics comes with a dainty Juniper ribbon, the patterned paper in this card along with a thin striped paper. 

Supplies Used: 
Paper: Creative Basics Wings Collection, New England Ivy CS, Colonial White CS
Inks: Juniper, New England Ivy
Stamps: Miracle and Childhood Portrait
Embellishments: Colonial White Ribbon, Sweet Leaf Ribbon, Pearl Opaques
Tools: 2" Scalloped Circle Punch, 1 3/4" Circle Punch

Thanks SO much for stopping by!!

I hope that this inspires you to follow the Mojo Monday Sketch Challenge sometime!!

Happy Scrapping and Stamping!

Jen

Wednesday, March 16, 2011

Mix-n-Mingle Album with a twist......

Do you remember a while back when coasters were the thing to play with in the paper crafting world?  I bought a TON of them and made boxes, frames, and mini albums with them.  Well......as I was trying to come up with a dimensional submission, I ran across the Mix-n-Mingle Album that Close to my Heart sells.  It was featured in the Autumn/Winter 2010 Idea Book and brought back in the Spring/Summer Idea book as well.  If you look through the Idea Books, you will see that they use this cute little album for more than just an album.  Which was my inspiration for this frame.  A couple of years ago, I received instructions on creating a standing frame using 4x4 coasters and Close to my Heart's metal Hinges.  That was my 2nd inspiration for this project.

The first one was the original one.  My brother's wedding matched the colors to Sweetheart PERFECTLY!!  This will be a gift to them as soon as I get it back from my submission.


This second one I created using Mayberry for a dimensional project for a unit meeting project that I was to teach.  That is until I found out that the project for the meeting prior also used the Mix n Mingle album.  Darn it!!  OH WELL!  I loved the way it turned out.  Thinking I will find pics of the kids, Rod and myself and give it to my mom and dad.


All supplies are Close to my Heart.  The flowers were created using a 2" circle punch then spiral cut to the center and rolled up.  I have a tutorial on how to create these flowers starting with a square piece of paper.  These are created in the same fashion.  The leaves were created using a 1 1/4 inch punch by punching a circle then placing the circle back into the punch and punching a leaf shape.  You can create 2 leaves from 1 punched circle.  I then folded the leaf in half and inked the center and all around the edges.

Thank you SO much for stopping by today!!  

I hope that this has inspired you to dust off those coasters that you purchased 4 years ago with good intentions!  OR purchase a Mix-n-Mingle Album from your favorite CTMH consultant and get playing!  You can create 2 tri-fold frames and have enough left over for a double frame.  

Happy Scrapping and Stamping!!

jen

Friday, March 4, 2011

Fun Times with the Color Ready Kraft Borders

This is one stamp set that I could just use OVER AND OVER AND OVER again.  I love it because it is SO stinkin' cute!  I have to be honest though.....it has been a while since I have pulled it out and used it.  So, as I was putting this card together today, I was going through my stamp sets to find one that spoke to me and this was the set that not only spoke to me but screamed at me!

These Color Ready Kraft Borders are my favorite embellishment right now!  Plus they just happen to come in the "Miracle" Workshop on the Go Kit.  I added a 1/2 strip of Sweet Leaf CS behind the border to give it just a hint of color which I think was just enough to tie in the Sweet Leaf stripes and the Sweet Leaf border around the snail image.


The crochet ribbon is in the Colonial White Ribbon Round Collection, still one of my favorites!  I also used the Pearl Opaques on top of the snail's shell along with a Mocha Opaque for his eye.  

Supplies used: 
Paper: Miracle Level 2 Paper Pack, Bamboo CS, Colonial White CS, Crystal Blue CS, Sweet Leaf CS
Stamp set: Fun Times
Inks: Chocolate (snail body), Desert Sand (distressing) Crystal Blue and Sweet Leaf
Embellishments: Pearl Opaques, Mocha Opaques, Colonial White Brads, Colonial White Crocheted Ribbon, Color Ready Kraft Borders
Tools used: Edge Distresser

Thanks SO much for stopping by today!!  

I hope this has inspired you to pull out your oldie but goodie stamp set from years past and play with it! 

Happy Scrapping and Stamping!!

jen