Friday, November 26, 2010

Covered Notebooks Using Mistletoe

Hello My Fellow Scrappers, Stampers and Paper Crafters!!  I hope that you all have had a wonderful Thanksgiving and a safe productive Black Friday!  Although my family and I do not celebrate the holidays, we did have a nice day off together.  We just hung out, went to go see "Unstoppable" and ate homemade Chicken and Noodles with Mashed Potatoes.  YUMMM!!  I am NOT a shopper, so Black Friday is the LAST day of the year that you will find me at ANY store.  LOL

So, instead of spending the day shopping, I spent my day trying to catch up with a few items that I need to make before the craft fair that my friend Val and I are a vendor at.  We are just going to have a few handmade items such as decorated nugget tins, gift card holders, the snowmen tic-tac holders, covered notebooks, and some yummy food that Val is making.

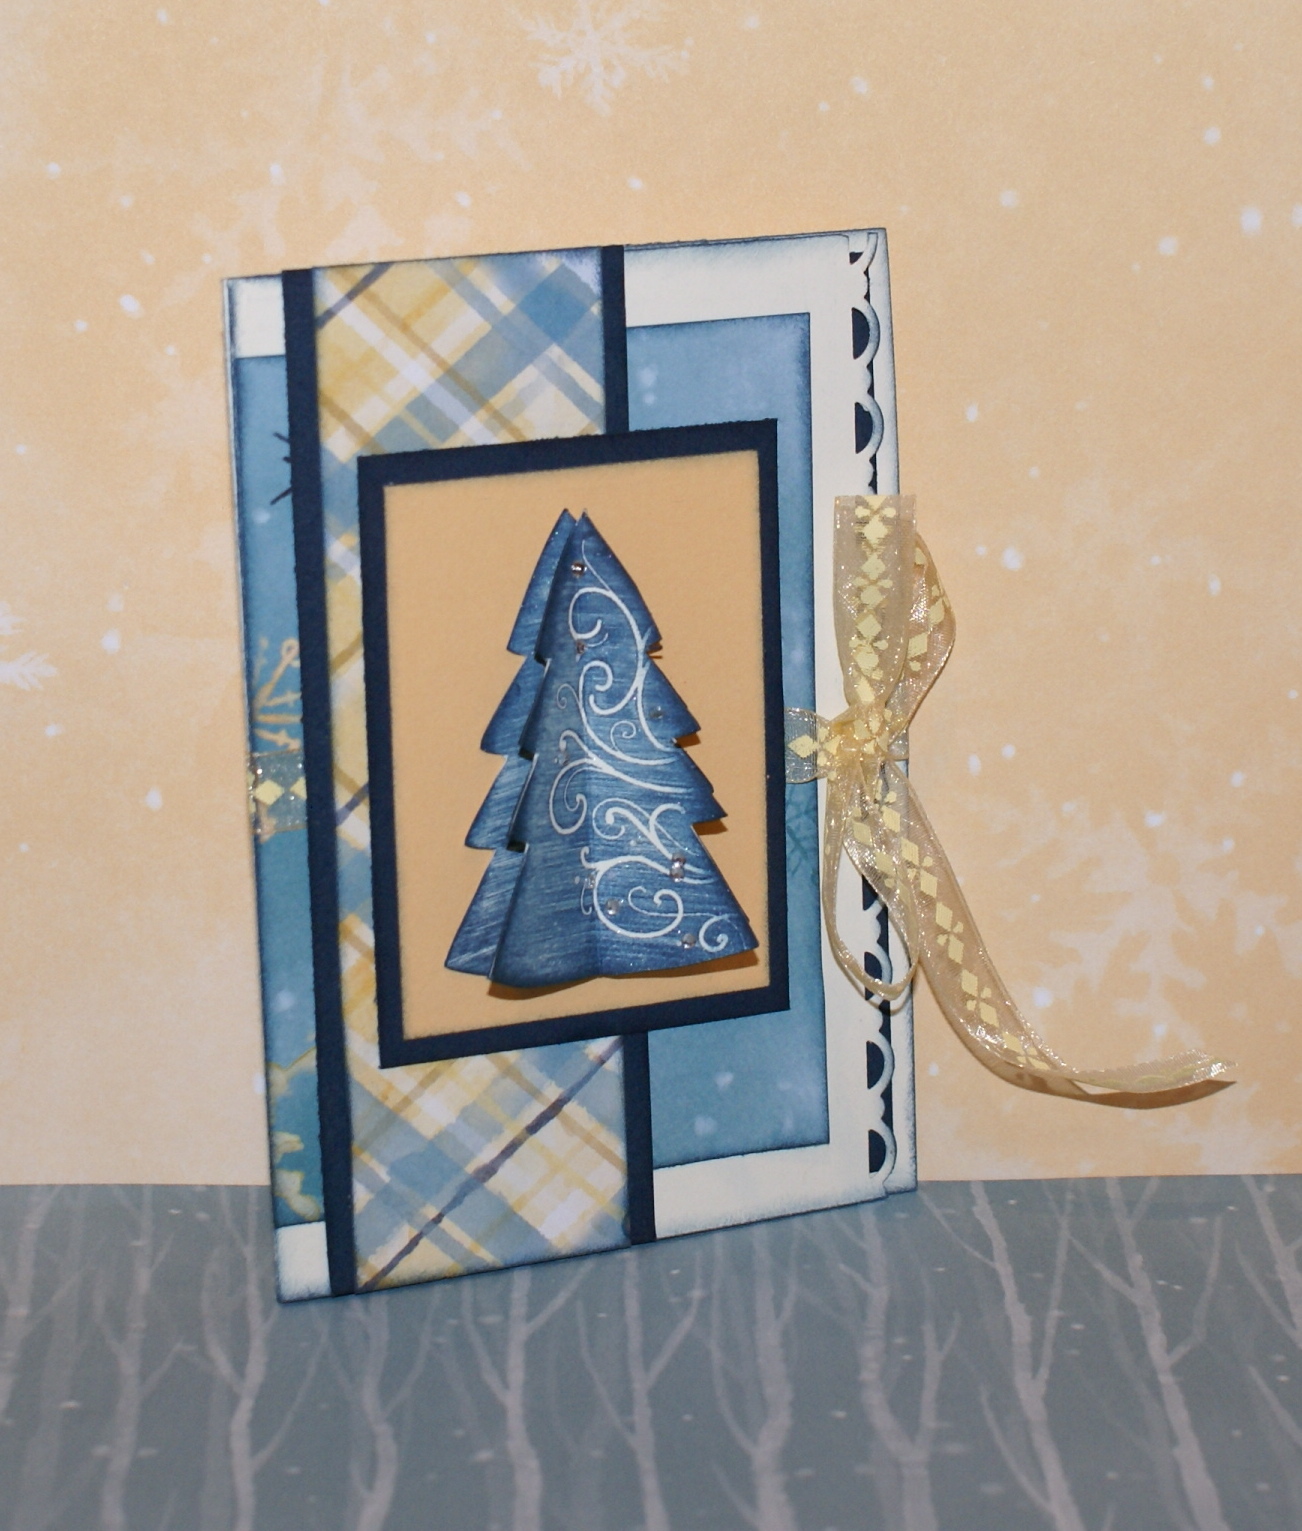
I thought I would share with you a few of the covered notebooks that I have made.  I dug out some of our older paper packs like "Aspen", "Jingle", and "Just Chillin'" to decorate my other notebooks.  For these, I of course used "Mistletoe".

If you LOVE these little covered pads, you can find them at Papertrey Ink .  All other accessories, inks and papers can be found on my website www.lovinscrappin.myctmh.com !


Supplies Used: 
Paper: "Mistletoe" Level 2 Paper Pack
Stamps: All the Best (Mistletoe WOTG), A Sip
Inks: Cocoa, New England Ivy, Cranberry
Embellishments: Red Sparkles, Clear Sparkles, "Mistletoe" Level 2 Assortment, Cranberry Ribbon, Colonial White Ribbon, Pearl Opaques,
Tools: Stardust Pen (non ctmh) Notepads from Papertrey Ink

Thanks so much for stopping by for a visit!

I hope that this has inspired you to check out these super cute Notepads and whip yourselves up a few.  

Happy Scrapping and Stamping!

Jen

Tuesday, November 23, 2010

Gift Card Holder Inspired by Tresa Black......

Happy Tuesday!!  I wanted to share with you all the SUPER CUTE gift card holder that Tresa Black made on one of her live you stream shows a few weeks back.  I LOVED everything about it, so used the same stamp set "A Timber" as she did to create the dimensional tree.

This is a GREAT project for ANY occasion!  I am patiently waiting for CTMH's Spring/Summer Idea Book to come out so I can make a few more of these using the brand spanking new products!

Until then.....I have pulled out a couple of retired paper packs to create my holder.  If you LOVE the papers, you might be able to find them on ebay......  The stamp set is current and available as are the sparkles that I used on each tree.


If you would like the dimensions and to watch a how-to video, check out Tresa's blog!

Supplies used: 
Paper: "Aspen" and "Just Chillin' "
Stamps: A Timber
Inks: Outdoor Denim, Lagoon and Vineyard Berry
Embellishments: Creme Brulee Ribbon and Sparkles
Tools: Soft Set Eyelet Tool, SU! Border Punch, Martha Stewart Border Punch, 1 1/4 SU! Circle Punch, Trimmer with Scoring Blade

Thanks for stopping by!!

I hope that this has inspired you to make a few of these for any occasion!

Happy Scrapping and Stamping!

Jen

Tuesday, November 9, 2010

16 Card Mistletoe Workshop

Back in September, I attended a craft fair as a vendor to showcase Close to my Heart products.  Well, we had a pretty good crowd in the morning, but in the afternoon the Huskers had a football game that was not only televised BUT was also playing at home.  That meant that everyone started heading either home or to Lincoln around noon.

The reason I am telling you all this is because I had brought with me the supplies to put together 16 cards using a cutting guide that came with the Everyday Celebration Card Kit that was a special about a year or more ago.  So, I cut and assembled all 16 cards that day and finished them 2 weeks ago at a crop that I attended.

I just LOVED the way they turned out!  The photos really do not do them justice as in person they sparkle.  Again, if you would like to see it up close and personal, just click on the picture!


The card above uses the Star Dust Glitter Pen for the steam coming up from the cup.  I used Cocoa Ink 2nd generation and then the glitter pen over the top of it.


If you click on the card above to view it larger, you will see there are bitty Pearl Opaques dotted on the tree.  Kind of hard to see the little details from these photos.


The card above uses the November Stamp of the Month "A Little Thanks".  I am LOVING this set!!  


The ornaments are from the Mistletoe Workshop on the Go Kit on page 25 of the Autumn/Winter 2010 Idea Book.  The stamp set is only available for purchase with the WOTG kit until January 31st 2011.

Supplies used: All CTMH and available!
Paper: Mistletoe Level 2 Paper Pack
Stamps: A Timber, Jingle Borders, A Sip, Stamp set from Mistletoe WOTG Kit, A Little Thanks (November Stamp of the Month)
Inks: New England Ivy, Cranberry and Cocoa
Embellishments: Colonial White Ribbon Collection, Cranberry Ribbon Collection, Bitty Sparkles, Sparkles, Pearl Opaques, Pink/Red Sparkles
Tools: Star Dust Glitter Pen, Pop Dots and Glue Dots

Thanks SO much for stopping by!!'

I hope that this has inspired you in one way or another.  Maybe it will inspire you to get your Christmas cards done if you have not already.  Maybe it will inspire you to get out your Sparkles and Pearl Opaques and USE them!  LOL  OR Maybe it will inspire you to get out your stamps and just play......

Happy Scrapping and Stamping!!

Jen

Monday, November 8, 2010

Buttons on Side Bar Have Changed...... NEW LINKS ADDED

I wanted to let you all know that I have made a few changes to the icons on my side bar.  A few of you have let me know that you were not sure where to go to find my website to do a little shopping with me.  SO, I have changed all of my side bar photos to link directly to various parts of my website.

The Autumn/Winter 2010 Idea Book links directly to shop on my site.  If you would like to see the actual Idea Book, you can go to the Products section of my website and it will direct you to all current Idea Books.

The Studio J will direct you to the Studio J site, via my website.  Give it a try for FREE......like what you create?  You have the choice of purchasing the Layouts in several different ways.  Check it out to find out how COOL Studio J is!  

The How To Books  will link you directly to purchase the books.  Cherish, Imagine, Reflections and Magic are AWESOME books that show you step by step how to create timeless Layouts for your scrapbook pages!  Magic goes a step further by showing you how to create INTERACTIVE pages in addition to traditional pages.

The Wishes book will link you to purchase that book.  If you are a card maker then I HIGHLY recommend either Wishes OR Originals Card Programs.  Wishes is a great book for multi-card cutting dimensions.  It has 3 in all.  Originals has classic card sketches and ideas that are perfect for any occasion.

The PH. D.  Certified Badge will direct you to more info on joining my team "Creativity in Motion".  If you LOVE the products as I do, then you might want to consider becoming a consultant for Close to my Heart!!  I signed up 4 1/2 years ago and LOVE the opportunities that I have had with this business.  Close to my Heart is truly an AMAZING company and I am PROUD to be a part of it, even if it is a small part! 

LASTLY....the  Book a Party with ME directs you to the same pages as the Badge.  If you would like to host a Home Party or a Book Party, contact me to find out more details.  My home parties are SO much fun!  You have the choice for you and your guests to create a card OR a scrapbook page.  I have fun games and great prizes too.  The best part is you can host at YOUR house or MINE!  

I hope that this has helped those of you who would like to shop with me, party with me or join my team!  

Thanks SO much for stopping by!  

Happy Scrapping and Stamping!

jen


Wednesday, November 3, 2010

3 Ring Binder Mini Album using Mistletoe

I found the instructions to create this Mini Album on Tresa Black's Blog, then followed all 5 you tube videos to make the interactive pages including instructions on how to make the super cool "ruffled ribbon".  This is the link to her first video http://www.youtube.com/watch?v=Uuk-h8NUzuY
I was SO excited to find that I still had my 3 Ring Binder that I purchased when they first became available through Close to my Heart!!  I knew that it was a cool mini album, just did not realize the potential that it had!  Thanks to Tresa for seeing the potential and MORE, I have a super cute gift!

Thanks SO much Tresa for your videos and the detailed instructions to make this!  I LOVE the way it turned out and can't wait to make more!  


If you want to see any of these photos closer, all you need to do is click on it and you will have a LARGE and DETAILED view of each page.......

                                                                        Front Cover

Up close of the trees.....


Front Inside and Page 1


Pages 2 and 3


Page 2 insert......


Pages 4 and 5


Page 5 insert....


Pages 6 (insert) and 7


Pages 8 and 9


Pages 10 and 11


Page 11 Flip Flap (please excuse the ribbon showing through...)


Page 12 and back inside.....


Back Cover


  If you would also like to make one of these, check out  Tresa's videos on her Youtube account!  I can see this made into SO many different events....baby shower/new baby, brag book, vacation book, graduation book, and yes of course, Christmas book.......

Supplies used: 
Paper: Mistletoe Level 2 Paper Pack (I used 1/2 pack for this album)
Stamps: A Timber and Snow Flurries
Inks: Cocoa, New England Ivy, Cranberry
Embellishments: Mistletoe Level 2 Assortment, Sparkles, Colonial White Ric Rac, Colonial White Ribbon and Cranberry Ribbon
Tools: Soft Set Eyelet Tool, Sandpaper, Sponges, Scoring Blade or stylus.

Thanks SO much for stopping by!!

Hope this has inspired you to get out your supplies, or purchase the needed ones and create one of these albums for yourself or a friend!!  

Happy Scrapping and Stamping!!

jen