Sunday, December 18, 2016

Origami Shadow Box Fold Cards - Jar of Love

Origami Shadow Box Fold Cards


OH MY GOODNESS!!  I just LOVE the way these cards turned out and how STINKING SIMPLE they were to create!!  I also like the look of the monochromatic color schemes.  I am TOTALLY making MORE of these to send out to my friends and family!!

Since I don't have my video space ready yet, I decided to do a pic tutorial to show you how to make the folds to create this.  

Step 1.  For MY card, I used a 3 3/4 x 3 3/4 piece of two sided paper.  You are going to score your paper at 1 7/8 on one side and again on the other side.  Basically you are going to score/fold it in half on both sides.


Step 2.  You are going to fold the edges into the center of the paper.  This is where the score lines come in handy.  It helps you find the center a little easier.


Make sure you know which side of the paper you want folded out before you start folding.


Step 3.  Now you are going to take the corners in the center of the square and fold them back towards the edge of the square.


Step 4.  Turn paper over and add adhesive to the outer edges of the fold, so it doesn't flop open.  I did NOT adhere the front flaps down, as I liked the dimension it gave with them popped open a bit.


Step 5.  Add a 1 1/4 x 1 1/4 piece of Whisper White CS to the center and stamp your sentiment.  


I put my Origami Shadow Box Fold onto the largest Scalloped Square from the Layering Squares Framelits Die set.  Which is why my paper started at 3 3/4 x 3 3/4.  The final square for my "shadow box" was 2 5/8 x 2 5/8.  You can start with a larger piece of paper, if you would like to use a bigger sentiment in the center.  

Dimensions: 
Whisper White CS - 4 1/4 x 11 (scored at 5 1/2), 3 1/4 x 3 1/4 (for scalloped square), 1 1/4 x 1 1/4, scraps for fish/flowers.
Pool Party/Calypso Coral CS - 4 x 5 1/4
Pool Party/Calypso Coral DSP Stack - 3 3/4 x 3 3/4


Stampin Up! Supplies Used: 


Thanks SO much for stopping by today!!

Hope this has inspired you to give this a try!!  I promise it was SUPER simple to make and looks like you spent FOREVER on it, when you really didn't!!

Happy Stampin' Up!

Jen

Wednesday, December 14, 2016

Paper & Ink Sketch #11 - Plus Occasions Sneak Peek!!

Cool Treats - Sneak Peek 


Happy Wednesday All!!  I am SO SO very excited about this card!!  I just LOVE the way it turned out and couldn't wait to share it with you!!  This was created using the Paper & Ink Sketch #11. 


 Normally, I stick to the original sketch as closely as I can.  BUT I REALLY wanted to use the NEW stamp set "Cool Treats", that will be released in the AMAZING NEW Occasions Catalog on January 4th.  SO I flipped it to make it a vertical card, instead of a horizontal card.  I kept all my measurements the same as the original sketch though.  

Card Dimensions: 
Whisper White CS - 5 1/2 x 8 1/2 (scored at 4 1/4), 2 1/4 x 4 1/4, 2 1/2 x 3 1/2 (for the oval), scraps to stamp ice cream scoops on and cut out.
Pool Party CS - 4 x 5 1/4 
Watermelon Wonder CS - 2 1/2 x 4 1/4
Peekaboo Peach CS - 2 3/4 x 3 3/4 (for scalloped oval)

This card was SUPER quick to put together!!  I embossed the Pool Party CS using the NEW Hexagons Dynamic Embossing Folder, that will also be released on the 4h of January!!  The striped accent and popsicle accent are washi tape from the Tasty Treats Designer Washi Tape collection.  Are you excited for the new releases yet??!!  I know I am!!  


Stampin' Up! Supplies Used: 


Paper & Ink Sketch Challenge with a PRIZE!!  

If you would like to play along with the sketch this week, I will be posting a challenge on my Facebook Page!!  Head on over and check the details on how you can play along and win a cool prize!!

Thanks SO much for stopping by!!

Hope this has inspired you to play along with the Paper & Ink Sketch this week!!  

Happy Stampin' Up!

Jen


Friday, December 9, 2016

Merry Christmas Snow Friends!!

Merry Christmas Snow Friends!!
Mojo Monday Sketch Challenge


OH MY GOODNESS!!  This week's Mojo Monday Sketch Challenge was quite the challenge for me!!  Not because I haven't had time to do it, but because I really struggled with it for some reason!  BUT thanks to my friend Nicki challenging me to give it a try, I forced myself to sit down and play with it!  It took SEVERAL tries, with several different color and paper combinations to FINALLY come up with something that I liked!  


I just LOVE the little penguin from the Snow Place stamp set and coordinating Snow Friends Framelits Dies!!  He is SO STINKING cute!!  Don't you think so??  

Here are the dimensions for the card: 

Basic Black CS - 4 1/4 x 11 (scored at 5 1/2), 2 1/2 x 3 1/4, 1 x 4
Garden Green CS - 1 3/4 x 4
Cherry Cobbler CS - 2 1/4 x 4
Whisper White CS - 2 1/4 x 3, 3/4 x 4, scraps for penguin, hat, scarf and holly berries

If you would like to create this card, I have downloadable/printable instructions listed in the SUPPLY LIST below!!


Remember I talked about NEW changes that I was implementing on my blog??  Well, I am SO excited to announce that I will now be giving YOU a gift when you place an order on my website!!  All you need to do is enter the hostess code HTX2NFPU when you place your order.  Each month I will have a new hostess code for you to use and I will send out everyone's gifts at the end of the month!!  YAY for free goodies!!  


Just in case you haven't checked out Stampin' Up!'s specials lately, you might want to do so!!  There's a TON of AWESOME products that you are NOT going to want to miss out on!!

Check out the Year End Closeouts HERE!

Thanks SO much for stopping by!!

Hope this inspires you to play along with the Mojo Monday Sketch Challenge this week!!

Happy Stampin' Up!

Jen

Thursday, December 8, 2016

Tasty Trucks - You're the Sweetest!!

Tasty Trucks - You're the Sweetest!! 

\
After creating the card below, I decided to change the 
background of this card to an embossed background as well.
I just LOVE the dimension it gave the finished card!


Dimensions: 
Basic Gray CS - 4 1/4 x 11 (scored at 5 1/2), 3 1/4 x 4, 2 1/2 x 4, 1 3/4 x 4
Bermuda Bay CS - 4 x 5 1/4
Shimmery White CS - 2 1/4 x 4, 2 1/2 x 3, 1 x 3
Daffodil Delight CS - 1 1/2 x 4


I think I am in LOVE with this little food truck!!  Isn't it just the cutest??  Although it isn't available quite yet.... thought I would go ahead and share anyways!!  BUT guess what??!!  It is a FREE stamp set with a qualifying purchase, starting on January 3rd, when the Occasions and Sale-A-Bration catalogs are released!!


You all know how I love my sketch's!  Well, I found this one on Pinterest.  I THOUGHT it would be SUPER SIMPLE to put together since the dimensions are already on the card.  BUT I was a bit confused as to what papers the measurements actually belonged to!!  Then again, I am VERY easily confused!  SO I am including my dimensions, to hopefully make it easier for you all to follow!


Basic Gray is your card base.  Bermuda Bay is the background paper.  In the center of the card, you are going to layer the Basic Gray, Shimmery White, Basic Gray, and Daffodil Delight.  After coloring in my cute little truck on the Shimmery White CS, I popped it up on the Basic Gray CS for dimension and added the smaller piece of Shimmery White to the bottom of the Basic Gray Cs.  

Did you know that you can use the Shimmery White CS to water color on?  This was my first try at it and I really liked the way it turned out!!  Which reminds me.... the water color pencils I used to color the truck in, will be available to order on January 3rd as well!!  WOO HOO!!!


Stampin' Up! Supplies Used: 


Thanks SO SO much for stopping by!!

I hope this inspires you to create!!  Maybe even use this sketch for your next card!!

Happy Stampin' Up!

Jen


Monday, December 5, 2016

Three Wise Owls

Three Wise Owls


SO I don't think I could EVER get tired of playing with these little owls!  When I was a Stampin' Up! Demo 2 years ago, I purchased the Owl Builder Punch and had a BLAST playing with it!!  After going back to CTMH last year, it just sat in a bin and never saw the light of day.  Then in the spring, I went through all of my crafting supplies that I wasn't using and sold most at a craft garage sale, including the Owl Builder Punch.  Little did I know then, that I would be joining SU! again!  lol  When I joined SU! again in October of this year, I knew I NEEDED to buy another Owl Builder punch!!  

ANYHOO.....  I know Christmas is just around the corner, so I am trying to use up the Warmth and Cheer DSP stack, so I can start playing with the NEW papers that are coming in the Occasions and Sale-A-Bration catalogs!  YAY for new and shiny!!  LOL  

Because I wanted my owls to be festive, to go along with the papers I was using, I pulled out my Snow Place stamps and the Snow Friends Framelits Dies to add the little Santa hat, ear muffs and sentiment.  TOO STINKING CUTE!!!  

Card Dimensions: 

Crumb Cake CS - 4 1/4 x 11 (scored at 5 1/2), scraps for owls
Black CS - 2 1/4 x 4, 3/4 x 3 3/8 (banner), scraps for owls
Garden Green CS - 2 1/8 x 4
Whisper White CS - 2 x 4, 5/8 x 3 1/4 (banner), scraps for owls
Warmth & Cheer DSP - 4 x 5 1/4, scraps for owls

Since switching back to SU!, I have not been edging my papers with ink like I used to do.  BUT I felt like the owls needed some kind of dimension, so I inked around each of the owl parts plus the papers on the card itself.  


Stampin' Up! Supplies Used: 


Thanks SO much for stopping by!!!

Hope this has inspired you to play around with the SUPER CUTE Owl Builder Punch!!  It's SO much fun!!  

Happy Stampin' Up!

Jen

Thursday, December 1, 2016

Cheers to Mixed Drinks!

Cheers to Mixed Drinks!!


SO for some reason, I was WIDE AWAKE at 2am this morning!  UGH!!  There was NO way I was going to fall back to sleep, so I made some coffee, place an SU! order and got to playing with the Mixed Drinks stamp set I bought a month ago!!  LOL  

As I was looking at all the YUMMY drink images, I was trying to figure out what the heck to do with them.  THAT'S when it came to me....  this would make a PERFECT random stamped background!  WOO HOO!!  I got busy stamping all the glasses and filled them in with Pear Pizzazz, Watermelon Wonder and Peekaboo Peach.  After that, I stamped out the orange slice, the cherry and finally the lime.  PERFECT!!

Dimensions: 
Whisper White CS - 4 1/4 x 11 (scored at 5 1/2), 3 3/4 x 5, 2 1/8 x 3/4 (banner), 2 3/8 Circle, scraps to stamp glasses on.
Pear Pizzazz CS - 4 x 5 1/4
Peekaboo Peach CS - 1 x 2 1/4 (banner)
Watermelon Wonder CS - 2 3/4 Scalloped Circle


Stampin' Up! Supplies Used: 


Thanks SO much for stopping by!!

I hope this inspires you to create your OWN background papers!!  It's SO much fun!!

Happy Stampin' Up!

Jen

Tuesday, November 29, 2016

Mojo Monday 476 - Spread the Love

Spread the Love - Mojo Monday 476


Oh my goodness!!  I just can't get enough of the Jar of Love stamp set with the Everyday Jars Framelits Dies!!  These, combined with the A Little Foxy papers, are SO bright and cheery!  

This week's Mojo Monday Sketch Challenge is a square card.  I made mine 4 1/4 x 4 1/4, so it would fit in a regular envelope.  I LOVE this size and EVERY time I make them, I tell myself I need to make more of this size!  lol


It's really hard to tell from the top photo, but I used the Clear Wink of Stella on each of the little hearts.  Because I wasn't adding any other "bling" to the card, I had to add it somewhere!  I just can't make a card without SOME kind of bling!  lol

Dimensions: 

Whisper White CS - 4 1/4 x 8 1/2 (scored at 4 1/4), 3 1/2 x 3 1/2, 1 3/4 Circle Punch, scraps for med. jar and jar lid.
Smokey Slate CS - 2 7/8 x 2 7/8
Pool Party CS, 2" Scalloped Circle Framelit, hearts
Calypso Coral - scraps for hearts
A Little Foxy DSP - Calypso Coral Wood Grain; 4 x 4, Multi-colored dots; 2 3/4 x 2 3/4

Stampin' Up! Supplies Used: 

If you would like to create this card, make sure to check out the "supply list" at the bottom of the supplies used, for a downloadable, printable instruction sheet.  

Thanks SO much for stopping by!

Hope this has inspired you to play along with the Mojo Monday Sketch Challenge this week and make a fun square card!!

Happy Stampin' Up!

Jen


Friday, November 25, 2016

Winter Wonderland

Winter Wonderland Set of 3 Cards


SO I sat down this morning to play with the Perfect Pines Die Set that I ordered a couple of weeks ago.  I challenged myself to use ONLY the dies to create the trees on the cards, mainly because I purchased the dies to go with my Foxy Friends stamp set and didn't want to use 2 stamp sets on this project.  

Let me tell you, I had a BLAST coming up with different ways to make these trees!!  Please forgive the photos.  I am TRYING to take "good" pics, but they keep falling a bit short of being just "ok".  I ended up taking them outside and setting them on my front porch and actually liked the way they turned out!  lol  The pic on the top turned out pretty good, so I went ahead and used it.  


Dimensions: 
Whisper White CS - 5 /12 x 8 1/2 (scored at 4 1/4), 4 x 5 1/4, scraps for 3 trees
Garden Green CS - two pieces of 2 x 4 1/4 (for hills)


Dimensions: 
Garden Green CS - 5 1/2 x 8 1/2 (score at 4 1/4)
Whisper White CS - 4 x 5 1/4, scraps for trees, ornaments and snow drifts
Doily from Stitched with Cheer Project Kit
Banner from Stitched with Cheery Project Kit


Dimensions: 
Cherry Cobbler CS - 5 1/2 x 8 1/2 (scored at 4 1/4)
Whisper White CS - 4 x 5 1/4
Garden Green CS - scraps for trees
Banner from Stitched with Cheer Project Kit
Doily from Stitched with Cheer Project Kit

Make sure to check out the "Supply List" at the bottom of the pics of the products I used to create these cards for a FREE downloadable and printable instruction sheet!!  

The Stitched with Cheer Stamp Set AND Stitched with Cheer Project Kit are in the Extravaganza sale till the 28th!!  Make sure to stop over to my website to check out the AWESOME deals going on!


Thanks SO much for stopping by!!

Hope this inspires you to get out your framelits and just play with them, even if you don't have a stamp set that coordinates with them!

Happy Stamping!

Jen

Wednesday, November 23, 2016

Mojo Monday Sketch 475 - Let it Snow!


Let it Snow with Mojo Monday Sketch Challenge 475


How's this for a change??  Trying out some new things that I am HOPING will help improve my blogging for the better!  LOL  I started my blog in November of 2008, which seems like FOREVER ago!  When I first started, I really had NO idea what I was doing.  I was just excited to share my cards, pages and 3D projects that I was creating.  I really wasn't consistent, nor did I give really any "official" instructions on how to make my projects.  

but NOW.... Not only am I going to SHOW you my projects, I am going to tell you how to MAKE them as well!!  WOO HOO!!  I will include a PDF with each post that will give you the cutting dimensions for the project that I am featuring.  If I have a special technique, or something that requires more information, I will include that as well.  There is also a complete list of supplies that I used on the project.

Card Measurements: 


Basic Gray CS - 5 1/2 x 8 1/2 (scored @ 4 1/4), 1 1/4 x 3 3/4 
Soft Sky CS - 3 x 4, 1 x 3 1/2 
Chevron DSP - 4 x 5 1/4 
Whisper White CS - 2 3/4 x 3 3/4, scraps for snowmen and their accessories 

It's hard to see from this photo, but I used Dazzling Diamonds glitter on the raised, embossed areas of the Whisper White. I also added Clear Wink of Stella to the hat and bow tie on the snowmen. I love how it adds just a bit of shimmer and sparkle to the card. After all, snow does sparkle when it has freshly fallen!

Stampin' Up! Supplies List


If you click on the "Supply List" link, it will bring up a PDF file that includes the cutting dimensions for the card.  I would LOVE some feedback on what you think of the format of the PDF.  Do you want complete instructions on how to create the card OR leave it as it is?  You can download and print the instructions for use later OR just visit my blog and it will be linked to this post.  

Thanks SO much for stopping by!

Hope this inspires you to play along with the Mojo Monday sketch this week!  

Happy Stamping!!

Jen

Tuesday, November 22, 2016

Extravaganza Sale!!


It's that time of the year again at Stampin' Up!  Now through November 28th, you can save 10%, 20%, 30% and 40% off your favorite products!!  PLUS there is an additional FLASH sale on November 28th that you are NOT going to want to miss out on!!  Check back on the 28th for a complete list of items available that day....

10% Off Items

20% Off Items

30% Off Items

40% Off Items


Monday, November 21, 2016

Paper & Ink Sketches #10 - A Foxy Christmas

Hey there!!  You all know how I feel about my sketches, I LOVE them!!  SO I am thrilled to be able to bring you all a fun new sketch to follow!  This sketch was created by my 2nd upline Angie and I am so excited to be able to share with you too!!


When I follow sketches, I tend to stay pretty true to the sketch.  It's just how I am wired.  I would LOVE to be one of those "out of the box" thinkers, but I'm really not, if I am honest with myself!  lol  But that's OK!  I'm good with that.  Each of us is unique in the way we paper craft, and we are always learning from each other!

Paper and Dimensions Used on Card: 

Whisper White CS: 5 1/2 x 8 1/2, 3" Stitched Circle, 1 1/4 Circle Punch
Cherry Cobbler CS: 4 x 5 1/4
Basic Black CS: 2 x 4
Delightful Dijon CS: 1 3/8 Circle Punch
Warmth & Cheer DSP Stack: 1 3/4 x 4

Stampin' Up! Supplies Used: 

Foxy Friends Stamp Set - 141549
Stitched with Cheer Stamp Set - 142182
Fox Builder Punch - 141470
Warmth & Cheer DSP Stack - 141991
Basic Black CS - 121045
Cherry Cobbler CS - 119685
Crumb Cake Ink - 126975
Early Espresso Ink - 126974
3/8" Ribbon Silky Taffeta Pack - 141989
Rhinestone Basic Jewels - 119246
Cable Knit Dynamic Textured Impressions Embossing Folder - 143537
Stitched Shapes Framelits Dies - 145372
1 3/8 Circle Punch - 119860
1 1/4 Circle Punch - 119861
Big Shot Die-Cutting Machine - 143263


Thanks SO much for stopping by!!

Hope this has inspired you to give this new sketch a try!!

Happy Stamping!!

Jen


Friday, November 18, 2016

Mystery of the Missing Card

SO I thought I would share what happened to me this morning. I really debated on whether or not to share this, only because my cupboard is a MESS and not the cleanest. BUT I wanted to keep things "real", because that's who I am. I'm not sure if it's because I am getting older and I am starting to care less, or if I'm tired of feeling like everything has to be "perfect" in my home. Either way, I am who I am, and maybe by my sharing my imperfections, I can continue to grow into the person I am supposed to be. Make sense? I don't think I will EVER live up to the person I THINK I should be. I'm a work in progress.... 

 On to my story.... I had just finished making a card and took it down to show my hubby who was in the kitchen preparing dinner for tonight. (Yes, he is a keeper!!). Because our kitchen is VERY small, I didn't want to put my card down on a surface that wasn't clean, which was EVERY flat surface at that point! SO I put it in a place that I thought would be safe. 

 I made some coffee and after pouring it into my cup, I went to look for my card to show it to Michael...but couldn't find it. I searched for it in the kitchen, on the dining room table, went upstairs to my craft space, then looked AGAIN in the places I had previously looked. I even looked at the dog to see if he had grabbed it, which he has been known to do! lol 

 I finally broke down and asked Michael if he had seen it. After a few minutes of BOTH of us now looking, he called me into the kitchen and asked if I would get out a plate from the cupboard for him....which I found rather odd. But I opened the cupboard door...and guess where my card was?? UGH!!


 I am TRULY losing my ever loving mind! LOL

Thanks SO much for stopping by!!  

Hope this has inspired you to....well maybe not inspired, but to help you feel like you are not alone IF this kind of thing happens to you!!  LOL

Happy Stamping!!

Jen


Thursday, November 17, 2016

Mojo Monday 474 "Best Fishes"

Happy Wednesday All!!  A LOT has happened since my last post!  SO let me fill you in...

On Thursday, October 27th, I received an email from A Muse Studio announcing that the CEO was retiring and they were closing the company.  I was honestly stunned.  I had only been a consultant for 43 days.  43 days!!  I had resigned from CTMH with GREAT hopes of what I could do with the product line from A Muse Studio, only to find out that everything I had been promised with A Muse Studio was not going to happen.  I had invested quite a bit over that 43 days to build my "stash" and build my business with them, only to find out it was all for not.  What was I to do?  

Well, after the initial shock of the announcement, I talked it over with my hubby and friends and decided to sign back up with Stampin' Up!  I couldn't be happier with my choice and have found a new place I can call "home".  I have found SO much love and support in my new team and can't wait to see where this journey takes me!  

ANYHOO!!  Along with the change in companies, I am making some changes on my blog as well!!  For starters, I am going to start including the measurements for all the cards that I create!!  That way if you like what you see, you will be able to recreate it without guessing what I used on it OR what the measurements are for each piece.  I am also going to start making videos!!  But please bare with me as I find what works.

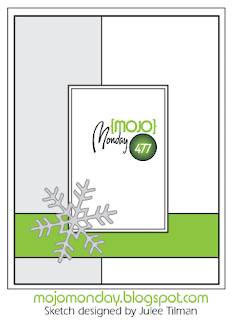
SO Here is the Mojo Monday sketch for this week....


And here is my card.  I just LOVE the "Jar of Love" stamp set and coordinating die set "Everyday Jars"!  There are SO many possibilities with this set and am having a BLAST creating with it!


Card Dimensions

My card is a 4 1/4 x 5 1/2.
Basic Grey CS - 5 1/2 x 8 1/2 (card base) 
A Little Foxy DSP - 4 x 5 1/4
Pool Party CS - 1/2 x 4
Smokey Slate CS - 1 x 1 3/4 (cut to make banner)
A Little Foxy DSP - 1 x 1 1/2 (cut to make banner)
Calypso Coral - 2 3/8 x 2 3/8 
Whisper White CS - 2 1/8 Stitched Shapes Framelits Square
You will also need Whisper White CS to stamp jar and fish.  Cut out using coordinating die set.  I used pop dots to pop up the jar.

Stampin' Up! Supplies Used:

Jar of Love - 141587
Everyday Jars Framelits - 141490
A Little Foxy DSP Stack - 141637
A Little Foxy CS Pack - 141638
Whisper White CS - 100730
Basic Gray CS - 121044
Basic Gray Archival Stamp Pad - 140932
Soft Sky Stamp Pad - 131181
Smokey Slate Stitched Ribbon - 141687
Jewels Basic Rhinestone - 119246
Stitched Shapes Framelits Dies - 145372
Big Shot - 143263

I TRIED to add photos of each of the products listed, but was having a hard time lining them all up!  LOL  Like I said, these new changes will be a work in progress.  Hope it won't take me TOO long to get it all figured out!  lol 

Thanks SO much for stopping by!!

Hope this inspires you to play along with the Mojo Monday Sketch Challenge this week!!  I really had fun playing with this sketch this week!

Happy Stamping!

Jen


Sunday, October 23, 2016

Freshly Made Sketch 259

Happy Sunday ALL!!  It's fixing to be a BEAUTIFUL day here in Omaha!  I am LOVING the cooler weather and the trees changing colors right now.  Not quite ready for snow...but I know it's coming sooner or later!  lol  SO for now, I am soaking in the crisp mornings but warm afternoons, the colors of the leaves on the trees before they all fall off, and the daylight hours before they grow short. 

 It's been a LONG time since I have played along with the Freshly Made Sketches blog, so thought I would check them out this week to see what the sketch was.  At first, I wasn't so sure I could make this sketch work for what I had planned on using.  I started with cutting my paper too small, and I didn't want to waste what I had cut.  SO I ended up making my card a 3 1/2 x 5 1/2!!  I LOVE this size, as you all know!  In fact, I'm not sure I would have liked this card/sketch any bigger.  It ended up being just PERFECT for the narrow oval I used.


Being new to A Muse Studio, I am still working on my stamp "collection".  It's SO hard because I want them ALL, but I'm not independently wealthy, so I am going to have to take it slower than I would like!  lol  BUT I did get a couple of 1/2 price stamp sets for being promoted to Senior Associate!!  Yay for 1/2 price stuff!  TRYING to be smart about my purchases, I chose 2 NEW stamp sets from the upcoming November collection.


One of the NEW stamp sets is called Oh Snap! and is where this cute little gingerbread man came from.  The set won't be released until November 1st, but I thought I would give you all a sneak peek, because he is just SO CUTE!  lol 


The top hat is actually from the October Collection "Turkey Day" die set.  I felt like this little guy was missing something, so I decided he needed a top hat to finish him off.  The die I used was for a Pilgrim's hat, but could easily pass for a top hat by adding a band to it.  I cut a piece of Sugar CS and added glitter to it to make it look like snow. 

Supplies Used: 
Stamp Set: Oh Snap! (being released on November 1st!!)
   Paper: Apple CS, Wasabi CS, Navy CS, Apple Mini Hexagon CS, Sugar CS
Ink: Cocoa
Embellishments: Cherry Buttons, Chocolate Pretty Pearls, Vanilla Twine, Diamond Glitter
Dies: Oh Snap!, Turkey Day, Mini Bow, Tag Your'e It Tag Bundle
You can purchase all items HERE!!  

Thanks SO much for stopping by!!

Hope this has inspired you to play along with the Freshly Made Sketches blog this week!  You still have till tomorrow night to play along!

Happy Scrapping and Stamping!!

Jen


Thursday, October 20, 2016

A Muse Studio Halloween Clearance Sale

Happy almost Friday!! LOL I just wanted to let you know that A Muse Studio is having a Halloween Clearance sale on ALL things Halloween, stamp sets, die sets, splash inks, buttons, ribbons, glitter, etc. now through the end of the month!! All items in the sale are marked down 30%, which is a GREAT deal! 
BUT if you were a consultant, you would receive an additional 20% off the already marked down prices!! WHAT???


SO say a stamp set is $20.99. The sale price at 30% off is $14.69. When you order as a consultant, you can take an additional 20% off the $14.69 price and it is now $11.75 which is about 45% off the original price of $20.99. THAT my friends is now an AWESOME deal!!

One of many Halloween stamp sets on sale NOW!

IF you were to join A Muse Studio by the end of October to take advantage of the $99 sign up deal with the 10 FREE ink pads, you could ALSO take advantage of the Halloween Clearance sale and stock up on some great products for your stash! Don't forget that there are NO minimums required when you join!! You can be your own best customer and get a GREAT discount on AMAZING products!


Guess who is going to take advantage of this sale?? YUP!! Your's truly!! Can't pass up a deal like this!
If you would like to check out the sale, go to amusestudio.com/jen and click on the Halloween banner like the one I have in this post.

Thanks SO much for stopping by!!  

Hope you check out the AWESOME Halloween Clearance Sale!!  There is some pretty awesome stuff that you are not going to want to miss out on!

Happy Scrapping and Stamping!

Jen


Monday, October 17, 2016

Mojo Monday 470

I am SO excited that I actually finished my Mojo Monday Sketch Challenge card on the day it came out!!!  WOO HOO!!  I feel SO VERY accomplished today.  Each Monday, I check to see what the sketch is, and even start planning out my card.  But actually sitting down to make it is a different story.  SO today, I was on a mission to complete the challenge AND post it all in one day!!  YAY ME!!  I did it!  lol


Question??  Do you struggle with how to put your cards together? Where do you start?  Let me tell you how I come up with the cards I create.  Sometimes I know which stamp set I am going to use, then look for a sketch that would fit the image I want to use. Other times, I like to start with the sketch, then find an image/stamp set that will fit the sketch. Either way, I don't come up with my own LO.
There are a LOT of card sketch's out on the Internet. My favorite is the Mojo Monday Sketch Challenge Blog (duh!).  I TRY to play along with the current sketch challenge. But sometimes I like to go through past sketches or even re-make sketches I've already done, because I liked the way it turned out the first time.

Another great place to find card sketches is Pinterest. Just search for card sketches and a TON will pop up!!


SO this is my take on this week's Mojo Monday card sketch. I just LOVE this stamp set!! ALL of the products used on this card are A Muse Studio!!Yeah, so I can't get enough of this stamp set!  This little cow is just TOO cute!!  

Supplies Used: 
Stamp Set: Go Hog Wild
Paper: Mushroom CS, Pumpkin CS, Kraft CS, Sugar CS and Wasabi Petite Polka Dot CS
Ink: French Roast
Riboon: Toffee Twine
Dies: Go Hog Wild, Tag Bundle Die Set
(Purchase all of the above supplies HERE!

Thanks SO much for stopping by!!

Hope this has inspired you to check out some of the awesome sketch's that are available ALL over the internet!!  Try out a different sketch each day, or at least once a week by playing along with Mojo Monday Sketch Challenge!

Happy Scrapping and Stamping!

Jen


Saturday, October 15, 2016

Need to Venti?

Happy Saturday All!!  Hope you are enjoying your weekend so far!  I have to be honest here.  Last night at dinner, I was a little confused as to what day it was.  I thought it was Saturday.  I really did!!  LOL  Not sure why yesterday felt like a Saturday, but I was actually relieved to find out it was only Friday night and I still had a full Saturday ahead of me!  

In my last post, I shared one of my FAV stamp sets from the A Muse Studio Stamp and Dies catalog.  Well, today I am sharing the other set that I fell in love with the first time I glanced through their catalog.  I just LOVE coffee!!  SO I was immediately drawn to this cute little coffee cup.   BUT what made the stamp set a MUST have for me was the "punny" sayings that went along with the coffee cup.  I just LOVE a play on words, so I KNEW that this would be one of the first sets that I purchased for my "collection".  

AND so, for my first card created with this set....


I have to admit that when I finished this card, I fell in love with it!!  This photo really does not do it justice.  In person, it is very pleasing to the eyes.  The soft colors of the Pebble CS, Sky CS and Sky Mini Hexagon CS against the Sugar CS feel SO calming together.  I hope that it has the same feeling for my recipient.


I'm pretty sure I said this in an earlier post, but I just LOVE that the majority of A Muse Studio stamp sets have a coordinating die set that goes with.  What is SO GREAT about this?  Let me tell you!  LOL  For one, I would have had to stamp this cup out 3 different times, PLUS cut out each piece, just to create a layered look.  Not to mention, my cutting skills are good, but not GREAT!  lol  BUT with the coordinating dies, all I had to do was choose the 3 colors I wanted, lay them out on my Cuttlebug along with the dies and roll them through.  EASY PEASY and SO fast!!  

Supplies Used are ALL A Muse Studio: 
Stamp Set: Need to Venti
Paper: Sky CS, Pebble CS, Sugar CS, Sky Mini Hexagon CS
Ink: Pebble
Embellishments: Sky Polka Dot Organdy Ribbon, Sky Pearl Stickers
Tools: Need to Venti Dies, Tag Your'e It Die Bundle, Pinking Circles 1B, Stitched Circles One
As always, you can purchase all of the above products online HERE

Thanks SO much for stopping by!!  

Hope this has inspired you!  LOL  I really have nothing inspiring to say today.  Just get your stuff out and play with it!  lol

Happy Stamping and Papercrafting!

Jen